Tools
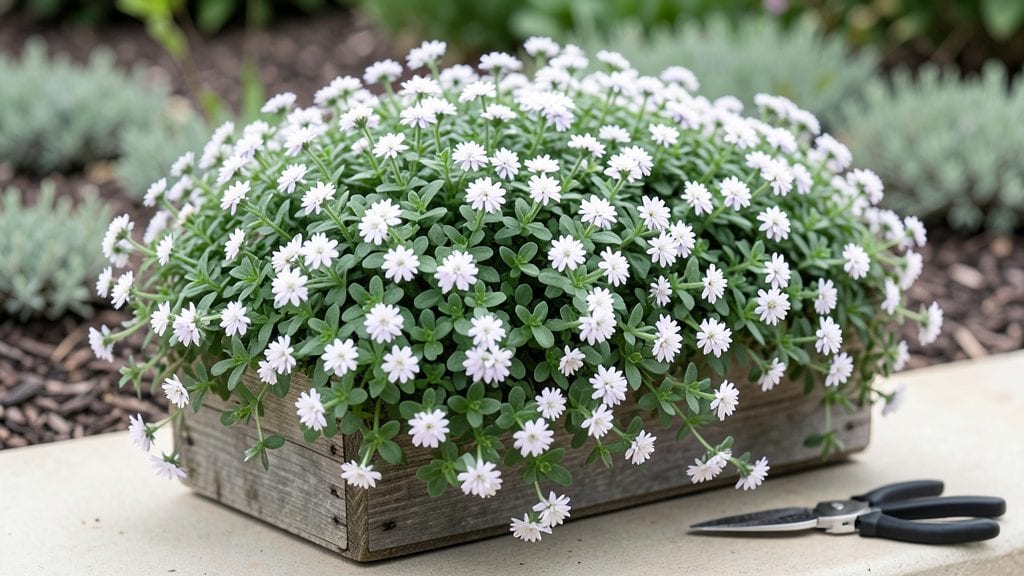
A bench garden planter turns dead space into a buzzing pollinator paradise with layers of color and movement. I stumbled onto these tiered designs while trying to maximize my tiny balcony, and they’ve since become my go-to for adding vertical interest without sacrificing ground space.
The key is stacking different heights—low for thyme, medium for lavender, and tall for coneflowers—to create a cascading effect that draws bees and butterflies like a magnet.
You’ll need a sturdy wooden or metal bench planter (12–18 inches deep works best), lightweight potting mix, and plants that thrive in shallow roots. My setup uses three tiers: the top for herbs like oregano, the middle for pollinator favorites like bee balm, and the bottom for trailing nasturtiums.
The result? A living edge that’s both functional and stunning, plus zero wasted space.
By summer’s end, you’ll have a thriving ecosystem that blooms from spring to frost, with pollinators visiting daily. The layered look softens harsh lines in your garden, and the plants self-prune as they grow.
Plus, it’s easier to maintain than a traditional in-ground border—just water the top tier and let gravity do the rest.
Works for urban balconies, cottage gardens, or even as a border along pathways. The beauty? You can swap out plants seasonally without digging. Here’s how to style yours for maximum impact—and keep it pollinator-approved all year.
📚 In This Guide
- What you need
- Instructions
- Tips and common mistakes
- Wrapping up and next steps
What you need
- ● Bench Garden Planter: 1 x Tiered wooden or metal bench planter (2–3 tiers, 3–4 ft long, 12–18" deep). Look for pre-drilled drainage holes!
- ○ Optional: Waterproof liner (e.g., pond liner or heavy-duty plastic) if your planter lacks built-in drainage.
- ● Soil & Drainage: 2–3 bags high-quality potting mix (1–2 cubic feet per tier, depending on size). Opt for a pollinator-friendly blend with added compost.
- ● 1–2 bags gravel or pebbles (for drainage layer, ~1–2" per tier). Quartzite or river rocks work great!
- ● Plants (Pollinator-Focused!): Perennials (tough & long-lasting): 3–5 plants per tier (e.g., lavender, coneflowers, or bee balm). Pro tip: Mix heights for visual appeal!
- ● Annuals (fast color): 2–4 plants per tier (e.g., sunflowers, cosmos, or marigolds). Choose native species when possible!
- ● Herbs (bonus pollinators + utility!): 1–2 plants per tier (e.g., thyme, oregano, or borage). 💡 These thrive in shallow tiers!
- ● 1 x Garden trowel (for planting and soil adjustments).
- ● 1 x Hand pruners (to trim plants post-planting).
- ● 1 x Rake or leveling tool (to smooth soil in tiers).
- ● 1 x Hose with spray nozzle (for gentle watering).
- ○ Optional but handy: Gloves (to keep hands clean!).
- ● Mulch (e.g., shredded bark) to retain moisture and suppress weeds.
- ● Decorative stones or edging (for a polished look).
- ● ✅ Sunlight spot: Ensure your planter gets 6+ hours of sunlight daily (most pollinators love full sun!).
- ● ✅ Drainage plan: If your planter lacks holes, elevate it on feet or bricks to prevent waterlogging.
- ● ✅ Watering schedule: Plan for deep watering 2–3x per week (adjust for heatwaves!).
Step-by-Step instructions for building a pollinator-friendly bench garden planter
Here's how to create a tiered bench planter that attracts bees, butterflies, and hummingbirds while adding charm to your space.
Choose and Prepare the Bench Structure
Start with a sturdy wooden bench that's at least 18 inches wide and has a flat seat surface. Sand any rough edges to prevent splinters—your hands (and pollinators) will thank you. If your bench doesn't have built-in planter edges, create tiers by attaching 12-inch high wooden strips along the sides using 2-inch deck screws. Space the strips 6 inches apart to form three planting levels.
I like to stain or paint the wood first—it protects the wood and gives a polished look. Let it dry completely before adding soil. If you're using a pre-made bench, skip this step and move straight to soil prep. The key here is ensuring each tier has proper drainage—drill ¼-inch holes in the bottom of each section if needed.
Layer Soil and Drainage Materials
For each tier, start with a 2-inch layer of small gravel or crushed stone at the bottom to prevent soil compaction and improve drainage. This is critical—soggy roots attract fungus and deter pollinators. Next, add 3 inches of high-quality potting mix to the lowest tier. Press it down lightly so it settles but stays loose enough for roots to grow.
Repeat the gravel and soil layers for each tier, but reduce the soil depth by ½ inch per level (so the top tier gets 2 inches of soil). This ensures lighter plants thrive at the top while heartier perennials anchor the bottom. Mix in 1 cup of slow-release fertilizer per tier to give plants a nutrient boost without overfeeding.
Select and Plant Pollinator-Friendly Species
Choose plants that bloom at different times to keep pollinators visiting all season. For the bottom tier, plant black-eyed Susans and bee balm—they're tough and attract bees and butterflies. In the middle tier, add lavender and salvia for their fragrant flowers and long bloom times. The top tier is perfect for sweet alyssum and cosmos, which spill over the edges beautifully.
Dig holes just deep enough to cover the roots but not bury the stems. Space plants 6-12 inches apart, depending on their mature size. Water each plant thoroughly after planting to help the soil settle around the roots. Here's the thing—pollinators love native plants best, so check what thrives in your region for the best results.
Add Finishing Touches for Pollinator Appeal
Place a small flat rock or decorative pebble in the center of each tier to create a tiny landing spot for bees and butterflies. These spots help them rest and make your planter even more inviting. Add mulch around plants to retain moisture and suppress weeds, but leave a 1-inch gap near the stems to prevent rot.
Finally, consider adding a small water feature like a shallow dish with pebbles and water—pollinators need hydration too! Position it where it catches morning sunlight but stays shaded by midday. This simple addition can double the number of visitors to your bench garden.
Maintain and Encourage Visitors Year-Round
Water deeply twice a week during dry spells, focusing on the soil around the roots. You'll know it's time when the top ½ inch feels dry to the touch. Fertilize lightly every 6 weeks with a balanced, water-soluble formula to keep plants healthy without overstimulating growth.
Deadhead spent blooms regularly to encourage more flowers and extend the season. In fall, cut back annuals but leave perennials until spring—their dried stems provide winter shelter for beneficial insects. This is the moment that matters: a well-maintained bench garden becomes a pollinator magnet, turning your outdoor space into a thriving ecosystem.
Tips & tricks for perfect tiered bench garden planters
A few simple strategies will help you create a thriving pollinator haven that looks as beautiful as it functions.
Drainage is Non-Negotiable: In Step 1, when drilling those ¼-inch holes, don't skimp on quantity. Aim for at least 3-4 holes per square foot of each tier's bottom surface. I've seen soggy soil turn a beautiful planter into a pollinator desert—proper drainage prevents root rot and keeps your plants healthy for seasons to come. The gravel layer in Step 2 works best when it's at least 2 inches deep and spread evenly across the entire tier bottom.
Soil Depth Strategy: The graduated soil depth from 3 inches in the bottom tier to 2 inches in the top tier might seem arbitrary, but it's intentional. Lighter plants like sweet alyssum need less soil to establish roots quickly, while deeper-rooted perennials like bee balm benefit from the extra depth. Press the soil down gently after adding it—this prevents settling that could leave plants exposed as they grow.
Plant Placement Matters: When arranging your pollinator-friendly species in Step 3, place taller plants like bee balm toward the back of each tier and shorter varieties like sweet alyssum toward the front. This creates visual layers that also prevent taller plants from shading out their shorter neighbors. I always arrange plants in odd-numbered groupings (3, 5, or 7) for a more natural, balanced look that pollinators find inviting.
Watering Wisdom: The twice-weekly watering guideline in Step 5 works best when you water in the morning. This gives plants time to absorb moisture before evening temperatures drop. When checking that ½-inch dry soil test, use your finger to press gently—if it feels dry just below the surface, that's your cue. A watering can with a narrow spout helps direct water precisely where the roots need it most.
Pro Tips for Bench Garden Planter
- A few simple strategies will help you create a thriving pollinator haven that looks as beautiful as it functions.
- Drainage is Non-Negotiable: In Step 1, when drilling those ¼-inch holes, don't skimp on quantity.
- Soil Depth Strategy: The graduated soil depth from 3 inches in the bottom tier to 2 inches in the top tier might seem arbitrary, but it's intentional.
Frequently asked questions
Got questions about transforming your space with a bench garden planter? You’re not alone! Here are some of the most common queries—and their practical solutions—to help you get started with confidence.
What’s the best time of year to plant in a tiered bench garden?
For most climates, spring (after the last frost) and early fall are ideal for planting perennials, annuals, and pollinator-friendly flowers. Start with hardy plants like lavender or sedum in cooler months, then add heat-loving blooms like coneflowers or salvia in summer. Pro tip: Check your local frost dates to align planting with your zone!
Can I use a bench garden planter for vegetables, or is it just for flowers?
While tiered planters shine with flowers and herbs, they’re also perfect for compact veggies like lettuce, strawberries, or cherry tomatoes. Just ensure the planter has drainage holes and use lightweight, well-draining soil. For heavy root crops (like carrots), opt for shallower varieties or deeper planters.
How often should I water a tiered bench garden planter?
Watering needs depend on your climate, but tiered planters dry out faster due to their layered design. Check soil moisture daily in hot weather—aim to water deeply 2–3 times per week rather than shallow daily doses. Pro tip: Use a drip irrigation system or self-watering planter to keep roots consistently moist without overwatering.
What are the easiest pollinator-friendly plants to grow in a bench planter?
Start with low-maintenance, high-impact bloomers like bee balm, cosmos, or borage—they thrive in containers and attract bees, butterflies, and hummingbirds. For year-round interest, mix in herbs like thyme or oregano (they’re drought-tolerant and pollinator magnets!). Avoid pesticides to keep visitors safe.
My bench planter is leaning—how do I fix it without damaging the plants?
Uneven weight distribution or poor drainage often cause leaning. First, check for root-bound plants or overly heavy soil—trim roots if needed and redistribute soil evenly. For stability, add weighted bases (like bricks) or secure the planter to a wall/railing with invisible brackets. If the issue persists, consider a wider or deeper planter for better balance.
Wrapping up and next steps
Transforming your outdoor space with a bench garden planter isn’t just about aesthetics—it’s a gift to pollinators and a creative boost for your gardening skills! 🌿 With tiered layers, you’ve created a thriving ecosystem that’s both functional and beautiful.
Whether you’re a seasoned gardener or just starting, this project proves that small spaces can make a big impact.
Ready to take the next step? Grab your tools, gather inspiration, and start planting! Share your progress with fellow gardeners—your pollinator-friendly haven might just spark someone else’s green thumb adventure. Happy gardening! 🌸