Tools
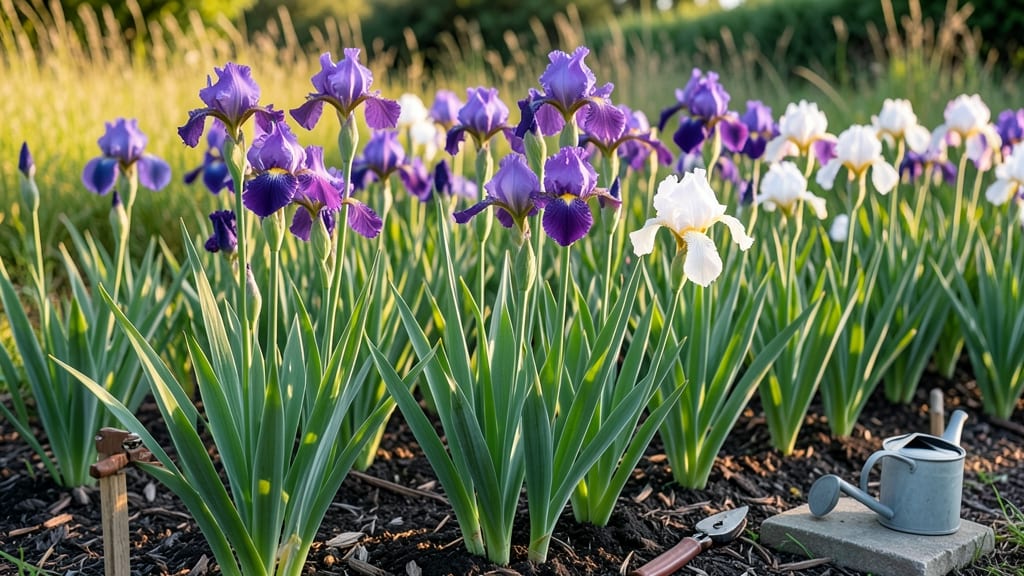
Iris gardens deliver bold, drama-free color that thrives with almost no fuss. 🌿 These striking perennials bring vertical interest and seasonal layers—from early spring blooms to late-season foliage—without demanding constant pruning or fussing.
The key lies in strategic placement, companion plants, and a few simple design rules that make them shine year-round.
My favorite setups pair irises with low-maintenance perennials like catmint, daylilies, and ornamental grasses, creating a textural contrast that feels intentional, not forced. For cottage gardens, I tuck them along pathways where their sword-like foliage frames walkways naturally.
Modern designs? Plant them in bold drifts against dark evergreens for a sculptural look that pops.
You’ll end up with a garden that blooms reliably from April through June, then carries interest through summer’s heat. The foliage stays upright and architectural, needing only an occasional deadhead—no shearing or heavy pruning required. Even drought-tolerant once established, these plants reward minimal effort with maximum visual impact.
Works in sun-drenched borders, woodland edges, or even container arrangements. The secret? Grouping plants in odd-numbered clusters (3, 5, or 7) for natural movement, then letting their colors—purple, yellow, or white—dictate the palette. Let’s make your garden the talk of the neighborhood with irises as the star.
📚 In This Guide
- What you need
- Instructions
- Tips and common mistakes
- Wrapping up and next steps
What you need
- ● Iris rhizomes: Choose bearded or sibiritica varieties (3–5 per square foot for full coverage). Opt for healthy, firm rhizomes with visible buds.
- ● Well-draining soil: A mix of garden soil, compost (1 part), and sand or perlite (1 part) to prevent rot. Test soil pH (ideal: 6.0–7.0).
- ● Organic mulch: Pine needles, gravel, or wood chips (2–3 inches deep) to retain moisture and deter weeds.
- ● Slow-release fertilizer: 10-10-10 NPK or bone meal (1–2 tbsp per plant at planting time).
- ● Watering can or hose with gentle nozzle: Irises hate soggy roots—aim for 1 inch of water per week (adjust for rain).
- ● Garden trowel or spade (for digging holes 4–6 inches deep).
- ● Garden fork or hoe (to loosen soil before planting).
- ● Measuring tape or ruler (to space rhizomes 12–24 inches apart).
- ● Pruners or sharp shears (for trimming foliage post-bloom).
- ● Gloves (to protect hands from sharp rhizome edges).
- ○ Optional but helpful: Stakes or labels (for tracking varieties).
- ● Soil moisture meter (to monitor watering needs).
- ● Edging tools (for defining borders neatly).
- ● Sunlight: 6+ hours of full sun daily (irises thrive in bright, open spaces).
- ● Drainage: Avoid low-lying areas or clay-heavy soil (irises hate waterlogged roots!).
- ● Timing: Plant rhizomes in early fall (6–8 weeks before first frost) or late winter (before new growth starts).
- ● Patience: Irises may take 1–2 years to reach full bloom potential!
How to design a low-maintenance iris garden that blooms all season
Here's the foolproof approach I've used for years—irises thrive with minimal fuss once you nail placement and soil.
🌱 Step 1: Select the Right Iris Varieties for Your Climate
Bearded irises (the classic purple/yellow types) are the easiest for beginners because they bloom reliably with almost no care. For cooler regions, choose early-season varieties like 'Blue Flag' or 'Katherine Hodgkin'—they'll flower in late spring before summer heat arrives. In warmer zones, opt for reblooming types such as 'Imagination' or 'Sheila' that produce two flushes of blooms per year.
I always plant at least three different varieties to ensure continuous color from early spring through summer. Mix heights too—taller varieties (30+ inches) go in the back, mid-height (24-30 inches) in the middle, and dwarf types (12-20 inches) near the front. This creates natural layers and prevents one variety from dominating the display.
☀️ Step 2: Choose the Perfect Sunny Location
Irises demand full sun—at least 6-8 hours daily—to produce their signature bold blooms. I test potential spots by placing a white board in the ground for a week. If the board stays cool to the touch, it's not sunny enough. Irises will tolerate partial shade in hot climates, but blooms will be smaller and less vibrant.
Here's the thing—avoid low-lying areas where cold air settles. Irises hate soggy roots, and winter wetness causes rot. Instead, choose a slight slope or raised bed where water drains quickly. The roots should never sit in standing water for more than a few hours after rain.
🪴 Step 3: Prepare the Soil for Long-Term Success
Irises thrive in well-draining soil with a slightly alkaline pH (6.8-7.2). I always amend heavy clay with 2-3 inches of coarse sand or perlite to prevent compaction. For sandy soils, mix in 1-2 inches of compost to retain some moisture without suffocating the roots.
Dig a hole 12-18 inches deep—irises need room for their thick rhizomes (not bulbs) to spread. Space them 12-24 inches apart, depending on variety. Place each rhizome so the top is just visible above the soil line. If buried too deep, they rot; if too high, they dry out. This is the moment that matters: adjust until you see the top third exposed.
✂️ Step 4: Plant and Water for Immediate Establishment
Set the rhizome in the hole and fan the roots outward gently. Cover lightly with soil, leaving the top third exposed to sunlight. Water immediately with 1 gallon per plant to settle the soil and encourage root contact. After that, water only when the soil feels dry 2 inches below the surface—irises hate soggy conditions.
I mulch around the base with 1-2 inches of gravel or pine bark to prevent soil from splashing onto the rhizomes (this causes rot). Avoid organic mulch like wood chips—it decomposes too quickly and can smother the plants. Watch for new growth within 3-4 weeks; that's your signal the roots have taken hold.
🌿 Step 5: Maintain With Just Two Seasonal Tasks
After the first bloom cycle, cut back the flower stalks (fans) at the base once they turn brown. Never cut the leaves—they feed the rhizome for next year's blooms. In late summer, fertilize lightly with a low-nitrogen, high-phosphorus formula (like 5-10-10) to encourage next year's buds.
Divide clumps every 3-5 years when blooms become sparse. Dig up the rhizomes in early summer, separate the fans, and replant the healthiest sections. This rejuvenates the garden and prevents overcrowding. Real talk: if you skip this, your irises will still bloom, but the display will thin out over time.
Tips & tricks for perfect iris garden design
A few strategic moves will transform your iris garden from good to spectacular with almost no extra work.
Variety Layering Secret: The height differentiation in Step 1 isn't just about looks—it's about light access. Taller varieties (30+ inches) cast less shade on shorter ones (12-20 inches) than you'd think. I've found that spacing mid-height varieties (24-30 inches) 18-20 inches apart creates the ideal airflow while maintaining that layered visual impact. This prevents fungal issues between plants while maximizing bloom visibility from all angles.
Sunlight Testing Hack: That white board test in Step 2 is my go-to for determining true sunlight exposure. Pro tip: do this test in both morning and afternoon—many spots get 6 hours of sun but not the critical 8 hours needed for optimal blooms. I've caught this mistake before and ended up with half-sized blooms. If your board stays cool during the hottest part of the day (11am-3pm), that spot won't support full sun requirements.
Rhizome Placement Precision: The 12-18 inch depth in Step 3 is non-negotiable, but here's what nobody tells you: the rhizome's orientation matters just as much. Place the fan-shaped top facing upward—this ensures proper light exposure for future growth. I've seen gardeners bury them sideways, which leads to uneven growth patterns. Also, never cover the top third—this is the growth point that needs sunlight to photosynthesize for next year's blooms.
Dividing Strategy: The 3-5 year division schedule in Step 5 is perfect, but here's how to make it even better: divide in early summer when the rhizomes are actively growing but before they've stored too many nutrients. Look for rhizomes that are 2-3 inches wide with multiple fans—these are your powerhouses. Smaller ones can be composted or replanted in less prominent areas. This selective approach gives you stronger plants for your main display while still utilizing all your divisions.
Pro Tips for Iris In Garden
- A few strategic moves will transform your iris garden from good to spectacular with almost no extra work.
- Variety Layering Secret: The height differentiation in Step 1 isn't just about looks—it's about light access. Taller ...
- Sunlight Testing Hack: That white board test in Step 2 is my go-to for determining true sunlight exposure. Pro tip: d...
Frequently asked questions
Got questions about adding irises to your garden? Here are some of the most common ones—and their answers—to help you get started with confidence!
What’s the best time of year to plant irises?
Plant irises in early fall (6–8 weeks before the first frost) or late winter (just as new growth appears). This timing lets roots establish before hot weather, ensuring stronger blooms next season. Avoid planting in summer—irises hate soggy heat!
How do I keep my irises blooming year after year?
Prune spent blooms after they fade (but leave the leaves until they yellow naturally). Divide clumps every 3–4 years in early fall, and fertilize lightly in spring with a balanced 10-10-10. Irises thrive with full sun (6+ hours daily) and well-draining soil—no fancy tricks needed!
Are irises deer- or rabbit-resistant?
Most irises are deer-resistant due to their bitter taste, but rabbits might nibble young shoots. Protect seedlings with chicken wire or plant irises near thorny shrubs (like barberry) or strongly scented herbs (like rosemary) to deter pests.
Why aren’t my irises blooming?
Common culprits:
- Too much shade—irises need sun!
- Overcrowded roots—divide clumps if they’re dense.
- Over-fertilizing—irises prefer lean soil; skip heavy nitrogen.
- Improper pruning—never cut leaves before they yellow.
What are some low-maintenance alternatives to irises?
If irises seem high-maintenance (they’re not!), try these equally tough perennials:
- Daylilies – Bloom all summer, drought-tolerant.
- Peonies – Fragrant, deer-resistant, and long-lived.
- Salvia – Drought-loving, attracts pollinators.
- Russian Sage – Silvery foliage, thrives in poor soil.
Wrapping up and next steps
Transforming your garden into a vibrant iris haven is easier than you think! With their striking blooms and low-maintenance nature, irises bring year-round beauty with minimal effort. Whether you’re a seasoned gardener or just starting, these versatile plants offer season-long color and effortless charm.
Ready to take the next step? Start small—plant a few irises in a sunny spot, experiment with colors, and watch your garden flourish! For even more inspiration, explore iris care guides or connect with local gardening communities to share your progress. 🌸✨