Watering
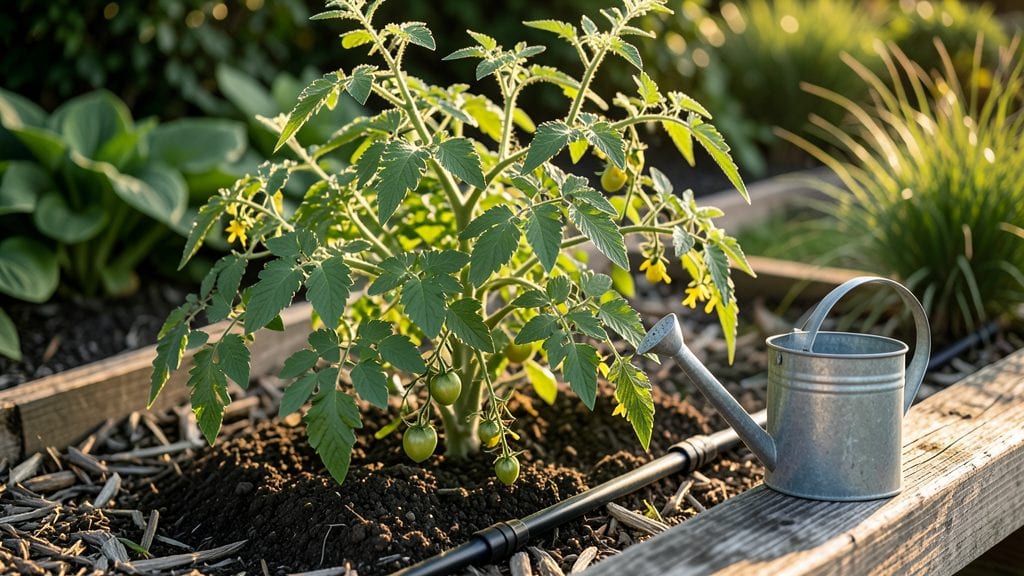
The best way to water a vegetable garden is to mimic nature’s rhythm—slow, steady, and right at the roots. I learned this after watching my tomatoes wilt from surface watering, their roots gasping for moisture instead of drinking deeply.
Drip irrigation changed everything, delivering water exactly where plants need it without waste.
You don’t need fancy equipment to start—just a simple system with tubing, emitters, and a timer. My setup costs under $50 and runs on a basic hose connection. The key is keeping water 6-8 inches deep in the soil, not just damp on top.
Most plants hate soggy leaves but thrive with consistent moisture at their roots.
By summer’s end, you’ll see the difference: fewer wilting leaves, no fungal diseases from overhead watering, and plants that produce heavier, sweeter harvests. The system even saves water—up to 30% less than sprinklers—while working for everything from leafy greens to heavy feeders like peppers.
Works for small raised beds or sprawling backyards, and adapts to seasonal needs—just adjust the timer as temperatures rise. Here’s how to set it up without the guesswork.
📚 In This Guide
- What you need
- Instructions
- Tips and common mistakes
- Wrapping up and next steps
What you need
- ● Drip irrigation kit: A complete system (e.g., Rain Bird or Netafim) with: 1 mainline tubing (½" or ¾" diameter, length depends on garden size)
- ● 1 backflow preventer (to protect against contamination)
- ● 1 pressure regulator (adjusts water flow, typically 15-30 PSI)
- ● 1 filter (180-micron mesh to block debris)
- ● Emitter tubing or micro-sprayers (quantity based on plant count, ~1 per plant or every 12-24 inches)
- ● Water source: Garden hose with ¾" female threaded connection (or a dedicated spigot)
- ○ Optional: Rainwater barrel with a spigot for eco-friendly watering
- ● Connectors & fittings: Tee connectors, end caps, and 90° elbows (quantity based on layout)
- ● Barb fittings or push-fit connectors (for emitter tubing)
- ○ Timer (optional but recommended): A smart or mechanical irrigation timer (e.g., Orbit B-Hyve) to automate watering schedules.
- ● Measuring tape & scissors: For precise tubing cuts and layout planning.
- ● Soaker hoses: For supplemental watering in tricky spots (e.g., Dura-Line soaker hose).
- ● pH test kit: To monitor water quality and adjust as needed.
- ● Mulch (straw or wood chips): Retains moisture and reduces evaporation.
- ● Wire or stakes: For securing tubing in windy areas.
- ● Extra emitters: Spare parts for future expansions or repairs.
Instructions for implementing the best drip irrigation system in your vegetable garden
Here’s the proven method I’ve used across seasons to eliminate waste, prevent disease, and grow vegetables with consistent vigor.
Plan Your Layout for Maximum Efficiency
Start by sketching your garden beds on paper, noting where each vegetable will go. Drip irrigation works best when emitters are placed near the base of each plant, about 6 inches from the stem. For rows, run the mainline tubing along the outer edge and branch off with smaller lines every 12-18 inches to reach each plant. This ensures even coverage without oversaturating one area while leaving others dry.
I like to use flagging tape to mark emitter locations before installing anything—this saves time and prevents mistakes when you’re ready to connect everything. For larger beds, consider a grid pattern with tubing spaced 18-24 inches apart to minimize gaps. The goal is to mimic nature’s slow, deep watering while keeping foliage dry to prevent fungal issues.
Install the Mainline and Connect Emitters
Lay out the ½-inch mainline tubing along your planned route, securing it with landscape staples every 2 feet to prevent shifting. Use a tubing cutter (never scissors) to avoid crushing the walls. Connect ¼-inch emitter lines to the mainline using barb fittings, spacing them according to your plant layout. For vegetables like tomatoes or peppers, use low-volume emitters (0.5-1 gallon per hour) to deliver water precisely where roots need it.
Here’s the thing—don’t bury the tubing. Instead, cover it with 2-3 inches of mulch to protect it from UV damage and keep soil temperatures stable. If you’re using soaker hoses instead of drip lines, lay them along the rows and secure them with hose clips every 12 inches. The key is to keep everything accessible for adjustments while shielding it from sunlight.
Set Up the Filter and Pressure Regulator
Attach a 180-micron screen filter to the mainline to prevent clogs—this is non-negotiable. Without it, sand and debris will block emitters within days. Next, install a pressure regulator set to 20-30 psi. Too much pressure causes uneven watering, while too little won’t deliver enough. I’ve seen systems fail because the regulator was skipped, so don’t skip this step.
Connect the filter and regulator to your water source, then turn on the system briefly to flush out any remaining debris. Watch for consistent flow from all emitters—if some sputter or drip erratically, backtrack and check for kinks or partial blockages. A properly set up system should deliver water slowly and evenly, with no hissing or surges.
Program Your Timer for Optimal Watering
Set your smart timer to run early in the morning (5-7 AM) for 1-2 hours, depending on your soil type and plant needs. Sandy soil drains faster, so you may need 30-45 minutes, while clay soil holds moisture longer and might only require 1-1.5 hours. The goal is to water deeply enough that the top 6-12 inches of soil stay consistently moist but not soggy.
I adjust the runtime weekly based on weather—reduce by 20-30% during rain and increase slightly in 90°F+ heat. Avoid watering in the evening, as damp foliage overnight invites powdery mildew and blight. A well-timed system ensures roots grow deep and plants develop resilience against drought.
Monitor and Adjust for Seasonal Changes
Check your system weekly during the growing season to ensure all emitters are functioning. Replace any clogged or damaged ones immediately—a single blocked emitter can leave a plant thirsty while others get overwatered. In late summer, increase runtime by 10-15% as evaporation rates rise. For winter crops, reduce to 30-45 minutes to prevent root rot in cooler soils.
Here’s where it gets smart: use a moisture meter to verify soil conditions. Stick the probe 2-3 inches deep near your plants—if it reads dry, increase runtime slightly. If it’s saturated, reduce or skip a cycle. Over time, you’ll learn exactly how your garden’s microclimate behaves, allowing you to fine-tune without guesswork.
Tips & tricks for perfect vegetable garden watering
These pro-level strategies will help you maximize efficiency and prevent common pitfalls when setting up your drip irrigation system.
Precision Layout Planning: In Step 1, when marking emitter locations with flagging tape, I recommend adding a small flag for each plant's mature size—not its current size. This accounts for growth and prevents needing to relocate emitters later. For example, a tomato plant might start needing water 6 inches from the stem but will require coverage up to 12 inches by mid-season. This foresight saves you from mid-season adjustments when plants are already established.
Emitter Selection Matters: The instructions mention using low-volume emitters (0.5-1 gallon per hour) for vegetables like tomatoes and peppers, but here's the thing—don't overlook the importance of matching emitter flow rates to your soil type. Sandy soils benefit from slightly higher flow emitters (closer to 1 gallon per hour) to prevent rapid drainage, while clay soils can handle lower flow (around 0.5 gallons per hour) to avoid oversaturation. This adjustment makes all the difference in root zone moisture consistency.
Pressure Regulator Calibration: When setting up your pressure regulator in Step 3, I've found that most garden water sources naturally run at 40-50 psi. The 20-30 psi range recommended is intentionally lower to prevent emitter damage and ensure even distribution. To achieve this, you may need to install a pressure-reducing valve before the regulator if your source pressure exceeds 50 psi. This extra step prevents premature wear on your emitters and maintains system longevity.
Seasonal Timer Adjustments: The 1-2 hour watering window in Step 4 works perfectly for summer conditions, but here's what nobody tells you about seasonal adjustments: In spring and fall, when temperatures drop below 60°F, reduce runtime by 30-40% to prevent overwatering. The cooler soil holds moisture longer, and plants generally require less frequent watering. I keep a garden journal to track these adjustments year after year—it becomes your system's operating manual over time.
Pro Tips for Best Way To Water Vegetable Garden
- These pro-level strategies will help you maximize efficiency and prevent common pitfalls when setting up your drip irrigation system.
- Precision Layout Planning: In Step 1, when marking emitter locations with flagging tape, I recommend adding a small flag for each plant's mature size—not its current size.
- Sandy soils benefit from slightly higher flow emitters (closer to 1 gallon per hour) to prevent rapid drainage, while clay soils can handle lower flow (around 0.5 gallons per hour) to avoid oversaturation.
Frequently asked questions
Got questions about keeping your veggie patch hydrated like a pro? Here are some of the most common concerns—and their straightforward solutions!
How often should I water my vegetable garden?
Most vegetables need 1 to 1.5 inches of water per week, including rainfall. Drip irrigation makes it easy to deliver consistent moisture—aim for early morning (5–9 AM) to reduce evaporation and fungal risks. Adjust based on heat: hot summers may require daily watering, while cooler weather can stretch intervals to every 2–3 days.
What’s the best time of day to water?
Watering in the early morning (before 10 AM) is ideal because it allows foliage to dry quickly, preventing mildew. Avoid evening watering—wet leaves overnight can attract pests and diseases. If you must water later, use drip systems with emitters at soil level to keep leaves dry.
Can I reuse water (like from my AC or shower) for my garden?
Yes! Greywater (cool, non-toxic water from sinks, showers, or washing machines) is great for gardens—just avoid soaps or chemicals. Let it sit for 24 hours to cool, then apply it to the soil (not leaves). Never use water from dishwashers, garbage disposals, or anything with salt/sugar.
Why are my plants wilting even with drip irrigation?
Wilting can mean underwatering, overwatering, or clogged emitters. Check:
- Soil moisture 1–2 inches deep—if dry, increase watering time.
- Clogged drip lines (flush with vinegar/water if needed).
- Root-bound plants or poor drainage (amend soil with compost).
Do I need to fertilize if I’m using drip irrigation?
Drip irrigation doesn’t replace fertilizer, but it’s perfect for delivering liquid nutrients (like fish emulsion or seaweed extract) directly to roots. Use a slow-release granular fertilizer at planting, then supplement with water-soluble feeds every 4–6 weeks. Over-fertilizing can burn roots—always follow package instructions!
Wrapping up and next steps
Mastering the best way to water your vegetable garden with drip irrigation isn’t just about efficiency—it’s about unlocking the full potential of your plants! 🌱 By focusing on consistent moisture, smart timing, and system maintenance, you’ll save water, reduce stress on your veggies, and enjoy a bountiful harvest.
Start small, experiment with setups, and don’t forget to monitor soil and plant needs as they grow.
Now that you’re armed with the secrets, it’s time to roll up your sleeves and get growing! 💦 Begin by setting up your drip system this weekend—your future salads, tomatoes, and peppers will thank you. Happy gardening!