Tools
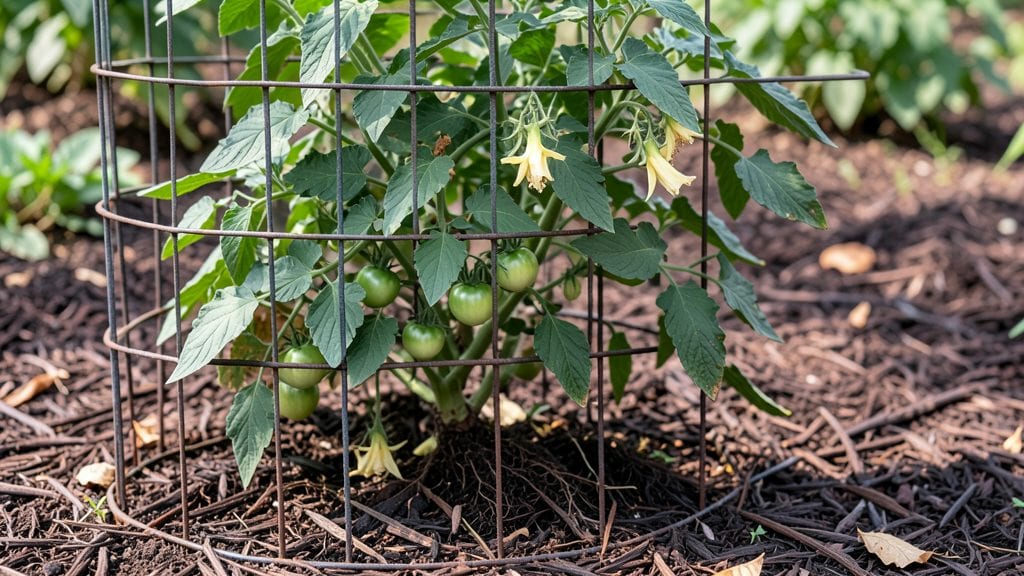
My caged vegetable garden turned my cramped backyard into a high-yielding harvest factory—no sprawling rows needed. 🌱 The right cage transforms vertical space into growing real estate, letting me fit twice as many plants in half the footprint.
I started with a simple 5-foot-tall trellis cage for tomatoes and pole beans, and within weeks, the vines climbed upward instead of sprawling outward.
You don’t need fancy equipment—just sturdy materials like powder-coated metal or heavy-duty plastic. Raised cages work for leafy greens, while hoop houses extend the season for cold-sensitive crops.
The key is matching cage height to plant growth habits: indeterminate tomatoes need 7+ feet, while bush beans thrive in 4-foot cages. Sunlight and drainage are non-negotiable, but even small spaces can produce shockingly lush yields when organized this way.
What you’ll love most is how cages simplify care: fewer weeds, better air circulation, and easier pest control. My cucumbers, once tangled messes, now grow neatly upward, and the vertical layout makes harvesting a breeze.
By summer’s end, I’m pulling in 30% more produce than my old flat-bed garden—all while keeping the space tidy and accessible. The secret? Start small, choose the right cage for your plants, and let gravity do the work.
Works for balconies, patios, or even sunny windowsills with the right setup. Whether you’re fighting limited space or just tired of sprawling gardens, cages make growing smarter—not harder. Let’s get those plants climbing!
📚 In This Guide
- What you need
- Instructions
- Tips and common mistakes
- Wrapping up and next steps
What you need
- ● Cage Frame: 1–2 metal or wooden trellis cages (4’–6’ tall, 2’–3’ wide, depending on space). Pro tip: Galvanized metal cages resist rust and last longer! 🔥
- ○ Optional: DIY cage using PVC pipes, wooden stakes, or rebar (cut to 4’–6’ lengths, ~12–16 pieces total).
- ● Hardware: 4–6 heavy-duty zip ties or wire (for securing cages to walls/fences).
- ● 1–2 bags of concrete mix (if anchoring cages to the ground).
- ● Screws or nails (if building a wooden frame).
- ● Growing Medium: 1–2 bags of high-quality potting mix (sterile, well-draining, e.g., Miracle-Gro or FoxFarm). Skip garden soil—it compacts! 🌡️
- ○ Optional: Coco coir or perlite for extra aeration.
- ● Containers or Lining: 1–2 large fabric grow bags (5–10 gallons) or 5–10 gallon plastic pots with drainage holes.
- ○ Optional: Landscape fabric (to line cages and prevent soil spillage).
- ● Location: A sunny spot (6+ hours of sunlight daily) with access to a water source. Wall-mounted? Ensure it’s sturdy! 🎯
- ● Tools: Tape measure, level, and drill (if assembling DIY cages).
- ● Garden gloves and knee pads (trust us, they’re a game-changer!).
- ● Plants: Choose compact, vine-friendly veggies like: Tomatoes, cucumbers, or beans (trellis lovers!).
- ● Peppers, herbs (basil, thyme), or strawberries (shallow-rooted picks!).
- ○ Optional Upgrades: Drip irrigation kit or soaker hoses (automate watering!).
- ● LED grow lights (for indoor/low-light setups).
- ● Decorative paint or lattice (for a cute, custom look!).
Step-by-Step guide to building a functional caged vegetable garden
Here’s how to transform limited space into a thriving vertical harvest zone—without compromising plant health or yield.
🪴 Step 1: Select and Assemble the Cage Structure
Choose a 4-foot-tall metal or plastic cage designed for vegetables (not flowers)—these typically have 12-16 square feet of growing space per unit. I prefer galvanized steel cages because they resist rust and last 5+ seasons. Assemble the cage according to manufacturer instructions, ensuring all wires or plastic panels are securely fastened. A wobbly cage will stress plants and limit growth potential.
Position the cage in full sun (at least 6-8 hours daily) and level the base. Uneven ground causes water to pool, leading to root rot. If your yard is sloped, add a 1-inch layer of landscape fabric under the cage to prevent weeds from competing for nutrients. The goal is stability—your plants will lean against the cage for support as they grow.
🌱 Step 2: Prepare the Soil and Planting Medium
Fill the cage with 2 cubic feet of high-quality potting mix (not garden soil—it compacts and drains poorly in containers). Mix in 1 cup of compost and 1 tablespoon of balanced fertilizer (10-10-10) per cubic foot to jumpstart nutrient availability. This ensures your vegetables get the phosphorus and potassium they need for strong roots and fruiting.
Moisten the mix until it’s evenly damp but not soggy—think of a wrung-out sponge. Press it down lightly to eliminate air pockets, then create 4 planting pockets (one per cage opening) by pressing your hand into the soil. Space pockets 12-18 inches apart to allow airflow and prevent disease. Overcrowding leads to leggy, weak plants that struggle to produce.
☀️ Step 3: Plant Vegetables Suited for Vertical Growth
Select determinate varieties (bush types) of tomatoes, peppers, or compact cucumbers—these thrive in cages and don’t require trellising. For 4 plants per cage, choose 1-2 tomato plants, 1 pepper, and 1 cucumber (or swap for bush beans). Plant seeds ½ inch deep or transplants at the same depth as their nursery pots. Gently firm soil around the stems to eliminate gaps where weeds could invade.
Water deeply immediately after planting to settle the soil and remove air pockets. Use a soaker hose or watering can with a rose attachment to avoid dislodging seedlings. Within 7-10 days, you’ll see first true leaves—this is your cue that roots have established. If leaves appear yellow, your soil may need more nitrogen; add a side-dressing of compost to correct it.
💧 Step 4: Maintain Water and Nutrients for Maximum Yield
Water every 2-3 days until the top 2 inches of soil feel dry—cages dry out faster than in-ground beds. Mulch with 1 inch of straw to retain moisture and suppress weeds. I water in the early morning to reduce evaporation and fungal risks. Overhead watering can spread disease, so aim for drip irrigation or soaker hoses if possible.
Fertilize every 4-6 weeks with a liquid tomato or vegetable fertilizer (follow label rates). You’ll notice larger leaves and heavier fruit within 2 weeks of feeding. Prune suckers on tomatoes weekly to direct energy to fruit production. If you see whiteflies or aphids, spray with neem oil—this organic treatment works without harming pollinators.
✂️ Step 5: Harvest and Prune for Continuous Production
Harvest tomatoes when fully colored and peppers when firm—this encourages more production. Pick cucumbers when 6-8 inches long to prevent bitterness. Use clean pruners to snip stems just above a leaf node. I harvest every 2-3 days during peak season to avoid overripe fruit that deters future blooms.
At season’s end, remove all plant debris to prevent disease carryover. Rinse the cage with water and mild soap, then store it in a dry place. Next spring, refresh the soil with 1 more cubic foot of potting mix and compost before replanting. A well-maintained cage can produce 2-3 harvests per season with proper care.
Tips & tricks for perfect caged vegetable gardens
Here's what I've learned after years of maximizing vertical space—these tricks will help you avoid common pitfalls and get the most out of your compact growing area.
Cage Stability is Non-Negotiable: In Step 1, when assembling your cage, take the extra 10 minutes to secure all connections with zip ties or cable ties. I've seen cages collapse under the weight of mature tomato plants—trust me, you don't want to deal with that mid-season. For extra stability, anchor the cage to a sturdy post using landscape fabric strips tied at each corner. This prevents shifting in windy conditions, which can damage stems and roots.
Soil Science Matters More Than You Think: When preparing your planting medium in Step 2, don't skimp on the compost-to-soil ratio. I've found that mixing in 2 cups of worm castings (instead of just compost) per cubic foot gives plants an immediate nutrient boost and improves soil structure. The key is creating that perfect balance—too much compost can create anaerobic pockets, while too little means your plants will starve. Test your soil's moisture by squeezing a handful: it should hold together but not drip water.
Plant Selection Makes All the Difference: In Step 3, resist the urge to mix too many varieties. While the instructions suggest 4 plants per cage, I've had success with just 3 high-value crops—like 2 tomato plants, 1 pepper, and 1 basil—for maximum yield. The basil acts as a natural pest deterrent while providing fresh leaves for cooking. For compact cucumbers, choose 'Bush Champion' or 'Spacemaster' varieties—they stay contained without sprawling. Remember, vertical space is precious, so prioritize plants that produce well in confined areas.
Watering Wisdom for Container Gardens: The 2-3 day watering schedule in Step 4 works, but timing is everything. I've learned that watering in the early morning (before 8 AM) prevents fungal diseases by allowing foliage to dry completely. For extra insurance, add 1 tablespoon of hydrogen peroxide (3%) to each gallon of water once a month—it oxygenates the roots and prevents root rot. And here's a pro move: place a moisture meter in your cage soil to track the exact dryness threshold for your specific climate.
Pro Tips for Caged Vegetable Garden
- Here's what I've learned after years of maximizing vertical space—these tricks will help you avoid common pitfalls and get the most out of your compact growing area.
- Cage Stability is Non-Negotiable: In Step 1, when assembling your cage, take the extra 10 minutes to secure all connections with zip ties or cable ties.
- Soil Science Matters More Than You Think: When preparing your planting medium in Step 2, don't skimp on the compost-to-soil ratio.
Frequently asked questions
Got questions about caged vegetable gardens? You’re not alone!
Here are answers to the most common queries to help you grow like a pro—even in tight spaces.
What’s the best time of year to install a vegetable cage?
Plant your cage after the last frost date in your zone (check your USDA hardiness zone). For warm-weather crops like tomatoes or peppers, install cages in early spring. Cool-season veggies (e.g., lettuce, kale) can go in late summer for a fall harvest. Pro tip: Prep the soil 2–4 weeks before planting for optimal root growth!
Can I use a vegetable cage for root vegetables like carrots or potatoes?
Not ideal! Root crops need deep, loose soil to spread. Cages work best for bushy plants like tomatoes, peppers, or herbs. For roots, try a raised bed or container with at least 12" of soil depth. Exception: Shallow roots (radishes, green onions) can thrive in shallow cages with extra compost.
Are DIY cages cheaper than buying pre-made ones?
Absolutely!
DIY cages (using PVC pipes, rebar, or wire mesh) cost $10–$30 vs. $50–$100+ for store-bought. Plus, you customize size and materials. Budget hack: Repurpose old fencing, trellises, or even laundry baskets lined with chicken wire for a free solution!
How do I keep pests out of my caged veggies?
Start with physical barriers: Secure cage mesh tightly (no gaps > ¼"). Use row covers for early pests. For stubborn bugs (aphids, hornworms), spray neem oil or introduce beneficial insects like ladybugs. Prevention tip: Rotate crops yearly to disrupt pest life cycles!
Do vegetable cages need full sun? What if my yard is shady?
Most veggies (tomatoes, peppers, cucumbers) need 6–8 hours of sun daily. In shady spots (<4 hrs sun), grow low-light tolerant crops like lettuce, spinach, or herbs (basil, cilantro). If partial shade is unavoidable, choose dwarf varieties and supplement with grow lights if needed.
What’s the easiest way to harvest without damaging the plant?
Use pruning shears for tomatoes/peppers—cut stems above the fruit to avoid bruising. For leafy greens (kale, Swiss chard), harvest outer leaves first to encourage regrowth. Gentle reminder: Always wash hands and tools before/after handling plants to prevent disease spread!
Wrapping up and next steps
A caged vegetable garden is your ticket to growing fresh, homegrown produce—even in the tiniest of spaces! 🌱 Whether you’re a seasoned gardener or just starting out, this vertical solution proves that limited yard size isn’t a limitation.
With the right materials, a little creativity, and some elbow grease, you’ll soon be harvesting crisp veggies and lush herbs right outside your door.
Ready to take the next step? Start small—sketch your design, gather your supplies, and plant those seeds! Before you know it, your balcony or patio will be bursting with flavor, and you’ll be the proud owner of a thriving, space-saving garden. Happy growing! 🌿✨