Tools
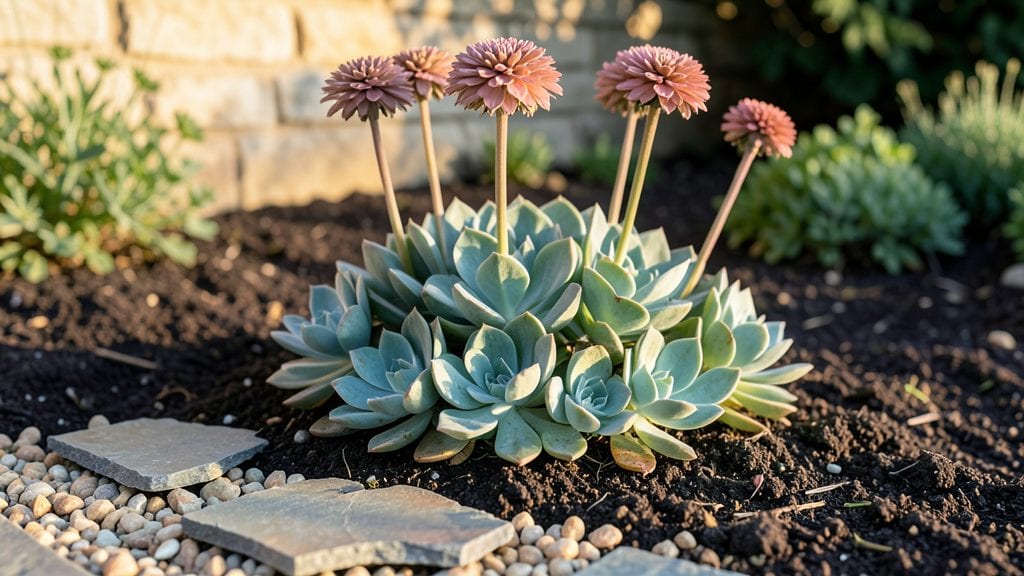
My chipped slate garden borders transformed a plain yard into a rustic retreat with almost no effort. The jagged edges and earthy tones blend seamlessly with natural landscapes while adding unexpected texture to flower beds and pathways.
I started with just a few bags of broken slate from a local supplier—no fancy tools or complicated prep work required.
Slate’s durability means these borders won’t wash away or degrade over time, unlike wood chips or mulch. You can create clean lines, meandering paths, or even mosaic-style designs by layering different slate sizes.
Pair it with drought-tolerant plants like lavender or ornamental grasses for a low-maintenance look that thrives year-round. The best part? It stays in place without needing edging.
What you’ll end up with is a garden that feels both polished and organic—think of slate as nature’s version of a decorative border. The cool gray tones complement warm wood accents or bright blooms, while the rough texture adds depth to any space.
Once installed, it’s basically set-and-forget landscaping that keeps looking fresh for years. Ready to try it?
Works for everything from cottage gardens to modern landscapes, and adapts to any yard size. The key is playing with placement—whether you want sharp edges or a more organic spread. Here’s how to get started without overcomplicating it.
📚 In This Guide
- What you need
- Instructions
- Tips and common mistakes
- Wrapping up and next steps
What you need
- ● Chipped slate tiles or pavers – 10-20 sq. ft. per linear foot of border (adjust based on desired height/thickness). Opt for natural, weathered slate in earthy tones like gray, brown, or green.
- ● Landscape fabric – 1 roll (3-ft. width) to suppress weeds and stabilize the base.
- ● Gravel or crushed stone – 2-3 bags (50 lbs. each) for drainage and a solid foundation.
- ● Sand – 1-2 bags (50 lbs. each) to level and secure the slate.
- ● Outdoor adhesive or concrete – 1 tube or 1 small bag (for securing edges or filling gaps).
- ● Shovel and garden trowel – For digging and edging.
- ● Wheelbarrow – To haul gravel, sand, and slate.
- ● Rubber mallet – For gently tapping slate into place.
- ● Level – Ensures your border stays perfectly straight.
- ● Safety gloves and knee pads – Because comfort matters!
- ○ String line and stakes – Optional but handy for marking layouts.
- ● Edging material – Metal, plastic, or flexible stone to contain the slate.
- ● Moss or ground cover plants – For a soft, natural look between gaps.
- ● Weather-resistant sealant – To protect slate from moisture.
- ● Decorative stones or pebbles – For added texture and color.
Instructions for creating a chipped slate garden border
Transform any outdoor space with this timeless, low-maintenance border that adds texture and charm.
Measure and Mark Your Garden Border Layout
Start by measuring the area where you want to install the chipped slate border. Use a tape measure to determine the length and width of the space, then mark the outline with spray paint or a garden hose. I like to use a string line and stakes for straight edges—this ensures your border stays crisp and professional-looking. Double-check your measurements before proceeding, as slate pieces won’t adjust well once laid.
For curves, use a flexible measuring tape or bend the hose to shape the border naturally. Sketch a rough outline on paper first if you're unsure—this helps visualize the flow before committing to the ground. The key here is to plan for a border that’s at least 6 inches wide to create a defined edge without overwhelming the garden.
Prepare the Ground for Installation
Remove any grass, weeds, or debris from the marked area using a shovel or edging tool. Dig down about 2-3 inches to create a shallow trench where the slate will sit. This depth ensures stability while allowing for proper drainage. I like to loosen the soil with a garden fork first—it makes the trench easier to shape and prevents compacting later.
For slopes or uneven ground, use a level to create a consistent base. If your soil is clay-heavy, mix in a handful of sand to improve drainage. Avoid tilling too deeply, as this can disrupt roots of nearby plants. Once the trench is ready, lightly tamp down the soil with a hand tamper or the back of your shovel to create a firm foundation for the slate.
Lay the Chipped Slate Pieces
Begin laying the slate pieces along the trench, working from one corner toward the opposite side. Press each piece firmly into the soil, ensuring they sit flush with the ground. For a natural look, vary the sizes slightly—this mimics the organic feel of chipped slate. If a piece is too large, break it gently with a hammer and chisel or step on it firmly to reduce its size.
Leave small gaps—about ½ inch—between pieces to allow for expansion and drainage. These gaps also let rainwater seep through, preventing water pooling that could shift the slate over time. If you notice uneven edges, trim excess slate with a masonry saw or angle grinder for a polished finish. Work in sections to maintain consistency, and step back occasionally to check the overall appearance.
Secure the Border and Add Finishing Touches
Once all the slate is in place, use a hand tamper or mallet to gently press each piece deeper into the soil. This locks them into position and prevents shifting. For extra stability, especially in high-traffic areas, use landscape adhesive or a thin layer of concrete mix to secure the slate temporarily. Let it dry for 24 hours before walking on the border.
Finish by adding mulch or gravel around the base of the slate to blend it into the garden. This not only enhances the rustic aesthetic but also suppresses weeds. I often use 2-3 inches of shredded bark mulch for a soft contrast. Water the area lightly after installation to help settle the slate and encourage any nearby plants to thrive. Within a few weeks, your border will look like it’s been there for years.
Tips & tricks for perfect chipped slate garden borders
A few simple strategies will help you create a border that looks like it belongs in a cottage garden rather than a DIY project.
Precision in Planning: Before you start measuring, walk around your garden and visualize where the border will flow best. I always sketch a rough layout first—this helps me spot potential issues like tight corners or awkward curves. Remember, the 6-inch minimum width is ideal for creating that defined edge without looking overwhelming. If you're working with curves, use a flexible measuring tape and bend it to shape the border naturally before marking.
Soil Preparation Matters: The 2-3 inch trench depth is crucial for stability, but don't overlook the soil quality. If your ground is rocky or compacted, take the extra time to loosen it with a garden fork before digging. For clay-heavy soil, mix in a handful of sand per square foot to improve drainage. I've seen borders shift over time when installed in untreated clay—this simple step prevents that frustration.
Slate Selection Secrets: When choosing slate pieces, look for natural variations in size and shape—they'll create that organic, rustic look you're aiming for. For those larger pieces that need reducing, I've found stepping on them firmly (with proper safety gear) works better than hammering, as it maintains more of the natural edges. And those ½-inch gaps between pieces? They're not just for looks—they allow for seasonal expansion and prevent water pooling that could shift your border over time.
Securing for Longevity: The 24-hour drying time for landscape adhesive or concrete mix is non-negotiable, but don't be afraid to extend it if you're in a high-traffic area. For extra peace of mind, I like to add a second layer of adhesive along the bottom edge of each slate piece. This might seem like overkill, but it's what keeps borders looking crisp for years rather than months.
Pro Tips for Chipped Slate Garden
- A few simple strategies will help you create a border that looks like it belongs in a cottage garden rather than a DIY project.
- Precision in Planning: Before you start measuring, walk around your garden and visualize where the border will flow best.
- Soil Preparation Matters: The 2-3 inch trench depth is crucial for stability, but don't overlook the soil quality.
Frequently asked questions
Got questions about creating a stunning chipped slate garden? You’re not alone! Here are some of the most common inquiries—and their straightforward answers—to help you get started with confidence.
What’s the best way to prep slate for chipping without damaging it?
Start by scoring the slate with a masonry chisel along natural cleavage lines (the thin, wavy lines on the surface). Tap gently with a hammer to create clean breaks. Avoid excessive force—slate is brittle! For larger pieces, use a slate splitter for precision. Pro tip: Wear safety goggles and gloves to protect against flying fragments.
How long does a chipped slate border last before needing repairs?
A well-installed slate border can last 10–20 years, depending on climate and foot traffic. In freezing winters or high-rainfall areas, check annually for loose pieces or moss growth. Re-chip or replace damaged sections as needed. Preventative tip: Apply a sealant every 2–3 years to slow erosion and keep colors vibrant.
Is chipped slate more expensive than other garden borders?
Yes, but it’s a long-term investment. While slate costs $3–$8 per square foot (more for premium varieties), its durability and timeless look often outweigh the upfront cost. Compare to gravel ($1–$3/sq ft) or brick ($8–$15/sq ft). Budget hack: Mix slate with fieldstone or reclaimed wood for a hybrid look that saves money.
Can I use chipped slate in a vegetable garden?
Slate’s alkaline nature won’t leach harmful chemicals into soil, making it safe for veggies. However, avoid placing large, sharp pieces directly in planting beds—opt for rounded chips or crushed slate mulch instead. Bonus: Slate helps with drainage and deters slugs naturally!
What’s the easiest way to fix a sunken or uneven slate border?
If your slate has settled, lift and re-level sections by digging a shallow trench (2–3 inches deep) and adding a gravel base. Reposition chips, then backfill with sand or soil to secure them. For stubborn gaps, use landscape adhesive or mortar sparingly. Warning: Avoid over-tamping, which can crack slate.
How can I mix slate colors for a cohesive look?
Stick to a 3-color palette (e.g., gray, green, and purple slate) for harmony. Group similar tones together and use darker shades for borders, lighter ones for focal points. Design tip: Test arrangements on the ground before installing—slate’s natural variations create beautiful contrast when planned intentionally!
Wrapping up and next steps
A chipped slate garden isn’t just a trend—it’s a timeless way to add rustic charm, texture, and personality to your outdoor space. 🌿 Whether you’re framing flower beds, lining pathways, or creating a cozy patio edge, these versatile borders bring effortless elegance with minimal upkeep.
With the right materials and a little creativity, you can transform even the simplest yard into a stunning, low-maintenance retreat.
Ready to take the next step? Start small—grab a handful of chipped slate, a trowel, and a vision for your dream garden. Your outdoor oasis is just a border away! 🛠️✨