Landscaping
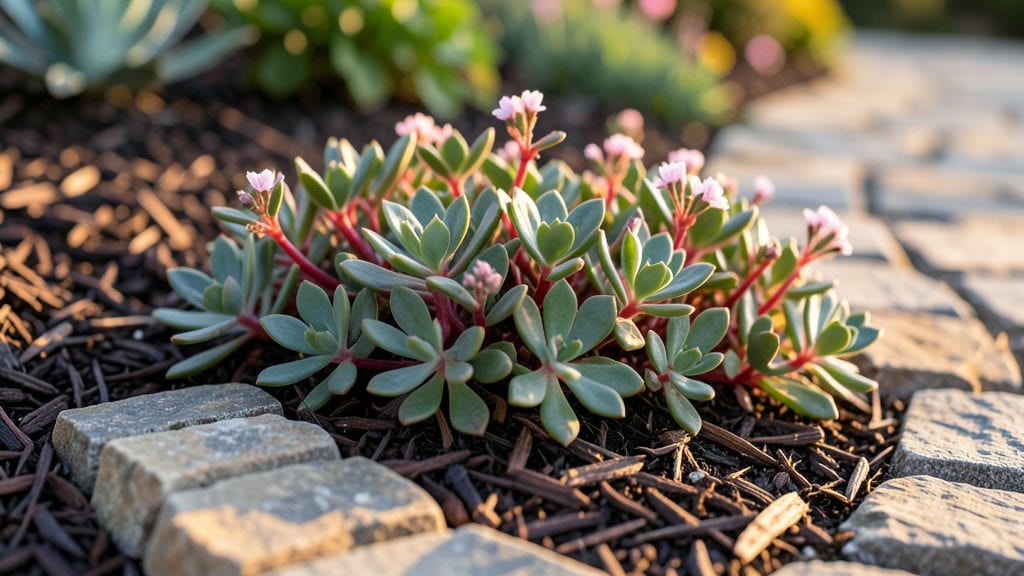
Cobblestone edging transforms a garden from ordinary to strikingly rustic in just a few hours. 🌿 I remember the first time I laid stones around my vegetable patch—the way they caught the morning light and framed the herbs made the whole space feel intentional.
It’s not just about looks; those uneven edges keep mulch in place and prevent soil from spilling onto pathways.
You don’t need fancy materials to get started. Natural river rocks or pre-cut pavers work beautifully, and most hardware stores carry both. For a true rustic look, hunt for irregularly shaped stones at a local quarry or salvage yard—they’ll cost less and add character.
Pair them with creeping thyme or ornamental grasses for a border that feels both structured and wild.
The best part? Cobblestone edging lasts decades with minimal upkeep. Unlike wood or plastic borders, it won’t rot, warp, or fade. I’ve seen the same stone edges in my neighbor’s garden for 20 years, still holding up under rain and foot traffic.
Plus, you can mix sizes and colors to match your garden’s theme—whether that’s cottage charm, modern minimalism, or a wild woodland feel.
Here’s where it gets interesting: these edges aren’t just for flower beds. Use them to define raised garden beds, line gravel pathways, or even create a sunken herb spiral.
The possibilities are endless, and the best part is, you can start small—even a single border around a favorite plant will make a difference. Ready to see how it works?
📚 In This Guide
- What you need
- Instructions
- Tips and common mistakes
- Wrapping up and next steps
What you need
- ● Cobblestones: Natural cobblestones (flat, irregular shapes, ~2–4 inches thick) – quantity depends on garden length (e.g., ~1 stone per 1–2 feet for a single-row edge).
- ● OR pre-cut cobblestone pavers (uniform size, ~3–6 inches) – calculate based on your edging width (e.g., 12–15 pavers per linear foot for a 6-inch-wide border).
- ● Base Materials: Crushed gravel (¾-inch minus) – 2–3 inches deep (for drainage and stability).
- ● Landscape fabric (weed barrier) – slightly larger than your edging area.
- ● Adhesive & Stabilization: Concrete adhesive or landscape adhesive (for securing pavers).
- ○ Optional: Sand (for leveling between stones).
- ● Tools: Shovel and garden rake.
- ● Wheelbarrow (for gravel/sand).
- ● Rubber mallet (for settling stones).
- ● Level (2–4 ft) and string line (for straight edges).
- ● Safety gloves and knee pads.
- ○ Optional: Plate compactor (for ultra-stable bases).
- ● Mark your edging layout with spray paint or stakes before digging.
- ● Check local regulations—some areas require permits for hardscaping projects.
- ● Pro Tip: 💡 Sketch your design first! Measure twice, dig once—precision saves time and stones.
Step-by-Step instructions for installing cobblestone garden edging
This rustic border transforms any garden into a polished, timeless space with minimal effort.
🪴 Step 1: Mark and Prepare the Edging Layout
Use a garden hose or string to outline your edging path, creating curves that follow the natural flow of your landscape. For a 4-foot border, maintain a consistent 6-inch width between the hose and your garden's edge—this ensures stability and a professional finish. I like to use stakes and twine to mark the exact placement, especially for curved sections.
Once marked, remove any grass, weeds, or debris within the edging area using a shovel or edging tool. Dig down about 4 inches to create a clean trench where the cobblestones will sit. This prevents future weed growth and gives your border a crisp, defined look. Real talk: Skipping this prep step leads to uneven stones and weeds popping up later.
💧 Step 2: Lay Down a Base of Crushed Gravel
Spread a 2-inch layer of crushed gravel (like #57 stone) evenly across the trench. Use a rake to level it out, ensuring it’s compacted firmly with a plate compactor or by stomping it down. This base prevents shifting and keeps your cobblestones in place. I always wet the gravel slightly before compacting—it helps the particles lock together better.
For extra stability, especially in high-traffic areas, add a landscape fabric layer over the gravel before placing the stones. This keeps weeds at bay without sacrificing drainage. The fabric should overlap edges by 6 inches and extend slightly beyond the trench to block weed growth completely.
☀️ Step 3: Arrange and Secure the Cobblestones
Start placing the cobblestones along the marked line, pressing them lightly into the gravel base. For a natural, rustic look, mix stone sizes—larger ones at the base and smaller ones toward the top. Use a rubber mallet to tap them into place without cracking. Leave about ¼ inch between stones for sand or additional gravel to fill later.
Check for level often with a 2-foot level—uneven stones look sloppy and can trip up gardeners. If a stone feels wobbly, add a bit more gravel beneath it and press down again. Here’s the thing: Cobblestones shift over time, so I recommend securing them with landscape adhesive or edging pins every 12 inches along the border.
✂️ Step 4: Fill Gaps and Finish the Edging
Once all stones are in place, sweep coarse sand or additional gravel into the gaps between them. This locks the stones in place and gives your edging a polished finish. Use a broom to sweep the sand into the crevices, then tap the stones lightly again to settle everything. For extra durability, apply a polyurethane sealer to the top of the stones—this keeps them looking fresh and prevents moss buildup.
Finally, trim any overhanging grass or mulch back from the edge to keep your border clean. Water the area lightly to help the gravel and sand settle. You’ll notice the stones look more uniform after a day or two—this is when the sand fully compacts. Don’t rush this step; patience ensures a border that lasts for years.
Tips & tricks for perfect cobblestone garden edging
A few key strategies will help you create a border that looks professionally installed and lasts for years. The secret lies in the details—preparation, precision, and patience make all the difference.
Precision in Step 1: When marking your 4-foot border, use a string line and stakes to create perfectly straight sections before curving. I learned this the hard way after trying to eyeball curves—trust me, the difference is night and day. For curved sections, use a garden hose as a template and adjust the twine to match its shape. This ensures your stones will follow the natural flow of your landscape without awkward gaps.
Base Stability Secret: In Step 2, the 2-inch layer of crushed gravel isn't just about drainage—it's about creating a solid foundation. After spreading and leveling, I recommend compacting the gravel in two passes: first with a plate compactor, then with a few firm stomps. This double-compaction prevents future settling that could cause your stones to shift. For extra security in high-traffic areas, consider adding a second 1-inch layer of gravel before placing the landscape fabric.
Stone Placement Technique: When arranging cobblestones in Step 3, work from the inside out—start with the largest stones at the base of your border and gradually use smaller ones toward the top. This creates visual interest while maintaining structural integrity. Pro tip: Before pressing a stone into place, check its level against adjacent stones using your 2-foot level. If you find uneven spots, adjust the gravel beneath before securing—this prevents the "domino effect" where one stone's tilt affects its neighbors.
Final Settling Strategy: After filling gaps with coarse sand in Step 4, resist the urge to walk on your new edging immediately. Let it settle for at least 24 hours before testing it out. I've seen many gardeners rush this step and end up with uneven stones that require complete removal and redoing. For added longevity, apply the polyurethane sealer after the initial 48-hour settling period—this creates a protective barrier that keeps your stones looking fresh for years.
Pro Tips for Cobblestone Edging Garden
- A few key strategies will help you create a border that looks professionally installed and lasts for years.
- Precision in Step 1: When marking your 4-foot border, use a string line and stakes to create perfectly straight sections before curving.
- Base Stability Secret: In Step 2, the 2-inch layer of crushed gravel isn't just about drainage—it's about creating a solid foundation.
Frequently asked questions
Got questions about adding cobblestone edging to your garden? You’re not alone! Here are some of the most common queries—and their straightforward answers—to help you get started with confidence.
What’s the best way to lay cobblestone edging without it shifting over time?
To prevent shifting, start with a solid base: compact the soil, then add a layer of landscape fabric followed by coarse sand or gravel (2–3 inches). This creates stability. For extra security, use edging restraints or interlocking pavers at the base. Pro tip: Leave a slight gap (about ¼ inch) between stones to allow for minor ground movement.
How long does cobblestone edging take to install?
For a small garden bed (10–15 feet), expect 4–6 hours if you’re DIY-ing. Larger projects or complex curves may take a full day. Break it into steps: prep the base (1–2 hours), lay stones (2–3 hours), and finish with sand/gravel (1 hour). Rushing? Prioritize the base—skipping this step leads to uneven or unstable edges.
Is cobblestone edging more expensive than other materials like brick or metal?
Cost varies, but cobblestones typically run $3–$10 per square foot (including labor), depending on the stone type (e.g., fieldstone vs. granite). Metal edging (e.g., aluminum) is cheaper ($1–$3/sq ft) but lacks the rustic charm. Brick is mid-range ($4–$8/sq ft). Save money: Use smaller stones or repurpose existing rocks from your property!
Can I install cobblestone edging in winter or rainy weather?
Avoid wet conditions—muddy soil or frozen ground makes it hard to compact the base properly. Wait for dry, above-freezing temps (40°F+). If you must work in cooler months, choose a dry, sunny day to speed up curing. Rainy-day hack: Cover materials overnight to prevent water damage.
What if my cobblestones sink or crack after installation?
Sinking usually means the base wasn’t compacted enough. Dig out the affected area, re-compact the soil, and add more gravel/sand before re-laying stones. For cracks, check if the stones were placed on a soft or uneven surface. Fix it: Lift the stones, add a layer of polymeric sand, and re-set them. For stubborn cracks, consider repointing with sand or gravel.
How can I match cobblestone edging to my garden’s style?
Cobblestones pair well with cottage gardens (use irregular fieldstone), modern landscapes (smooth, uniform river rocks), or formal gardens (precision-cut granite). Color tip: Neutral tones (tan, gray) blend seamlessly, while red or brown stones add warmth. Mix textures (e.g., rough + polished) for visual interest!
Wrapping up and next steps
Transforming your garden with cobblestone edging isn’t just about aesthetics—it’s about adding timeless charm and functionality to your outdoor space. Whether you’re framing flower beds, pathways, or lawns, these rustic borders bring texture, durability, and a cozy, cottage-core vibe. The key? Start small, plan carefully, and embrace the process.
Ready to take the next step? Grab your tools, gather your materials, and let your creativity flow! Sketch a design, lay those stones, and watch your garden glow with newfound elegance. 🌿✨