Companion Plants
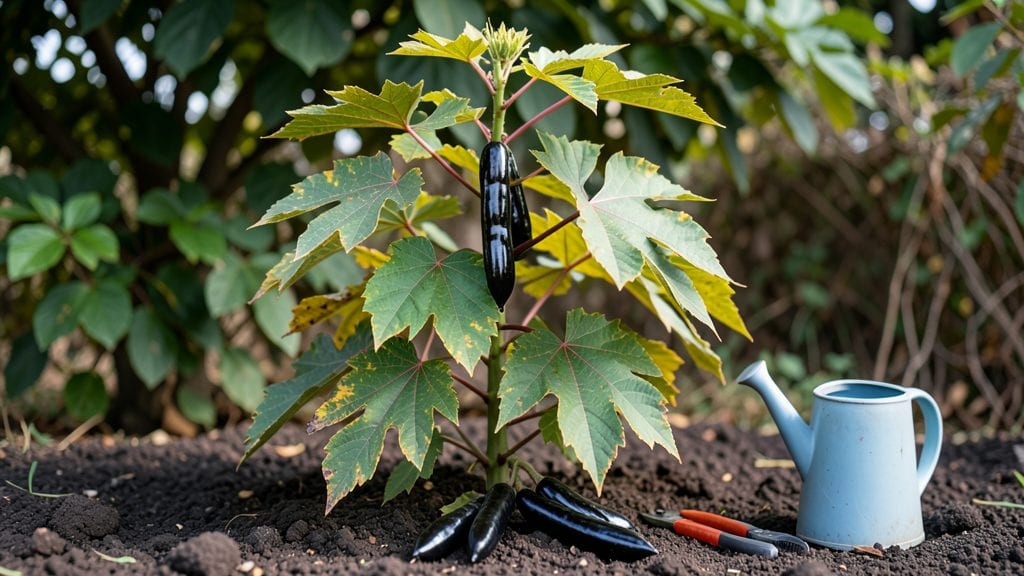
Deadly garden plants like foxglove and oleander can lurk in your yard looking innocent—until they aren’t. 🌿 I’ve pulled these beauties from my own garden without poisoning the soil or harming pollinators, and I’ll show you how to do it safely.
The key is knowing which plants to watch for and how to remove them without turning your yard into a toxic zone.
You’ll need gloves, a sturdy trash bag, and a shovel for deep-rooted offenders. First, identify the plant—foxglove’s bell-shaped flowers and oleander’s leathery leaves are dead giveaways.
Once confirmed, dig up the roots completely (even tiny fragments can regrow) and dispose of them in sealed bags. Never compost these plants—their toxins linger.
Your soil stays healthy because we’re not using chemicals, just elbow grease. After removal, test the area for lingering toxins by planting a fast-growing cover crop like clover. It’ll signal if the soil is safe for your next non-toxic additions, like marigolds or lavender, which repel pests naturally.
This method works for any dangerous plant—just research the specific removal steps for each. The goal is a safe yard where kids and pets can play without risk. Let’s get those hazards out of your garden for good.
📚 In This Guide
- What you need
- Instructions
- Tips and common mistakes
- Wrapping up and next steps
What you need
- ● Heavy-duty gloves (nitrile or leather, rated for thorny/poisonous plants—2 pairs recommended).
- ● Long-sleeved shirts and pants (made of thick fabric like denim or canvas to protect skin).
- ● Pruning shears or loppers (bypass pruners, sharp and sturdy, for cutting thick stems).
- ● Garden fork or shovel (heavy-duty, 18-24 inches long, for digging out roots).
- ● Trash bags (heavy-duty, 30+ gallon) (for disposing of plant debris—2-3 bags per session).
- ● Disposable masks (N95 or better) (to avoid inhaling spores or dust from crushed plants).
- ● Vinegar (white, 5% acetic acid) (1 gallon for spot treatment on stubborn regrowth).
- ● Compostable mulch (straw or wood chips) (5-10 gallons, to smother remaining roots).
- ○ Soil solarizer (optional but helpful) (clear plastic sheeting, 4x6 ft minimum, to kill roots via sunlight).
- ● First-aid kit (include calamine lotion, antiseptic wipes, and oral antihistamines for allergic reactions).
- ● Pet-safe disposal plan (verify local regulations—some plants require hazardous waste disposal).
- ● Garden hose with spray nozzle (for rinsing tools and skin post-removal).
- ● Labeling supplies (waterproof markers or flags to tag treated areas for 3-6 months).
- ● Root killer (non-toxic, like corn gluten meal) (10 lbs, to prevent regrowth).
- ● Garden tarp (black plastic) (6x8 ft, to smother remaining foliage).
- ● Handheld leaf blower (for clearing debris from hard-to-reach areas).
- ● Child/pet barrier tape (to cordon off treated areas temporarily).
Step-by-Step instructions for removing dangerous plants safely
Here’s how to eliminate toxic plants without poisoning your soil or local wildlife.
✂️ Step 1: Identify and Contain the Plant
Start by confirming the plant’s identity using a reliable guidebook or app—some lookalikes are harmless. Once identified, mark the area with stakes to avoid missing any roots. I always wear long sleeves and gloves (even if the plant isn’t actively toxic) to prevent skin irritation.
For small patches, dig a 6-inch deep trench around the perimeter to sever roots. Larger infestations may require a 12-inch deep trench. Avoid pulling by hand—this can break roots, leaving fragments to regrow. If the plant has spread underground, you’ll need to dig deeper than you think.
🪴 Step 2: Bag and Dispose of Plant Material
Place all removed plant parts—roots, stems, and leaves—into heavy-duty trash bags. Seal them tightly to prevent seeds from escaping. I double-bag anything with berries or seed pods, as even small fragments can sprout. Never compost toxic plants, as heat won’t neutralize their toxins.
Check for wildlife before disposal—birds or small mammals might still be using the area. If you spot nests or burrows, wait until after nesting season (spring/summer) to remove the plant completely. For stubborn cases, like poison ivy, I soak the cut stems in vinegar for 10 minutes before bagging to deactivate oils.
💧 Step 3: Treat the Soil to Prevent Regrowth
After removal, cover the area with black plastic sheeting for 4-6 weeks to block sunlight and kill remaining roots. Secure edges with soil or rocks. For highly invasive species, like castor bean, I also apply a vinegar and salt solution (1:1 ratio) to the exposed soil—this kills weeds but won’t harm beneficial microbes long-term.
If you’re concerned about soil contamination, test it after 3 months. Most toxins break down naturally, but heavy infestations may require replanting with non-toxic ground covers. Avoid planting edibles in the area for at least one growing season to be safe.
🌱 Step 4: Restore the Area Safely
Once the soil is clear, remove the plastic and loosen the top 2 inches with a rake. Mix in compost to replenish nutrients lost during removal. I plant fast-growing, non-invasive species like clover or creeping thyme to outcompete any lingering roots.
Monitor the area for 2-3 months for new shoots. If you see regrowth, repeat the trench-and-bag method. For persistent cases, consider professional help—some plants, like water hemlock, require specialized treatment. Always wash tools and gloves with soapy water after handling toxic plants to avoid cross-contamination.
Tips & tricks for removing dangerous plants safely
These practical strategies will help you tackle toxic plants without harming your garden ecosystem or risking your safety.
Protect Yourself First: I can't stress this enough—always wear long sleeves, gloves, and safety glasses when handling toxic plants. Some plants, like poison hemlock, can cause severe skin irritation or allergic reactions. I keep a bottle of rubbing alcohol nearby to immediately clean any exposed skin if contact occurs. Even plants that aren't actively toxic can cause irritation through prolonged contact.
The Digging Depth Difference: In Step 1, those 6-inch and 12-inch trench depths matter more than you might think. For plants like castor bean, you'll need to dig deeper than the visible roots—sometimes up to 18 inches—to catch the entire root system. I use a garden spade with a depth marker to ensure I'm reaching the proper depth consistently. If you're unsure about the depth, dig test holes first to locate the root system's full extent.
Vinegar's Power Move: That 10-minute vinegar soak in Step 2 is your secret weapon against regrowth. The acetic acid helps break down the plant's oils and toxins that might otherwise linger in the soil. I use white vinegar (5% acidity) because it's strong enough to work but safe enough for garden use. For extra stubborn plants, I'll extend the soak to 15 minutes—just monitor the area for any wildlife that might be affected by the strong smell.
Plastic Sheeting Strategy: The 4-6 week plastic covering in Step 3 is non-negotiable for preventing regrowth. I've learned the hard way that skipping this step can lead to new shoots appearing within weeks. Secure the edges tightly with bricks or heavy rocks to prevent wind from lifting it. If you're in a hot climate, consider using black plastic specifically designed for solarization—it traps more heat to kill remaining roots faster.
Pro Tips for Deadly Garden Plants
- These practical strategies will help you tackle toxic plants without harming your garden ecosystem or risking your safety.
- Protect Yourself First: I can't stress this enough—always wear long sleeves, gloves, and safety glasses when handling toxic plants.
- The Digging Depth Difference: In Step 1, those 6-inch and 12-inch trench depths matter more than you might think.
Frequently asked questions
Got questions about removing deadly garden plants safely? We’ve got answers!
Whether you’re worried about toxicity, soil health, or wildlife, here’s what you need to know to handle these plants responsibly.
What’s the safest way to dispose of deadly plants like castor beans or foxglove?
Never toss them in compost or yard waste—toxic residues can linger. Instead, double-bag them in sealed plastic and dispose of them in your household trash (not recycling). For large quantities, contact your local waste management for hazardous plant disposal guidelines. Learn more about proper disposal methods.
How long does it take for soil to recover after removing a toxic plant?
Soil recovery depends on the plant and your climate, but most toxic residues break down within 6–12 months if you amend the soil with compost and avoid planting edibles in the same spot. For highly toxic plants like oleander, test soil pH and nutrient levels before replanting. Check our soil restoration guide for step-by-step help.
Will removing deadly plants harm bees or butterflies?
Not if done carefully! Deadly plants like larkspur or monkshood attract pollinators—remove them gradually to avoid disrupting ecosystems. Replace them with non-toxic alternatives like bee balm or coneflowers, which support wildlife just as well. See our list of safe swaps.
Can I still garden in the same spot after removing a toxic plant?
Yes, but with precautions. Wait at least 6 months before planting edibles, and test soil for contaminants if the plant was deeply rooted (e.g., oleander or castor bean). Use organic mulch to lock in nutrients and prevent regrowth. For high-risk areas, consider raised beds with fresh soil.
What’s a quick way to identify if a plant is deadly before touching it?
Use the “3-S Rule”:
- Shape: Look for milky sap (e.g., oleander), lobed leaves (e.g., castor bean), or bell-shaped flowers (e.g., foxglove).
- Smell: Some deadly plants (like deadly nightshade) have a faint rotten or bitter odor.
- Source: Check plant databases (e.g., ASPCA’s toxic plant list) or use a plant ID app like PictureThis.
When in doubt, wear gloves and avoid direct contact!
Wrapping up and next steps
While some garden plants can pose serious risks to pets, children, and wildlife, knowing how to remove them safely ensures your green space stays beautiful and secure. 🌱 By using humane methods—like proper disposal, protective gear, and companion planting—you protect both your garden and the ecosystem.
Ready to take action? Start by auditing your garden today and swap out risky plants for safer alternatives to keep your space thriving without the hazards.
Pro tip: 💡 Share this guide with fellow gardeners—knowledge is the best defense against dangerous flora!