Landscaping
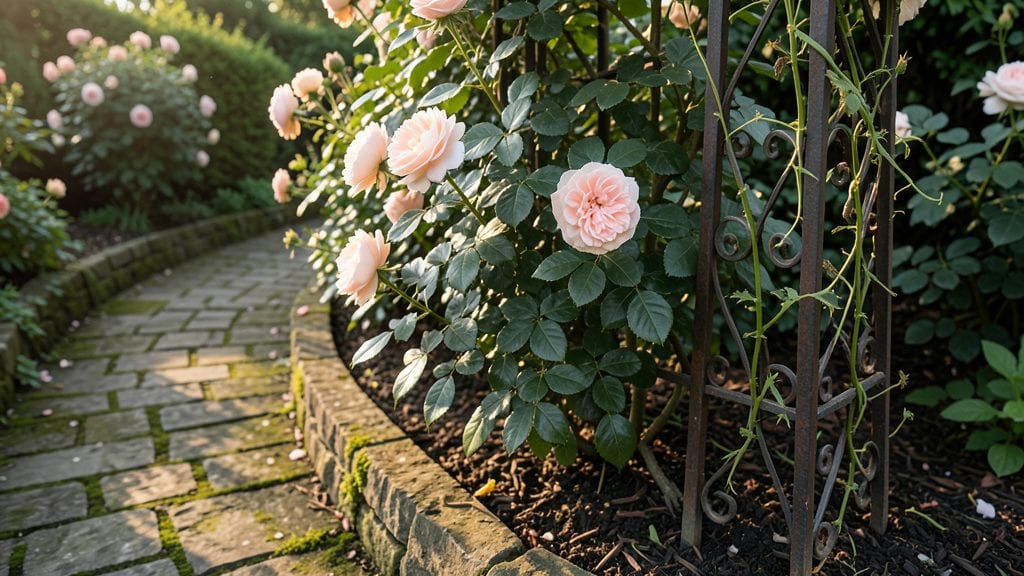
Creating an English garden landscaping design feels like stepping into a storybook—every path, border, and topiary tells a quiet tale of tradition and nature. 🌿 I fell in love with this style after stumbling upon a hidden cottage garden where roses climbed over stone arches and lavender spilled onto winding brick paths.
The magic isn't just in the plants; it's in how they're arranged—layered, romantic, and full of surprises around every turn.
The key is balancing structure with whimsy: neat herbaceous borders packed with perennials, gravel paths that meander like lazy rivers, and topiary that adds just enough formality to keep things elegant.
You don’t need a sprawling estate—even a small yard can borrow these elements with a few well-placed plants and a mix of old bricks or flagstone. Think of it as a living tapestry where every season brings new colors and textures.
By summer, your garden will burst with peonies and delphiniums towering over low-growing thyme and geraniums, while autumn delivers fiery maple leaves and golden grasses. The scent of roses and the sound of bees in the lavender create an atmosphere that feels like a retreat from everyday life.
This isn’t just gardening—it’s crafting a space that feels like home, where every visit feels like coming home to a friend.
Start small with one border or path, then let the charm grow organically. The beauty of English gardens is that they evolve over time—just like the stories they inspire. Here’s how to begin weaving that timeless magic into your own space.
📚 In This Guide
- What you need
- Instructions
- Tips and common mistakes
- Wrapping up and next steps
What you need
- ● Topsoil: 10–15 cubic yards (for leveling and planting beds). Opt for nutrient-rich, well-draining soil.
- ● Mulch: 2–3 cubic yards (cedar or bark chips work beautifully for pathways and borders).
- ● Perennials & Shrubs: 20–30 Peonies (for lush, fragrant blooms)
- ● 15–20 Hydrangeas (for bold color and texture)
- ● 10–15 Roses (climbing or bush varieties for classic English flair)
- ● 10 Boxwoods (for structured hedges or borders)
- ● Ornamental Grasses: 10–15 plants (e.g., Fountain Grass or Miscanthus for movement and height).
- ● Gravel or Sand: 5–10 bags (for pathways and drainage layers).
- ● Garden Stones or Stepping Stones: 20–30 pieces (for whimsical pathways; slate or flagstone adds elegance).
- ● Shovel & Spade: Heavy-duty for digging and planting.
- ● Garden Fork: For aerating soil and breaking up compacted areas.
- ● Wheelbarrow: 1–2 (for hauling soil, mulch, and plants).
- ● Pruners & Shears: Sharp, high-quality tools for shaping plants.
- ● Rake: Bow rake for leveling soil and leaf cleanup.
- ● Level & Measuring Tape: Ensures pathways and beds are perfectly aligned.
- ○ Hose & Sprinkler: For consistent watering (drip irrigation is optional but ideal).
- ● Knee Pads or Stool: Because gardening is easier on your knees! 😉
- ● Arbors or Trellises: For climbing roses or clematis (adds vertical interest!).
- ● Birdbaths or Fountains: Invites wildlife and adds serene ambiance.
- ● Garden Seating: A vintage bench or wrought-iron chair for that quintessential English feel.
- ● String Lights or Solar Lanterns: For magical evening glows.
- ● Compost or Slow-Release Fertilizer: Keeps your garden thriving year-round.
Step-by-Step instructions for creating an English garden
Let’s bring that timeless charm to your space with soft curves, layered plants, and meandering paths.
🌿 Step 1: Plan Your Layout with Soft, Organic Lines
English gardens thrive on movement and layers, so start by sketching your design on paper. I like to draw gentle curves for pathways—nothing too rigid—because straight lines feel too formal for this style. Use a 4-foot wide path as a guide; it’s wide enough for two people to walk comfortably while keeping the garden feel intimate.
Mark where your layered borders will go: tall plants at the back, mid-height in the middle, and low-growing ground covers in front. Think of it like a stage—everything should be visible from the main seating area. A winding path through the center creates a sense of discovery, so place a few focal points (like a small bench or a topiary) along the way.
🪴 Step 2: Prepare the Soil for Rich, Fertile Beds
English gardens love deep, nutrient-rich soil, so break up any compacted areas with a garden fork. Work in 2-3 inches of compost into the top 6 inches of soil—this mimics the lush, fertile beds you’d see in classic English gardens. If your soil is heavy clay, mix in 1 part sand or perlite to improve drainage without losing moisture.
For raised beds, use untreated wood or stone to keep the soil contained and prevent weeds from creeping in. I always add a 1-inch layer of gravel at the bottom for drainage before filling with soil. This step ensures your plants won’t struggle with waterlogged roots or poor nutrition.
☀️ Step 3: Plant in Layers for Depth and Texture
Start with your tallest plants at the back—think roses, hollyhocks, or delphiniums—to create a natural backdrop. These should be spaced 18-24 inches apart to give them room to grow. Next, add mid-height plants like lavender, salvia, or peonies in the middle layer, spacing them 12-18 inches apart.
Finally, fill the front with low-growing perennials or annuals like ajuga, creeping thyme, or pansies. These should spill slightly over the edges of the border to soften the look. Water everything in deeply after planting to help the roots settle. You’ll see the layers come together beautifully once everything fills out in a few weeks.
💧 Step 4: Add Pathways with Natural Materials
English garden paths should feel organic, so avoid rigid pavers. Instead, use stepping stones, gravel, or crushed brick to create a meandering trail. I like to place stepping stones 12-18 inches apart and fill the gaps with fine gravel or sand for a soft, natural look. If you’re using gravel, edge the path with landscape fabric to prevent it from spreading into the flower beds.
For a more rustic feel, try a mix of flagstone and moss between the stones. This keeps the path looking intentional but still wild. Mulch the edges of the path with wood chips or bark to blend it seamlessly into the garden.
✂️ Step 5: Maintain with Regular Pruning and Deadheading
English gardens stay lush with consistent care. Prune roses and shrubs in early spring to encourage new growth, and deadhead spent blooms regularly to keep flowers coming. I like to trim back perennials in late fall to tidy up the space, but leave some seed heads for winter interest.
Water deeply 1-2 times per week, depending on your climate, and always in the morning to reduce fungal diseases. A light layer of mulch around plants helps retain moisture and keeps weeds at bay. With this routine, your garden will stay vibrant and inviting all season long.
Tips & tricks for perfect English garden landscaping
Here's what I've learned from creating these gardens over the years—these tricks will help you avoid common pitfalls and create that dreamy, timeless look.
Layering Secret: In Step 3, when planting your layers, I can't stress enough how important those spacing measurements are. The 18-24 inches for tall plants gives them room to grow without crowding, while the 12-18 inches for mid-height plants creates that perfect visual balance. Think of it like a painting—each layer should complement the one behind it without competing for attention.
Pathway Pro Tip: For Step 4, when creating your meandering path, consider using slightly irregularly shaped stepping stones instead of perfect rectangles. The natural imperfections make the path look more organic and intentional. Also, if you're using gravel, add a 1-inch border of edging material around the path to keep it contained—this is a game-changer for maintaining that English garden charm.
Soil Strategy: In Step 2, don't skip the 1-inch gravel layer at the bottom of raised beds. This might seem like a small detail, but it makes all the difference for drainage, especially in clay-heavy soils. I've seen gardens where this step was skipped, and the plants struggled with waterlogged roots. Trust me, your plants will thank you for this simple addition.
Maintenance Hack: For Step 5, I've found that deadheading isn't just about looks—it actually encourages more blooms! Make this a weekly habit, especially with roses and lavender. And here's a bonus: collect those spent blooms and compost them. They'll return to your garden as nutrient-rich soil for next year's plants.
Pro Tips for English Garden Landscaping
- Here's what I've learned from creating these gardens over the years—these tricks will help you avoid common pitfalls and create that dreamy, timeless look.
- Layering Secret: In Step 3, when planting your layers, I can't stress enough how important those spacing measurements are.
- Pathway Pro Tip: For Step 4, when creating your meandering path, consider using slightly irregularly shaped stepping stones instead of perfect rectangles.
Frequently asked questions
Got questions about creating your dream English garden? Here are some of the most common ones—and their answers!
Whether you're just starting or troubleshooting, we’ve got you covered.
What’s the best time of year to plant an English garden?
The ideal time to plant perennials, shrubs, and trees is early spring (March–April) or early fall (September–October). This gives plants time to establish roots before extreme heat or cold. Bulbs, like tulips and daffodils, should go in fall, while annuals can be planted spring through summer for continuous blooms.
How do I create the signature "layered borders" in an English garden?
Layering is all about height, texture, and color! Start with tall plants (like delphiniums or hollyhocks) at the back, mid-height shrubs (hydrangeas, roses) in the middle, and low-growing perennials (lavender, geraniums) at the front. Add climbers (clematis, roses) for vertical interest. Pro tip: Use odd-numbered groupings (3, 5, or 7 plants) for a natural, whimsical look!
What’s the easiest way to maintain an English garden with minimal upkeep?
Prioritize drought-tolerant plants (lavender, sedum, or Russian sage) and mulch heavily to retain moisture. Choose native species—they thrive with less water and care. Invest in a drip irrigation system to automate watering, and opt for perennials over annuals to reduce replanting. Bonus: Add a gravel path to minimize mud and weeds!
My garden looks crowded—how do I thin out overgrown plants without ruining the look?
Start by removing dead or diseased foliage first. For shrubs, prune in late winter or early spring to shape them. Dig up and divide overgrown perennials (like hostas or daylilies) in fall—share extras with neighbors! If space is tight, replace some plants with smaller varieties or add ornamental grasses for airy texture.
Can I mix modern elements (like sleek hardscaping) with traditional English garden styles?
Many modern English gardens blend rustic charm with contemporary touches. Try a clean-lined stone path paired with wildflower borders, or a minimalist metal trellis supporting climbing roses. The key is balance—keep one element traditional (like a cottage-style arbor) and one modern (e.g., a geometric planter). Think "timeless with a twist!"
Wrapping up and next steps
Creating an English garden landscaping design is all about embracing nature’s charm—layered borders, winding pathways, and a touch of whimsy. Whether you’re adding classic roses, a cozy herb spiral, or a rustic stone path, the key is to let your space breathe with organic beauty.
Start small, experiment with textures, and don’t forget to enjoy the process!
Ready to transform your yard? Sketch a rough layout, gather inspiration from local nurseries, and take the first step—your dream garden awaits! 🌿✨