Tools
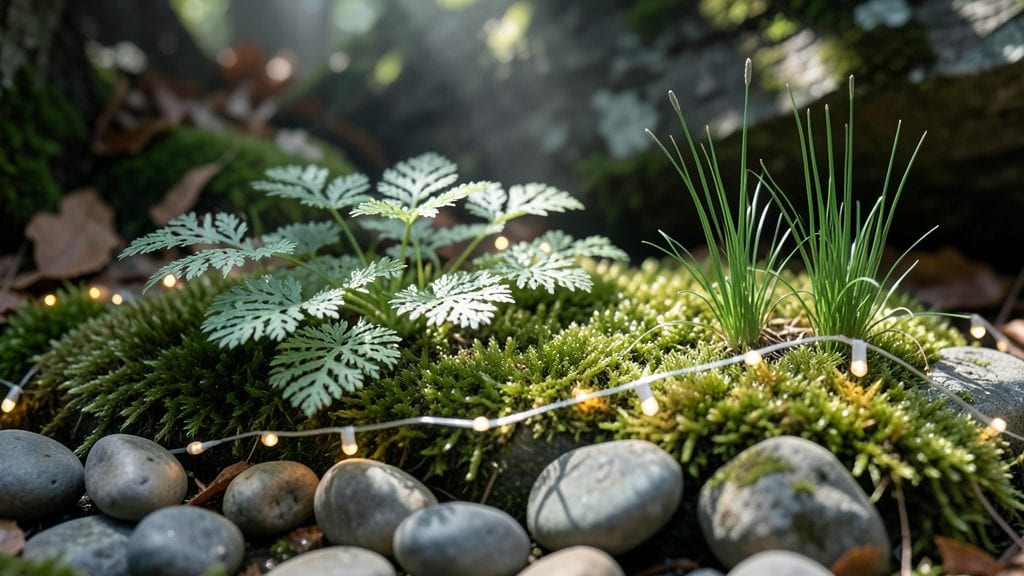
Creating a fairy rock garden transforms your backyard into a secret world where tiny bridges span mossy streams and delicate flowers bloom among gnarled stones. ✨ I stumbled upon this idea after watching my kids pretend their garden was a fairy kingdom—now we’ve built three hidden nooks where even the hummingbirds seem to pause mid-flight to admire the details.
The magic starts with the rocks: smooth river stones for paths, flat slabs as stepping stones, and weathered boulders as "fairy houses." Add moss for soft green carpets, tiny succulents as "fairy lanterns," and wildflowers that sway like enchanted dancers.
The decor—miniature mushrooms, pebble paths, or even a tiny wind chime—turns ordinary spaces into storybook scenes that spark imagination.
By the time you’re done, you’ll have a living fairy tale that grows more whimsical with each season. The best part? It’s as practical as it is magical—low-maintenance plants thrive in the rocky nooks, and the layout encourages exploration.
Kids (and adults) will want to visit daily to "check on the fairies" or leave tiny offerings.
Works in shady corners, sunny borders, or even container gardens—just pick a spot where the light and your creativity can shine. Here’s how to bring the magic to life without breaking the bank or your back.
📚 In This Guide
- What you need
- Instructions
- Tips and common mistakes
- Wrapping up and next steps
What you need
- ● Rocks: 10–50 medium-to-large-sized rocks (smooth or flat for seating, jagged for texture). Aim for a mix of colors and sizes!
- ● Moss: 1–2 bags of preserved moss (or fresh if you’re harvesting from nature). Pro tip: 🌿 Soak dried moss in water for 10–15 minutes before use!
- ● Soil: 2–3 bags of potting mix or topsoil (lightweight and well-draining works best).
- ● Peat moss or mulch: 1 small bag (for pathways or extra texture).
- ● Small plants: 3–5 tiny succulents, ferns, or wildflowers (fairy-friendly greenery!).
- ● Decorative elements: Miniature furniture (stools, benches, or bridges)
- ● Fairy lights or solar-powered LED lights (battery-operated)
- ● Acorns, pinecones, or twigs (for natural accents)
- ● Glass pebbles or sand (for pathways or water features)
- ● Hand trowel or small garden spade
- ● Gloves (to protect your hands from soil and sharp rocks)
- ● Spray bottle (for misting moss or plants)
- ● Scissors or pruners (for trimming plants)
- ○ Optional: Rake (for smoothing soil), twine or wire (for creating tiny fences), and a small wheelbarrow (for hauling materials).
- ● A designated outdoor space (partial shade is ideal for moss and delicate plants).
- ● Access to water (a hose or watering can for initial setup and maintenance).
- ● Patience! Fairy gardens evolve over time—let nature (and your creativity) guide the process. ✨
Step-by-Step instructions for building your fairy rock garden
Here's how to create a charming, magical space that feels like a secret fairy retreat.
🪴 Step 1: Choose and Prepare Your Base Location
Pick a shady or partially shaded spot—fairy gardens thrive where direct sun won’t dry out delicate plants or melt tiny details. I like to use a 12-18 inch deep container or a natural ground depression to contain the space. If working in-ground, clear away grass and weeds first, then add a 2-inch layer of small gravel for drainage.
Press down lightly to create a firm base. This prevents erosion and keeps your fairy village stable during rain. For containers, place a plastic liner at the bottom before adding gravel to catch any excess water. A 4-foot square area is perfect for a whimsical display that feels expansive but manageable.
💧 Step 2: Layer Soil and Create Textured Beds
Fill your prepared base with 3-4 inches of well-draining potting mix. Fairy gardens need soil that drains quickly to prevent soggy moss or rotten roots. Mix in a handful of sand or perlite to lighten the soil—this mimics the natural, airy texture fairies might prefer.
Use a small trowel or your fingers to create gentle mounds and dips. Think of rolling hills, tiny valleys, or even a miniature cliffside. Press down lightly on the edges to define pathways or "roads" for your fairy visitors. A 1-inch layer of fine pebbles along these paths adds a magical touch and prevents soil erosion.
☀️ Step 3: Add Rocks and Structures for Whimsy
Place flat, irregularly shaped stones to create a natural, fairy-tale landscape. I like to arrange them in clusters—some stacked like tiny towers, others laid flat as stepping stones. For containers, use 3-5 medium-sized rocks (about 3-6 inches wide) to anchor the scene.
Add miniature structures like a tiny bridge (use a small piece of bark or a bent wire), a mushroom house (a hollowed-out acorn cap or terracotta pot), or a fairy door (a small wooden plaque nailed to a rock). These elements draw the eye and spark imagination. Place them near the edges or along pathways to create a sense of depth.
🌱 Step 4: Plant Tiny, Low-Maintenance Flora
Choose slow-growing, shade-loving plants like miniature ferns, moss, or tiny succulents. These stay small and add texture without overpowering the scene. Plant them in clusters of 3-5 to mimic natural groupings. Use a small spoon or chopsticks to dig tiny holes—about ½ inch deep—and gently tuck in the plants.
Press the soil lightly around each plant to secure it. Avoid overwatering at this stage; mist the soil lightly instead. You’ll see the fairy garden come to life as the plants fill in over 2-4 weeks. For extra magic, sprinkle fine silver or gold sand around the base of plants to mimic fairy dust.
✂️ Step 5: Add Finishing Touches for Enchantment
Scatter tiny pinecones, acorns, or pebbles to create a forest floor effect. Use a small paintbrush to dust light-colored sand along pathways or around structures—this mimics moonlight and adds contrast. For containers, add a 1-inch layer of bark chips to cover the soil edges and prevent erosion.
Finally, place miniature furniture like tiny stools (made from bark slices) or a fairy-sized table (a flat rock with a tiny dish on top). These details make the garden feel lived-in and inviting. Step back and admire your work—your fairy garden is now ready for tiny visitors!
Tips & tricks for perfect fairy rock gardens
Creating a magical fairy garden takes a little extra attention to detail—here are my favorite tricks to make yours truly enchanting.
Location is Everything: The shady or partially shaded spot you choose in Step 1 makes all the difference. Fairy gardens in full sun will dry out quickly, causing delicate plants to wither. If your yard has limited shade, consider using a container—it gives you control over light exposure. I've found that placing containers near north-facing walls or under large trees creates the perfect microclimate.
Texture Matters More Than You Think: In Step 2, when creating those gentle mounds and dips, think about how fairies would navigate their world. Use your fingers to create tiny crevices along pathways where fairies might hide their treasures. For containers, I like to use a small spoon to carve out shallow "pools" near the edges—just deep enough to hold a few pebbles and mimic a natural water feature.
Rock Placement Secrets: The 3-5 medium-sized rocks you add in Step 3 should feel organic, not arranged. Place the largest rocks first to anchor your scene, then fill in with smaller stones. I often create a "fairy path" by arranging flat rocks in a winding pattern, leaving just enough space between them for a tiny fairy to tiptoe through. For extra magic, turn one rock to face the center—fairies love a good view!
Planting with Purpose: When planting those clusters of 3-5 slow-growing plants in Step 4, group them by height. Place taller plants toward the back (if your garden has depth) and shorter ones in front. This creates that magical layered look. I also like to leave small gaps between plants—fairies need hiding spots too! And remember, those 2-4 weeks of growth will happen faster if you mist the soil daily rather than watering deeply.
Pro Tips for Fairy Rock Garden
- Creating a magical fairy garden takes a little extra attention to detail—here are my favorite tricks to make yours truly enchanting.
- Location is Everything: The shady or partially shaded spot you choose in Step 1 makes all the difference.
- Texture Matters More Than You Think: In Step 2, when creating those gentle mounds and dips, think about how fairies would navigate their world.
Frequently asked questions
Got questions about creating your own fairy rock garden? You’re not alone—this enchanting project sparks curiosity! Below, we’ve rounded up the most common queries to help you bring your magical vision to life with confidence.
What’s the best time of year to build a fairy rock garden?
A fairy rock garden thrives year-round, but spring or early fall are ideal times to start. Mild weather makes it easier to arrange rocks and plants, while avoiding extreme heat or frost. If you’re in a warmer climate, winter can work too—just water lightly to prevent drying. Pro tip: Start small in spring to let plants establish before winter!
Do I need special tools for this project?
Not necessarily! Basic tools like a trowel, small shovel, and pruners are helpful, but many fairy gardeners use just their hands for delicate work. A spray bottle for watering tiny plants and a soft paintbrush for details (like moss or tiny pebbles) can elevate your project. For larger rocks, gloves protect your hands— comfort matters!
How do I keep my fairy rock garden looking magical long-term?
Regular light maintenance is key! Trim overgrown plants, remove weeds, and top off mulch or moss as needed. Place a small watering can or drip irrigation system to keep moisture consistent without overwatering. A quick weekly check ensures your garden stays lush and inviting for fairy visitors!
Can I make a fairy rock garden on a budget?
Hunt for free or low-cost materials like smooth river rocks, pinecones, or fallen branches from nature walks. Upcycle containers (old teacups, terracotta pots) as homes for fairies. Thrift stores often have tiny furniture or decor for a whimsical touch. Creativity beats cost—imagine, then improvise!
What do I do if pests or critters invade my garden?
Fairy gardens are tiny ecosystems, so pests like slugs or ants might appear. Handpick larger critters or use organic deterrents like diatomaceous earth (food-grade) around the base. Avoid chemicals—they’ll harm your fairy friends! For ants, a vinegar spray (1:1 ratio) keeps them away. A balanced garden stays resilient!
Wrapping up and next steps
A fairy rock garden isn’t just a charming addition to your backyard—it’s a magical escape that sparks creativity and joy for all ages.
Whether you’re crafting tiny pathways for fairies or designing a serene retreat for yourself, the key is to embrace the whimsy and let your imagination lead the way.
Ready to bring your vision to life? Gather your tools, pick your stones, and start building! 🌿✨ Share your progress or final masterpiece—we’d love to see your enchanting creations!