Advice
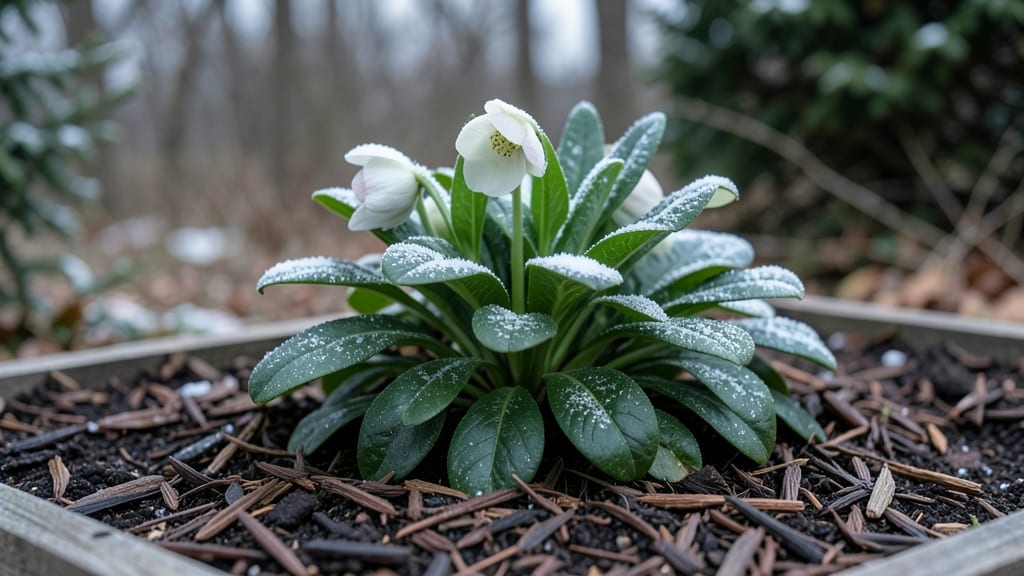
February gardening tasks set the stage for a showstopping spring—when my first batch of seed-started tomatoes finally outgrew their trays last year, I knew we’d nailed the prep. 🌱 The key is balancing indoor starts with outdoor prep while dodging late frosts that can still sneak in.
Most gardeners focus only on seeds, but February’s real magic happens in the soil and tools too.
Start by cleaning and sharpening pruners, then sketch a planting map for spring veggies and flowers. In colder zones, focus on cold-hardy crops like peas and spinach, while warmer areas can direct-sow carrots and lettuce.
The goal is to have beds ready to plant by March—no last-minute scrambling when the weather cooperates. I’ve ruined more early plantings by skipping this step than by any other mistake.
You’ll end up with vibrant seedlings, weed-free beds, and plants that thrive because they got the perfect head start. The payoff? Blooms that arrive weeks earlier than neighbors’ and vegetables that outperform anything from a nursery.
Plus, February’s prep turns March into a month of watching (not waiting) for growth. Let’s get those gloves on and make it happen.
Works for backyard plots, raised beds, or even balcony containers—just adjust timing based on your last frost date. Whether you’re in the US, UK, or Australia, the principles stay the same: protect what’s already growing, prepare for what’s coming, and enjoy the process.
Here’s how to make February your most productive month yet.
📚 In This Guide
- What you need
- Instructions
- Tips and common mistakes
- Wrapping up and next steps
What you need
- ● Garden gloves (1–2 pairs): Opt for waterproof, breathable ones to protect your hands from soil and sharp edges.
- ● Hand trowel (1): A stainless-steel or ergonomic model (4–6" blade) for precision planting.
- ● Pruners (1 pair): Bypass pruners (with sharp, clean blades) for trimming dead growth.
- ● Garden fork (1): A 4–6 tine fork (18–24" handle) for aerating soil and loosening compacted areas.
- ● Wheelbarrow or bucket (1): A 5–10 gallon container for hauling soil, compost, or tools.
- ○ Soil test kit (optional but helpful): Check pH and nutrient levels before amending soil.
- ● Compost or aged manure (5–10 gallons): Boosts soil fertility—look for well-decomposed options.
- ● Organic mulch (straw, shredded leaves, or wood chips): 2–3 inches to retain moisture and suppress weeds.
- ● Seed-starting mix (1–2 bags): A lightweight, sterile blend for indoor seedling trays.
- ○ Cold frames or row covers (optional): Protect tender seedlings from late frosts (frost cloth or mini greenhouses work great).
- ● Plant markers (biodegradable or wooden): Label seeds/seedlings to track varieties.
- ● Kneeling pad: Save your knees during long prep sessions.
- ● Watering can or hose with nozzle: A gentle spray setting prevents soil erosion.
- ● Notebook & pen: Jot down planting dates, weather notes, or garden goals!
Step-by-Step February gardening prep for spring blooms
February is all about laying the groundwork—here’s how to get your garden ready without rushing spring.
🌱 Step 1: Assess and Prepare Garden Beds
Start by walking your garden beds to spot last year’s debris or weeds. Use a sturdy garden fork to loosen compacted soil, breaking up clumps to a depth of 6-8 inches. This improves drainage and root penetration for spring plantings. I like to work in dry conditions—wet soil sticks to tools and makes everything messier.
If your soil feels heavy or clay-like, mix in 2-3 inches of compost (the amount depends on bed size). Spread it evenly and lightly rake it into the top layer. Avoid piling compost in one spot—this creates nutrient hotspots that can burn tender roots later. Your goal is to enrich the soil without overwhelming it.
🪴 Step 2: Plan and Start Cold-Hardy Seedlings Indoors
February is prime time for starting cool-season crops like broccoli, cabbage, and lettuce. Use the seed-starting mix in small pots or seed trays, filling them halfway and pressing down lightly. Plant seeds at a depth of about ¼ inch, then cover with a fine layer of soil.
Place trays on a seedling heat mat set to 65-75°F to speed up germination. Keep the soil consistently moist—use a spray bottle to avoid displacing seeds. Once sprouts appear (usually within 7-14 days), move them to a sunny windowsill or under grow lights for 12-14 hours daily. Watch for leggy growth (thin, stretched stems)—this means they need more light.
☀️ Step 3: Prune and Protect Perennials
Early February is safe for pruning dormant perennials like shrubs and ornamental grasses. Use sharp pruning shears to trim back dead foliage, cutting just above the first set of healthy buds. This encourages fresh growth and improves airflow, reducing disease risk. I always clean my shears with rubbing alcohol between cuts to prevent spreading pathogens.
Wrap young or tender perennials with burlap or frost cloth if your region still experiences hard freezes. Secure the fabric loosely—tight wraps can trap moisture and damage plants. Check weekly to ensure the protection hasn’t shifted or torn. Mulch around the base with 2-3 inches of shredded leaves or straw to insulate roots from temperature swings.
💧 Step 4: Test Soil and Adjust pH if Needed
February’s calm weather is perfect for soil testing. Collect samples from multiple spots in your garden (about 6-8 inches deep) and mix them in a clean bucket. Send the sample to a local extension office or use a home test kit. Aim for a pH of 6.0-7.0 for most vegetables and flowers—this range supports nutrient uptake.
If your soil is too acidic (low pH), sprinkle dolomitic lime evenly over the bed and lightly rake it in. For alkaline soil (high pH), mix in elemental sulfur at the recommended rate. Avoid over-amending—small adjustments now prevent bigger problems later. Water the area lightly after applying amendments to help them integrate into the soil.
⏰ Step 5: Review and Order Supplies for Spring
Take inventory of last season’s tools, containers, and fertilizers. Replace any worn-out gloves, dull pruners, or cracked pots—sharp tools and sturdy containers make gardening easier and more effective. Check seed packets from last year; if they’re older than 1-2 years, order fresh ones for higher germination rates.
Plan your spring layout by sketching a rough map of where each plant will go. Group plants with similar water and sunlight needs together to simplify care. Order mulch, compost, and any specialty soils now—supplies sell out fast as spring approaches. I always add a few extra bags of mulch to my cart; you’ll thank yourself when summer heat arrives and weeds try to take over.
Tips & tricks for perfect February gardening prep
February's early prep sets the stage for a thriving spring garden—here's how to avoid common pitfalls and maximize your efforts.
Soil Prep Secret: In Step 1, when breaking up that 6-8 inch soil depth, focus on the top 3 inches first. This is where most plant roots will establish, and it's easier to work with smaller sections. I've found that using a garden fork in a "walking" motion—pushing it forward slightly with each lift—helps loosen soil more efficiently without compacting it again. For clay-heavy soil, add a handful of coarse sand to the 2-3 inches of compost to improve drainage while still enriching the soil.
Seedling Success: For Step 2's 65-75°F heat mat, I recommend setting it to the lower end (around 68°F) for most cool-season crops. This temperature prevents over-heating which can cause seeds to sprout too quickly and become leggy. Once your seedlings get their 12-14 hours of light, rotate the trays daily so all sides get equal exposure—this prevents them from leaning toward the light source. I've seen seedlings grow 30% straighter when rotated consistently.
Pruning Precision: When pruning perennials in Step 3, cut just above the first set of healthy buds at a 45-degree angle. This creates more surface area for water absorption and prevents moisture from pooling on the cut. For shrubs with multiple stems, step back frequently to visualize the shape—you'll notice how much easier it is to create balance when you can see the whole plant. And remember, those 2-3 inches of mulch should be spread in a donut shape around the base, keeping it 2-3 inches away from the plant stems to prevent rot.
Soil Testing Strategy: In Step 4, when collecting your 6-8 inch deep soil samples, take them from multiple spots—especially areas where you noticed last year's plants thrived or struggled. Mix these samples thoroughly before testing, as soil composition can vary dramatically even within a single bed. For pH adjustments, apply dolomitic lime or elemental sulfur in smaller amounts than recommended, then retest in 4-6 weeks. I've learned the hard way that over-amending can create nutrient imbalances that take years to correct.
Pro Tips for February Gardening Tasks
- February's early prep sets the stage for a thriving spring garden—here's how to avoid common pitfalls and maximize your efforts.
- Soil Prep Secret: In Step 1, when breaking up that 6-8 inch soil depth, focus on the top 3 inches first.
- Seedling Success: For Step 2's 65-75°F heat mat, I recommend setting it to the lower end (around 68°F) for most cool-season crops.
Frequently asked questions
Got questions about tackling February gardening tasks? You’re not alone—early spring prep can feel tricky! Here are answers to the most common queries to help you get started with confidence.
What should I plant in February, even if it’s still cold?
Focus on cool-season crops like lettuce, spinach, peas, and broccoli. These thrive in cooler temps (30–50°F) and can handle light frosts. For warmer zones (Zone 8+), try onions, carrots, or radishes. Always check your last frost date—plant 4–6 weeks before it for best results!
Is it too early to start seeds indoors?
Absolutely not! February is perfect for early starts like tomatoes, peppers, and herbs. Use grow lights (12–16 hours/day) to prevent leggy seedlings. Wait until 6–8 weeks before your last frost to transplant outdoors. Pro tip: Label trays and keep soil moist but not soggy!
Can I reuse last year’s compost or soil?
Yes, but test it first! Old compost may still be breaking down—mix in fresh amendments like worm castings or aged manure. For soil, conduct a pH test (ideal: 6.0–7.0 for veggies). If it’s compacted, add perlite or sand to improve drainage. Don’t reuse soil from diseased plants—sterilize with baking soda or solarization.
What tools do I really need for February gardening?
Start with basics: a hand trowel, pruners, gloves, and a wheelbarrow. For seed starting, grab seed trays, a spray bottle, and a heat mat (optional). Upgrade later with a soil thermometer or cold frame. Skip expensive gadgets—DIY solutions (like repurposed containers) work too!
How do I protect my garden from pests in early spring?
Prevention is key! Use row covers for tender plants and set out beneficial insects (like ladybugs) early. Remove debris where pests hide, and apply neem oil as a natural deterrent. Avoid chemical sprays—wait until pests appear to minimize harm to pollinators.
What’s the best way to organize my February gardening schedule?
Break tasks into weekly themes:
- Week 1–2: Plan layouts, clean beds, and start seeds.
- Week 3–4: Harden off seedlings and direct-sow cool crops.
Wrapping up and next steps
February may still feel like winter’s last holdout, but your garden is already waking up—and so are you! 🌱 By tackling these early tasks—like prepping soil, planning your layout, and starting seeds indoors—you’re giving your spring blooms a head start.
Small efforts now mean big rewards later, whether it’s vibrant flowers, crisp veggies, or a thriving herb garden.
Ready to turn those dreamy garden sketches into reality? Start with one task this week—maybe it’s ordering seeds, testing your soil, or sketching a simple layout. Then, watch your green thumb grow as the days warm up! 🌿