Landscaping
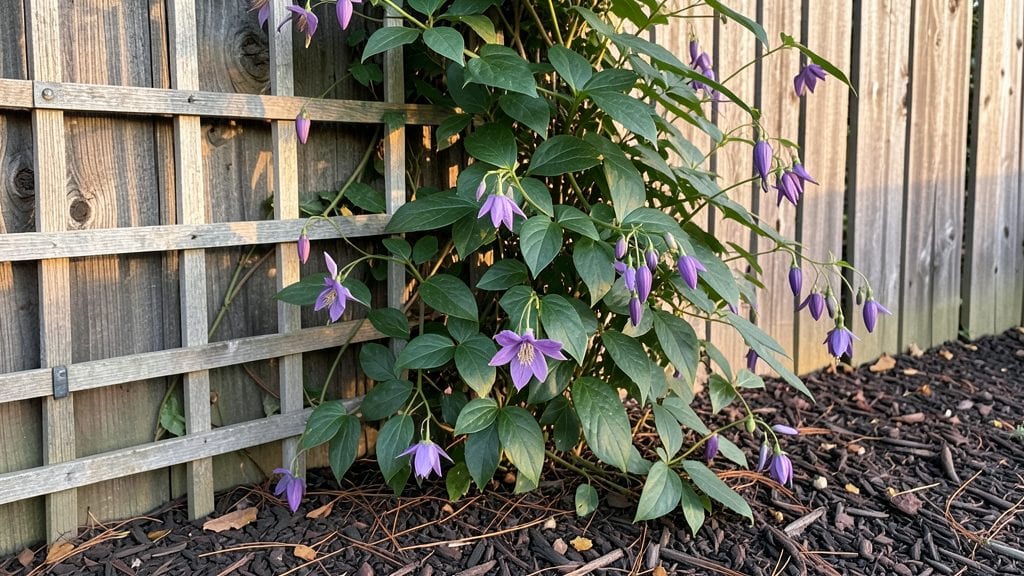
My garden against the fence transformed from an awkward corner into a lush, private retreat—all by stacking plants vertically and choosing the right greenery. The key isn't just what you plant, but how you arrange it so every inch works for both beauty and function.
I'll show you how to turn that fence into a living screen that hides neighbors while adding layers of texture and seasonal interest.
Start with the fence itself as your foundation—whether it's chain link, wood, or metal, you'll need a sturdy mounting system for taller plants.
Add a trellis or lattice for climbing vines like clematis or morning glories, then layer in mid-height shrubs like hydrangeas or abelia, and top it off with ornamental grasses or boxwood for structure. The best part?
You can mix evergreens for year-round privacy with deciduous plants that bloom in spring and summer.
By the end of this, you'll have a garden that feels twice as big and completely secluded—no more peeking eyes, just fragrant foliage and blooms that change with each season. The right plants will soften the fence's harsh lines while creating a cozy, enclosed space perfect for relaxing or entertaining.
Let's get started with the design that works for your space and sunlight.
This approach works for any fence height or yard size, from urban balconies to suburban backyards. The same principles apply whether you're dealing with full sun or shade—just adjust the plant choices.
You'll end up with a garden that's not just functional but also stunning, all while making the most of that often-wasted corner.
📚 In This Guide
- What you need
- Instructions
- Tips and common mistakes
- Wrapping up and next steps
What you need
- ● Plants: Tall, dense shrubs (e.g., Bamboo, Arborvitae, or Hydrangeas) – 3-5 per 4 ft of fence
- ● Medium-height perennials (e.g., Boxwood, Lavender, or Salvia) – 2-3 per linear foot
- ● Spiller plants (e.g., Creeping Jenny, Ferns, or Liriope) – 1-2 per foot
- ● Soil & Amendments: Topsoil or garden soil – 1-2 cubic yards per 10 ft of fence
- ● Compost or organic matter – 1-2 bags per plant (boosts drainage & fertility)
- ● Hardware & Supports: Garden stakes or trellises – 1 per tall plant (for climbing vines like Clematis or Ivy)
- ○ Landscape fabric – 1 roll (5 ft wide) (optional but helps suppress weeds)
- ● Mulch (cypress, pine, or shredded bark) – 2-3 bags per 10 ft
- ● Garden trowel or spade – for digging holes (6-12" deep)
- ● Pruners or shears – for trimming and shaping
- ● Wheelbarrow – for hauling soil and plants
- ● Measuring tape & stakes – to mark plant spacing
- ● Gloves & knee pads – because gardening is hard work!
- ● Solar-powered fence lights – for moody evening vibes
- ● Decorative rocks or pebbles – to add texture and prevent erosion
- ● Vertical planters or hanging baskets – for extra greenery at different heights
- ● Drip irrigation kit – to keep your garden thirsty but not drowning
Instructions for creating a layered fence garden
Here’s the straightforward approach I use to build a lush, private garden along a fence—no complicated layouts, just smart layering.
Mark and Prepare the Fence Line
Start by measuring the fence length and marking the planting area with stakes and string. This keeps your design straight and prevents uneven growth. I like to leave 12-18 inches of space between the fence and the first row of plants—this allows for airflow and makes maintenance easier.
Clear away weeds, rocks, or debris from the marked area. Use a garden fork to loosen the soil to a depth of 6-8 inches. This helps roots spread without resistance. If your soil is heavy clay, mix in a 2-inch layer of compost to improve drainage and fertility.
Plant Tall Backdrop Plants
Begin with the tallest plants closest to the fence to create an instant privacy screen. I recommend shrubs like arborvitae, boxwood, or bamboo for year-round coverage. Space them 3-5 feet apart, depending on their mature width. Dig holes twice as wide as the root ball but only as deep as the container.
Place each plant in the hole, backfill with soil, and water deeply to settle the roots. Mulch around the base with 2-3 inches of shredded bark to retain moisture and suppress weeds. Avoid piling mulch against the stems—keep it 3 inches away to prevent rot.
Add Mid-Height Fillers
Next, fill the middle layer with plants that reach 3-5 feet tall, such as hydrangeas, butterfly bush, or ornamental grasses. These add texture and color while filling gaps between taller shrubs. Plant them 18-24 inches apart, staggering them slightly to create a natural look.
Dig holes just deep enough to cover the roots but not bury the crown (the area where stems meet roots). Water each plant thoroughly after planting to encourage root establishment. If using perennials, apply a balanced fertilizer to give them a strong start.
Layer Ground Covers and Annuals
Finish with low-growing plants like creeping thyme, ajuga, or ivy to cover the soil and prevent weeds. These also add color and fragrance. Plant them 6-12 inches apart, depending on their spread. For instant impact, tuck in annuals like impatiens or lobelia between the ground covers.
Water the entire bed deeply to help all plants settle in. A slow drip irrigation system or soaker hose makes maintenance easier, especially in hot weather. Keep the soil consistently moist but not soggy for the first 2-3 weeks.
Maintain and Adjust Over Time
After the first growing season, assess which plants thrive and which struggle. Prune leggy growth or overcrowded stems in early spring to encourage bushier habits. Add new plants as needed to fill gaps, especially if any shrubs outgrow their space.
Mulch annually in early spring to replenish nutrients and suppress weeds. Watch for signs of pests or disease—early intervention keeps your garden healthy. With the right mix, this layered design will provide privacy and beauty for years.
Tips & tricks for perfect layered fence garden design
Creating a beautiful, functional garden against your fence doesn't have to be complicated—these practical tips will help you avoid common mistakes and achieve that lush, private look with ease.
Spacing is Everything: In Step 1, when marking your planting area, use the 12-18 inch spacing guideline as your baseline, but adjust based on plant maturity. Check plant tags for mature width measurements—this prevents overcrowding as your garden grows. I've seen too many gardens where plants struggle because they were planted too close together. Trust me, a little extra space now saves pruning headaches later.
Soil Prep Makes All the Difference: The 6-8 inch soil loosening in Step 1 is crucial, especially if you have heavy clay soil. If you're unsure about your soil type, do a simple jar test: fill a jar with soil and water, then shake and observe the layers that settle. Sandy soil drains too fast, while clay holds too much moisture—this helps you determine if you need to add compost or sand. For clay soil specifically, mix in that 2-inch layer of compost thoroughly to break up compaction.
Mulching Matters More Than You Think: When you apply the 2-3 inches of shredded bark mulch in Step 2, don't just pile it up—create a donut shape around each plant, keeping it 3 inches away from stems as instructed. This prevents moisture from sitting against the bark where it can cause rot. I've learned this the hard way after losing several plants to stem rot from improper mulching. Also, refresh that mulch layer annually to maintain its weed-suppressing benefits.
Layering Secrets for Visual Impact: The key to a stunning layered garden is creating visual interest through height variation. In Step 3, when planting your 3-5 foot mid-height fillers, stagger them slightly behind the taller backdrop plants. This creates depth and makes your garden look more natural and intentional. For the 6-12 inch ground covers in Step 4, consider using plants with different textures and colors—this adds another dimension to your design that flat layers can't achieve.
Pro Tips for Garden Against Fence
- Creating a beautiful, functional garden against your fence doesn't have to be complicated—these practical tips will help you avoid common mistakes and achieve that lush, private look with ease.
- Spacing is Everything: In Step 1, when marking your planting area, use the 12-18 inch spacing guideline as your baseline, but adjust based on plant maturity.
- Soil Prep Makes All the Difference: The 6-8 inch soil loosening in Step 1 is crucial, especially if you have heavy clay soil.
Frequently asked questions
Got questions about creating a lush, private garden against a fence?
You’re not alone! Here are answers to the most common concerns—from planning to maintenance—so you can design with confidence.
What’s the best time of year to plant a garden against a fence?
For fastest results, plant in early spring (after the last frost) or early fall (6–8 weeks before your first frost). This gives roots time to establish before extreme weather. Evergreens and shrubs can handle cooler temps, while annuals thrive in milder spring soil.
Do I need special materials for a fence-side garden?
Not necessarily! Start with well-draining soil (amend with compost if needed), mulch (to retain moisture), and support structures (like trellises or stakes) for climbing plants. Avoid heavy materials that could damage the fence—opt for lightweight fabric or lattice if privacy is the goal.
How do I keep plants from overcrowding or blocking sunlight?
Plan for layered heights: Tall plants (like arborvitae) at the back, medium shrubs (e.g., hydrangeas) in the middle, and low ground covers (like creeping thyme) up front. Space plants 1–3 feet apart based on their mature size, and prune regularly to encourage airflow and light penetration.
Will pests or weeds be a bigger problem in a tight space?
Yes, but you can minimize issues! Use disease-resistant plants, organic mulch (like cedar chips) to deter weeds, and neem oil for pests. Regularly inspect leaves for signs of trouble, and keep the area clean and well-aerated to reduce hiding spots for bugs.
What are some low-maintenance alternatives to a traditional hedge?
Consider evergreen shrubs (e.g., boxwood or holly), climbing vines (like clematis or jasmine on a trellis), or ornamental grasses (such as pampas grass) for texture. For instant privacy, try bamboo screens (non-invasive varieties) or privacy fabric stretched over a frame.
How do I protect my fence-side plants in winter?
Mulch heavily (3–4 inches) around the base, wrap tender plants in burlap, and water before freezing to prevent root damage. Evergreens may need lightweight frost cloth to avoid snow breakage. Prune dead branches in late winter (before new growth starts) to keep plants healthy.
Wrapping up and next steps
A garden against fence isn’t just a privacy solution—it’s a living, evolving masterpiece that transforms your outdoor space into a serene retreat. By layering plants, choosing the right materials, and planning for year-round beauty, you’ve got everything you need to create a lush, functional, and stylish barrier. 🌿
Now that you’re armed with tips and tricks, it’s time to roll up your sleeves and get growing! Start small—pick one section of your fence, gather your supplies, and let your creativity bloom.
Before you know it, you’ll be enjoying the fruits (and flowers!) of your labor, basking in the privacy and beauty you’ve cultivated.