Companion Plants
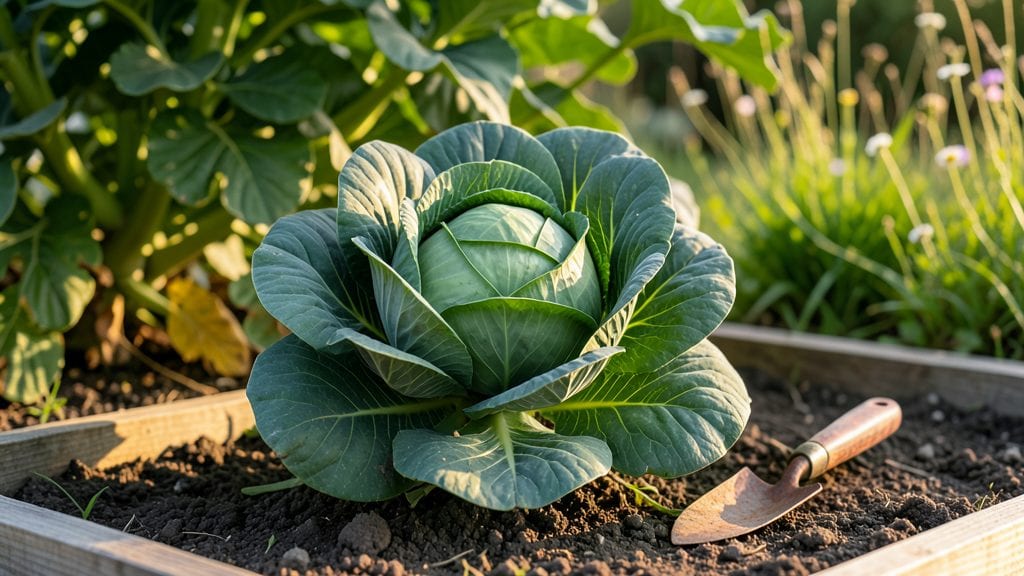
Even the most stubborn gardeners can coax head-sized harvests from garden cabbage plants packed into tight spaces—if they master timing, soil prep, and the right varieties. 🌱 The key isn’t just about squeezing them together—it’s about. outgrow their containers.
My first attempt with store-bought seedlings ended in bitter disappointment when they bolted before forming heads, but now I grow compact varieties like 'Golden Acre' and 'Miniature Marvel' that thrive in just 12" of space.
You'll need well-draining soil mixed with compost, consistent moisture (about 1 inch per week), and 4-6 hours of sunlight daily—no fancy equipment required. Most beginners overwater, which causes splitting heads, so I use a moisture meter to check soil before watering.
The real game-changer? Starting seeds indoors 6-8 weeks before last frost gives you a head start on the season, and you can transplant them into containers or small garden plots without stress.
By midsummer, you'll be harvesting firm, crisp heads perfect for salads or fermenting. The secret to avoiding common problems like cabbage worms lies in weekly inspections and row covers—no harsh chemicals needed.
Even in small spaces, you'll get 3-5 pounds per plant, enough to share with neighbors or freeze for winter. The best part? These same techniques work for kale and broccoli too, so you're not limited to just one crop.
Works for urban balconies, raised beds, or even large pots—just adjust spacing to 18-24 inches apart for full heads. Once you master this, you'll never buy cabbage from the store again. Let's get those seeds started!
📚 In This Guide
- What you need
- Instructions
- Tips and common mistakes
- Wrapping up and next steps
What you need
- ● Cabbage seeds or seedlings: Choose compact varieties like ‘Miniature Drumhead’ or ‘Golden Acre’. Buy 3–6 plants (or 10–20 seeds if starting from scratch).
- ● Growing containers: For seedlings: 4–6 inch pots (1–2 per seedling).
- ● For mature plants: 12–18 inch deep containers (minimum 12" diameter per plant).
- ● High-quality potting mix: 10–20 lbs (sterilized, well-draining, and rich in organic matter). Avoid garden soil—it’s too dense!
- ● Compost or worm castings: 1–2 cups per container to boost nutrients.
- ● Slow-release fertilizer: Balanced 10-10-10 (1 tbsp per plant at planting time).
- ● Hand trowel (for transplanting seedlings).
- ● Spray bottle (for gentle watering of seedlings).
- ● Watering can (with a fine rose nozzle).
- ● Garden gloves (to protect your hands from prickly leaves).
- ● Pruning shears (for harvesting outer leaves).
- ○ pH testing kit (optional but helpful—cabbage thrives at pH 6.0–7.0).
- ● Sunlight: 6+ hours of direct sun daily (south-facing windows or full sun outdoors).
- ● Temperature: Start seeds indoors at 60–70°F; transplant outdoors when soil is 50°F+.
- ● Space: 12–18 inches between plants (or 9–12 inches in containers).
- ● Watering routine: Keep soil consistently moist (not soggy!).
Step-by-Step instructions for growing cabbage in compact spaces
Here’s how I grow sturdy, head-forming cabbage plants in tight spaces—no sprawling rows needed.
🌱 Step 1: Start Seeds Indoors at the Right Time
Cabbage thrives when transplanted as sturdy seedlings, so I begin indoors 6-8 weeks before the last frost date. Fill 4-inch seedling pots with the sterile seed-starting mix (never garden soil—it’s too dense). Press the mix down lightly to remove air pockets, then moisten it until evenly damp but not soggy.
Sow 2-3 seeds per pot at a depth of ¼ inch, just below the surface. Cover lightly with a sprinkle of additional mix, then mist gently with water until the soil looks uniformly moist. Place the pots in a warm spot (65-75°F)—a seedling heat mat speeds germination to 5-7 days. Keep the soil consistently moist but never waterlogged; overwatering here causes damping-off, which kills seedlings overnight.
✂️ Step 2: Thin Seedlings and Harden Off
Once seedlings show 2-3 true leaves, thin to the strongest one per pot by snipping the others at the base with clean scissors. This prevents competition and ensures a single, robust plant. I like to use a small hand trowel to loosen the soil around the remaining seedling before transplanting it into a larger 6-inch pot filled with the organic potting mix.
Two weeks before outdoor planting, begin hardening off by placing seedlings in a shaded, sheltered spot for 1-2 hours the first day. Gradually increase exposure to full sun and wind over 10-14 days. Watch for wilting or yellowing leaves—this signals they’re not ready yet. Cabbage is tough, but abrupt changes shock it severely.
🪴 Step 3: Transplant into Containers or Small Garden Beds
Choose a location with full sun (6+ hours daily) and well-draining soil. If using containers, select 12-inch pots—cabbage needs depth for root development. Fill each with organic potting mix mixed with compost, then dig a hole twice as wide as the root ball but no deeper. Gently remove the seedling from its pot, loosen the roots if they’re circling, and place it in the hole.
Backfill with soil, firming lightly around the base to eliminate air pockets. Water deeply until moisture seeps from the drainage holes. Space plants 18-24 inches apart—crowding leads to small, misshapen heads. I always add a slow-release fertilizer at planting to provide steady nutrients without burning tender roots.
💧 Step 4: Maintain Moisture and Fertility
Cabbage loves consistent moisture—1-1.5 inches per week—but hates soggy soil. Water at the base of the plant in the morning to reduce fungal risks. Mulch with 2-3 inches of straw to retain moisture and suppress weeds. You’ll know your watering is right when the soil feels damp 2 inches down but not waterlogged.
Side-dress with balanced fertilizer (10-10-10) every 4-6 weeks to encourage head formation. Watch for yellowing lower leaves—this often signals nitrogen deficiency. If heads start to loosen or split, they’re ready for harvest. Regular harvesting prevents bolting (flowering), which ruins the plant’s edible quality.
☀️ Step 5: Extend the Season with Succession Planting
For year-round harvests, I stagger plantings every 2-3 weeks from spring to early summer. In fall, opt for cold-hardy varieties like ‘January King’ and plant 8-10 weeks before the first frost. Use row covers in early spring or late fall to protect young plants from light frosts (<28°F).
Remove any bolting or flowering stems immediately—they drain energy from head formation. If pests like cabbage worms appear, handpick them or use row covers to block access. With these steps, you’ll enjoy firm, flavorful heads for months, even in small spaces.
Tips & tricks for perfect garden cabbage plants in compact spaces
These game-changing strategies will help you maximize your yield while keeping your cabbage plants happy in limited space.
Seed Starting Precision: In Step 1, the 6-8 week indoor starting window is critical—check your local frost dates and work backward. I use a seedling heat mat to maintain that 65-75°F range consistently, which cuts germination time to just 5-7 days. The key is keeping the soil evenly moist without waterlogging; I find using a spray bottle for misting gives me better control than pouring. Too much water here causes damping-off, and you'll lose seedlings overnight.
Harden Off Gradually: The 10-14 day hardening process in Step 2 can't be rushed. I start with just 1-2 hours of shade on day one, then increase exposure by 1-2 hours daily. Watch for wilting—this is your plant's way of saying "slow down." I've learned the hard way that abrupt sun exposure causes shock that can set back growth for weeks. If your seedlings start yellowing, they're not ready for more sun yet.
Transplanting Technique: When transplanting in Step 3, focus on root health. Gently loosen any circling roots before placing in the 12-inch pots—this prevents girdling as the plant grows. I make the hole twice as wide as the root ball but never deeper, which encourages downward root growth. After planting, I water until moisture seeps from the drainage holes, ensuring the roots make immediate contact with wet soil. This single step makes all the difference in establishing strong plants.
Season Extension Secrets: For fall plantings mentioned in Step 5, I always choose cold-hardy varieties like 'January King' and plant them 8-10 weeks before frost. The trick with row covers is using them only when temperatures drop below 28°F—any warmer and you risk creating too much humidity, which promotes fungal diseases. I also remove covers during the day when temperatures rise to let plants get sunlight for photosynthesis.
Pro Tips for Garden Cabbage Plants
- These game-changing strategies will help you maximize your yield while keeping your cabbage plants happy in limited space.
- Seed Starting Precision: In Step 1, the 6-8 week indoor starting window is critical—check your local frost dates and work backward.
- Harden Off Gradually: The 10-14 day hardening process in Step 2 can't be rushed.
Frequently asked questions
Got questions about growing garden cabbage plants?
You’re not alone! Here are answers to the most common queries—from timing to troubleshooting—to help your cabbage thrive in even the smallest space.
When is the best time to plant garden cabbage?
For most climates, plant cabbage seeds 4–6 weeks before your last frost date (early spring) or 60–90 days before fall’s first frost. In warm regions, opt for cool-season varieties and plant in fall or winter. Cabbage hates heat—avoid planting when temps exceed 80°F (27°C).
How long does it take for garden cabbage to grow?
From seed to harvest, expect 70–120 days, depending on the variety. Head varieties (like ‘Golden Acre’) take longer (90–120 days), while baby leaf types (e.g., ‘Miniature Peanut’) mature in 30–50 days. Check seed packets for exact timelines!
What pests or diseases should I watch for in garden cabbage?
Cabbage is a magnet for cabbage worms, aphids, and flea beetles. Use row covers or neem oil for prevention. Watch for clubroot (soil-borne fungus)—rotate crops and avoid waterlogging. Pests? Handpick worms or spray with BT (Bacillus thuringiensis) for organic control.
Can I grow garden cabbage in containers or small spaces?
Dwarf or compact varieties
(like ‘Cavalo’ or ‘Ruby Perfection’) thrive in 5–10 gallon pots with 12+ inches of depth. Place containers in full sun (6+ hours/day) and use well-draining soil. For vertical space, try trellises or tower gardens—just ensure heads stay upright!
How do I know when garden cabbage is ready to harvest?
Check for firm, round heads (like a basketball!) with tightly packed leaves. For baby leaves, harvest when 4–6 inches tall. Don’t wait too long—overgrown cabbage can bolt (send up a flower stalk) or split. Use a sharp knife to cut stems, leaving 1–2 outer leaves intact.
Pro Tip:
Struggling with slow growth? Side-dress with compost or nitrogen-rich fertilizer (like fish emulsion) every 3–4 weeks. Cabbage is a heavy feeder—keep soil rich for big, happy heads!
Wrapping up and next steps
Growing garden cabbage plants in compact spaces is totally doable—just pick the right varieties, optimize your setup, and embrace companion planting for healthier harvests! 🌱 Whether you’re a seasoned gardener or a beginner, these year-round hacks make it easier than ever to enjoy fresh, homegrown cabbage without sacrificing space.
Ready to take the next step? Start small—try a single pot or raised bed with your favorite compact variety, and let your confidence (and garden!) grow from there. Happy planting! 🌟