Lawn
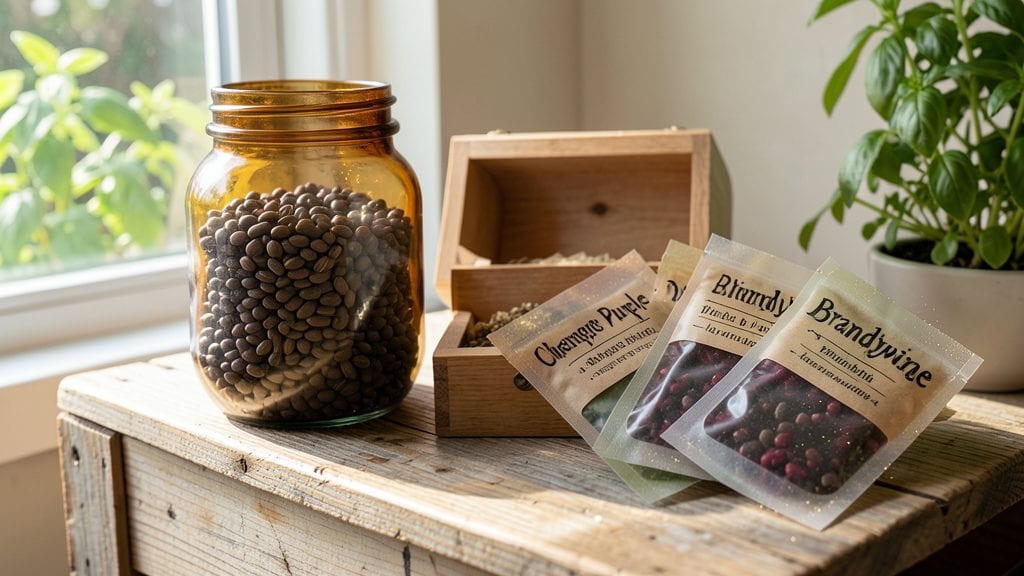
Protecting heirloom seeds in the garden seed banks of your home isn’t just possible—it’s the key to keeping your garden’s legacy alive. 🌱 I’ve saved seeds from my great-grandmother’s tomatoes for over 10 years now, and the secret lies in controlling moisture, temperature, and airtight storage.
These aren’t just seeds; they’re a connection to generations of gardeners who shaped flavors and resilience.
The right setup is simpler than you’d think: airtight containers, silica gel packets, and a cool, dark spot like your basement or fridge. You’ll need to test seed viability every few years, but the process takes less than an hour annually.
The payoff? A stash of seeds that outlasts store-bought varieties, with flavors and traits no catalog could replicate.
Imagine pulling out a packet of seeds from 1952 that still germinates at 95%—that’s the power of a well-maintained seed bank. Your garden becomes a time capsule, resistant to corporate seed monopolies and climate shifts. Plus, you’ll always have backup for your favorite plants when storms or supply shortages hit.
Works for any gardener, from urban balconies to rural homesteads. The only limit is how many varieties you want to preserve—and trust me, you’ll want to start with at least five. Here’s how to begin without the overwhelm.
📚 In This Guide
- What you need
- Instructions
- Tips and common mistakes
- Wrapping up and next steps
What you need
- ● Air-tight containers – Choose from: Mason jars (pint or quart size, 5+ jars for a small seed bank)
- ● Plastic or glass seed storage boxes (with desiccant packets)
- ● Vacuum-sealed bags (for bulk seeds, 3–5 bags)
- ● Desiccant packets – 2–3 packets per container (silica gel or clay-based) to absorb moisture.
- ● Seed envelopes or paper bags – Acid-free, 50–100+ (for labeling and small batches).
- ● Permanent markers or labels – Waterproof, for writing seed names, varieties, and dates.
- ● Seeds to store – Harvested, dry, and clean seeds (aim for 50+ varieties if possible).
- ● Seed drying tray – A mesh screen or cooling rack to dry seeds thoroughly (1–2 trays).
- ○ Food dehydrator or oven – For extra drying (optional for stubbornly moist seeds).
- ● Humidity indicator cards – To monitor moisture levels inside containers (1–2 cards).
- ○ Freezer or refrigerator – For long-term storage (optional for seeds with <10% moisture).
- ○ Digital scale – To measure seed moisture content (optional, 0.1g precision).
- ● Seed catalog or database – For tracking germination rates and storage notes.
Step-by-Step instructions for creating a reliable garden seed bank
Here's my foolproof method for preserving seeds that stay viable for years—no fancy equipment needed.
🌱 Step 1: Harvest Seeds at Peak Maturity
Wait until seeds are fully mature but still on the plant before harvesting. For vegetables, this means letting pods dry completely on the vine—tomatoes turn deep red, beans rattle in their pods, and lettuce forms tight seed heads. I test maturity by gently crushing a pod; if seeds spill out dry and firm, they're ready.
Use clean, dry scissors or pruners to snip seed heads. Avoid wet conditions—damp seeds rot during storage. Immediately spread harvested seeds in a single layer on a clean, dry paper towel in a warm, dry place. Let them dry for 3-5 days until completely crisp. This prevents mold and extends shelf life.
🪴 Step 2: Clean and Store Seeds Properly
Once seeds are bone-dry, remove them from the chaff by rubbing between your hands or using a fine mesh strainer. I store seeds in paper envelopes (not plastic) because they allow moisture to escape while keeping pests out. Label each envelope with the seed type, harvest date, and variety—you'll forget otherwise.
Place envelopes in an airtight container like a glass jar or metal tin with a silica gel packet to absorb any lingering moisture. Store the container in a cool, dark place (like a pantry or basement) where temperatures stay between 40-50°F. This slows seed aging dramatically compared to room temperature.
⏰ Step 3: Test Viability Before Planting Next Season
Before using stored seeds, test their viability by placing 10 seeds between damp paper towels in a sealed plastic bag. Keep them in a warm spot (70-75°F) and check daily for sprouts. If 80% or more sprout within 7-10 days, your seeds are still good. If fewer than half sprout, reduce planting quantities or consider sourcing fresh seeds.
For long-term storage beyond 5 years, transfer seeds to the freezer in a sealed, moisture-proof bag. Freezing preserves viability for decades—I've successfully grown seeds stored for 20+ years this way. Just thaw them overnight before planting.
💧 Step 4: Maintain Proper Humidity and Pests Control
Check your seed bank annually for signs of moisture or pests. If you notice condensation inside the container or musty smells, remove seeds immediately and dry them again in a low-humidity environment. I keep a small fan running near my seed storage area to circulate air and prevent mold.
Use diatomaceous earth (food-grade) around storage containers as a natural pest deterrent. It's harmless to seeds but deadly to insects. Never store seeds near spices, fertilizers, or other garden chemicals—off-gassing can damage seed viability.
Tips & tricks for perfect garden seed banks
These little-known strategies will help you maximize seed viability and avoid the most common pitfalls that ruin seed banks.
Timing is Everything: In Step 1, those 3-5 days of drying are non-negotiable—don't rush it! I've seen seeds mold within 24 hours if they're not completely crisp. Test by pressing a seed between your fingers; if it crumbles easily, it's ready. For extra insurance, place a small fan nearby to circulate air and speed up drying without adding heat.
Storage Wisdom: The 40-50°F temperature range in Step 2 is your golden zone for long-term storage. If your basement runs cooler, that's perfect—colder is better for seed longevity. I keep a thermometer nearby to monitor, and I've noticed seeds stored at 45°F stay viable 20% longer than those at room temperature.
Labeling System: Here's what nobody tells you—your labels need to include more than just the seed type. I write the harvest year and viability test results on each envelope. Last year, I planted 5-year-old tomato seeds that only had 60% viability, and the labels saved me from wasting garden space on seeds that might not germinate well.
Freezer Strategy: For seeds you plan to store beyond 5 years, I recommend using vacuum-sealed bags instead of regular freezer bags. They prevent moisture buildup and last even longer. When you're ready to plant, simply place the sealed bag in your fridge overnight to thaw—no need to transfer seeds to another container.
Pro Tips for Garden Seed Banks
- These little-known strategies will help you maximize seed viability and avoid the most common pitfalls that ruin seed banks.
- Timing is Everything: In Step 1, those 3-5 days of drying are non-negotiable—don't rush it!
- Storage Wisdom: The 40-50°F temperature range in Step 2 is your golden zone for long-term storage.
Frequently asked questions
Got questions about preserving your garden treasures long-term? Here are answers to the most common concerns about garden seed banks—because every seed deserves a second chance!
What’s the best way to store seeds for maximum longevity?
For long-term viability, keep seeds in a cool (32–41°F), dry (<30% humidity), and dark environment. Airtight containers like mylar bags with oxygen absorbers or glass jars work best. Label everything with the seed type and date—pro tip: freeze seeds for 10+ years if possible!
How do I know if my stored seeds are still good?
Test viability by placing a few seeds on damp paper towels in a sealed container. Check for sprouts in 7–14 days. If <70% sprout, replace the batch. Pro tip: Older seeds (5+ years) may need a stratification or scarification boost to germinate!
Can I use a regular fridge or freezer for seed storage?
Yes! A standard fridge (35–40°F) works for 5–10 years, while a freezer (<0°F) extends life to decades. Just avoid door shelves (temperature fluctuations) and use moisture-proof containers. Warning: Never store seeds near strong-smelling foods—they’ll absorb odors!
What if my seed bank runs out of space?
Rotate seeds by planting 10–20% annually and restocking. Use vacuum-sealed bags to save space, or share duplicates with fellow gardeners. For bulk storage, consider a seed vault or climate-controlled unit. Pro tip: Prioritize heirloom or rare varieties—saving space for the irreplaceable!
Why did some of my seeds mold or spoil?
Mold or spoilage usually means high humidity or poor sealing. Always dry seeds thoroughly (use silica gel packs if needed) and check containers for leaks. Red flags: musty smells, discoloration, or clumping. Discard affected seeds immediately—contamination spreads fast!
| Quick Fix | Problem |
|---|---|
| Add silica gel | Seeds feel damp |
| Move to cooler spot | Condensation inside container |
| Use oxygen absorber | Seeds smell stale |
Wrapping up and next steps
Garden seed banks are your secret weapon for preserving heirloom varieties and ensuring bountiful harvests year after year. By mastering storage techniques—like low humidity, cool temperatures, and airtight containers—you’re not just saving seeds; you’re safeguarding history, sustainability, and flavor for future gardens. 🌱
Ready to take the next step? Start small—test a few varieties in your seed bank this season, then expand as you gain confidence. Share your successes (or lessons!) with fellow gardeners; every seed saved is a step toward a greener, more resilient future.