Lawn
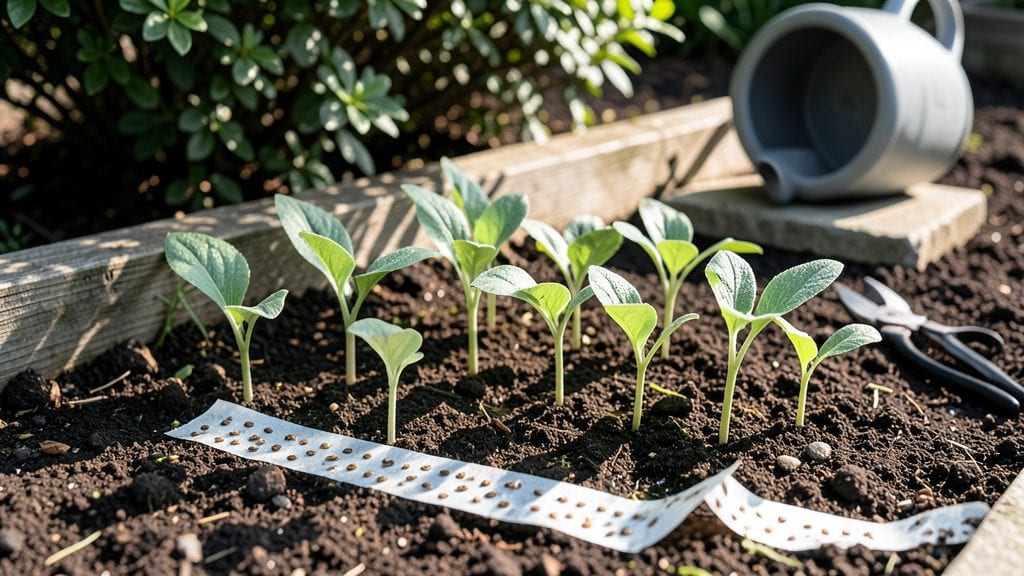
Planting seeds in straight rows used to be a guessing game for me—until I discovered garden seed tape. This simple tool turns messy sowing into a foolproof, fast process that even my shaky hands can handle.
The tape holds seeds perfectly spaced, so you don’t waste time adjusting or overcrowd seedlings later.
You’ll need just three things: seed tape, a small shovel or trowel, and your garden bed. The tape itself is pre-spaced with seeds embedded in biodegradable strips, so planting takes about half the time of traditional methods.
Just lay it down, cover with soil, and water—no fuss. Works best for small seeds like carrots, lettuce, or radishes, but I’ve even used it for beans with great results.
What you’ll get is a neat, uniform row of seedlings popping up at the same time. No more patchy germination or thinning later—just straight, strong plants ready to grow. The tape dissolves as it decomposes, so no cleanup needed. Perfect for beginners or anyone tired of uneven seedling rows.
Pro tip: Moisten the tape before planting to help seeds stick to the soil. For larger seeds, like peas, skip the tape and use a DIY version with flour paste. Either way, you’ll save time and frustration—guaranteed. Ready to try it?
📚 In This Guide
- What you need
- Instructions
- Tips and common mistakes
- Wrapping up and next steps
What you need
- ● Garden seed tape: Choose pre-seeded tapes (e.g., carrot, radish, or onion) or DIY tapes with your preferred seeds (check seed packet for spacing guidelines).
- ● Water-soluble seed tape: If making your own, use biodegradable tape (e.g., paper or cornstarch-based) or waterproof tape (for outdoor use).
- ● Seeds: Ensure they’re fresh and viable (test germination if unsure). Quantity depends on tape length—typically 1–2 seeds per inch.
- ● Water: A spray bottle or hose with a gentle nozzle for even moisture.
- ● Garden soil: Well-draining, loamy mix (amend with compost if needed).
- ● Garden tools: Trowel or small shovel (for digging trenches).
- ● Measuring tape or ruler (to mark spacing).
- ● Planting grid or staking: For ultra-straight rows (especially for large gardens).
- ● Seed tape maker kit: Includes glue, tape dispenser, and seed applicator (for DIY tapes).
- ● Mulch or straw: To retain moisture and suppress weeds.
- ● Label markers: Waterproof tags to track seed types and planting dates.
- ● Garden kneeler/pad: For comfortable, long planting sessions.
- ● Sunlight assessment: Know your garden’s sun exposure (full sun, partial shade, etc.)—match seeds to conditions!
- ● Soil prep: Loosen soil to a depth of 2–3 inches and remove rocks/debris.
- ● Weather check: Plant on a cool, cloudy day (or late afternoon) to reduce stress on seeds.
- ● Seed tape storage: Keep unused tapes in a cool, dry place (avoid humidity).
Step-by-step instructions for using garden seed tape
Skip the guesswork—this method guarantees straight rows and rapid germination every time.
Prepare Your Soil and Mark Planting Lines
Work the soil to a depth of 6 inches until it’s loose and free of clumps. Use a straight piece of wood or a level board to create a perfectly straight planting line. I like to lay it down and run my finger along the edge to make a shallow trench—this keeps seeds at the right depth without digging too deep.
For larger gardens, use a garden hose to create a water line along your desired row. The slight indentation from the hose helps guide the seed tape as you plant. If you’re working in an area with uneven terrain, take a moment to level the ground first—uneven soil can cause the tape to sag or pull unevenly.
Load the Seed Tape and Align the First Row
Unroll the seed tape slowly, ensuring the seeds are facing upward. Hold the tape taut but not stretched—just enough to keep it straight as you plant. I like to start at one end of the row and gently press the tape into the soil, seeds-side down, about ½ inch deep. For most vegetables, this depth ensures strong germination without burying seeds too deeply.
Use a small board or your hand to press the soil lightly over the tape, covering the seeds but leaving the tape visible. This prevents the tape from floating up when you water. If you’re planting multiple rows, measure 12-18 inches between each line (depending on the plant) and repeat the process. Double-check alignment before pressing—once the seeds are in the ground, straightening the tape becomes tricky.
Water Gently and Maintain Moisture
Water the newly planted rows with a fine-mist spray nozzle or a gentle stream from a watering can. Avoid blasting the soil—you want moisture to seep in evenly without displacing the seeds or tape. I aim for the soil to feel damp 1 inch below the surface after watering. Overwatering here can cause the tape to shift or even float away.
Keep the soil consistently moist for the first 7-10 days—this is critical for fast germination. Use a mulch layer (like straw or grass clippings) to lock in moisture and prevent the soil from drying out too quickly. If your climate is hot and dry, water lightly every 2-3 days until you see the first sprouts pushing through the soil.
Monitor Growth and Remove the Tape
Once seedlings emerge—usually within 5-14 days, depending on the plant—watch for the first true leaves (the second set of leaves after the initial cotyledons). This is your cue to carefully pull the tape out. Grip the edge and lift gently, working from one end of the row to the other. If the tape resists, lightly wiggle it side to side to loosen it without damaging the delicate roots.
After removing the tape, give the seedlings a light watering to settle the soil around their roots. If any seeds didn’t germinate, you can replant them by hand at the same depth. This method works best for small seeds like lettuce, carrots, or radishes, but larger seeds (like beans or peas) may not need the tape—just plant them directly in rows for the same straight growth.
Thin and Maintain for Optimal Spacing
When seedlings reach 2-3 inches tall, thin them to the recommended spacing for your plant. Use a small pair of scissors or your fingers to snip or pull the weaker seedlings at the base. This prevents competition for nutrients and ensures stronger, healthier plants. For example, carrots should be 2-3 inches apart, while lettuce can handle 6-8 inches between plants.
Continue to water at the base of the plants, avoiding the leaves to prevent disease. If you notice any seedlings leaning or stretching toward the light, they need more sun—either move the plants to a sunnier spot or thin them further to reduce crowding. With seed tape, you’ll see faster, more uniform growth compared to hand-planting, and the rows will stay straight all season long.
Tips & tricks for precision planting with garden seed tape
These simple strategies will help you achieve perfectly straight rows and faster germination every time you use seed tape.
Soil Preparation Tip: Before planting, work the soil to a depth of 6 inches and create a perfectly straight trench using a level board. This ensures your seeds are planted at the ideal depth of ½ inch without digging too deep. For uneven terrain, level the ground first—uneven soil can cause the tape to pull or sag, ruining your straight rows. I've found that using a garden hose to create a water line works beautifully for larger gardens, giving you a natural guide for alignment.
Planting Technique: When pressing the seed tape into the soil, hold it taut but not stretched—just enough to keep it straight. Gently press the soil over the tape, covering the seeds but leaving the tape visible. This prevents it from floating up when you water. Double-check alignment before pressing completely; once the seeds are in the ground, straightening the tape becomes much harder. I always work from one end of the row to the other to maintain consistency.
Watering Wisdom: Use a fine-mist spray nozzle or gentle stream from a watering can to avoid displacing seeds or tape. Aim for soil that feels damp 1 inch below the surface after watering—overwatering can cause the tape to shift. For the first 7-10 days, keep the soil consistently moist by using a mulch layer like straw or grass clippings. This helps lock in moisture and prevents drying out, which is critical for fast germination.
Timing for Tape Removal: Once seedlings emerge (usually within 5-14 days), wait for the first true leaves to appear before removing the tape. Grip the edge and lift gently, working from one end of the row to the other. If the tape resists, lightly wiggle it side to side to avoid damaging delicate roots. This careful removal ensures your seedlings stay healthy and undisturbed as they grow.
Pro Tips for Garden Seed Tape
- These simple strategies will help you achieve perfectly straight rows and faster germination every time you use seed tape.
- Soil Preparation Tip: Before planting, work the soil to a depth of 6 inches and create a perfectly straight trench using a level board.
- Planting Technique: When pressing the seed tape into the soil, hold it taut but not stretched—just enough to keep it straight.
Frequently asked questions
Got questions about garden seed tape? You’re not alone—this handy tool simplifies planting, but it’s smart to know the ins and outs before diving in! Here are answers to the most common queries to help you get started with confidence.
What exactly is garden seed tape, and how does it work?
Garden seed tape is a pre-spaced strip of biodegradable material with seeds embedded at precise intervals. It eliminates the guesswork of hand-planting, ensuring even spacing and depth for faster, straighter growth. Just unroll it, press it into the soil, and cover—no measuring required!
When is the best time to use seed tape in my garden?
Timing depends on your plants, but generally, use seed tape when the soil is warm enough for germination (check seed packet guidelines) and after the last frost date in your zone. For cool-season crops like lettuce or peas, plant in early spring or fall. For warm-season veggies like tomatoes or peppers, wait until soil temps hit 60°F+.
Can I reuse or repurpose seed tape if I don’t use it all?
No, seed tape is designed for single-use only. The biodegradable material breaks down over time, and unused strips may dry out or lose viability. However, you can store unused rolls in a cool, dry place (like a seed catalog) for up to a year. Pro tip: Buy smaller packs if you’re unsure how much you’ll need!
What are some alternatives to seed tape for small gardens?
If seed tape isn’t your style, try these space-saving methods:
- Hand-planting with a ruler: Mark rows with sticks or string and use a dibber for even depth.
- Seedling trays: Start seeds indoors, then transplant with tweezers for precision.
- DIY seed tape: Glue seeds to a biodegradable strip (like coffee filters) with flour paste.
- Hydroponic mats: For herbs or microgreens, use pre-soaked seed mats in water.
My seed tape isn’t germinating—what could be wrong?
Troubleshoot with this quick checklist:
- Moisture issues: Keep soil consistently damp (not soggy) until sprouts appear.
- Depth problems: Cover with no more than 2x the seed size—too deep = no sprouts.
- Temperature: Some seeds need warmth (e.g., 70°F+ for peppers) to germinate.
- Old seeds: Check the packet date—seed tape loses viability after 1–2 years.
- Poor soil contact: Gently press the tape into soil to ensure seeds touch moisture.
Wrapping up and next steps
Garden seed tape is your secret weapon for effortless, straight-row planting—perfect for beginners and pros alike! 🌱 With its precision placement and faster germination, you’ll enjoy neater gardens, less weeding, and stronger starts in no time.
Whether you’re revamping flower beds or sowing veggies, this tool makes gardening simpler and more rewarding.
Ready to transform your green space? Grab your seed tape, follow the steps, and watch your plants thrive! Start small—try a single row today—and let your confidence (and garden!) grow. 🌿