Tools
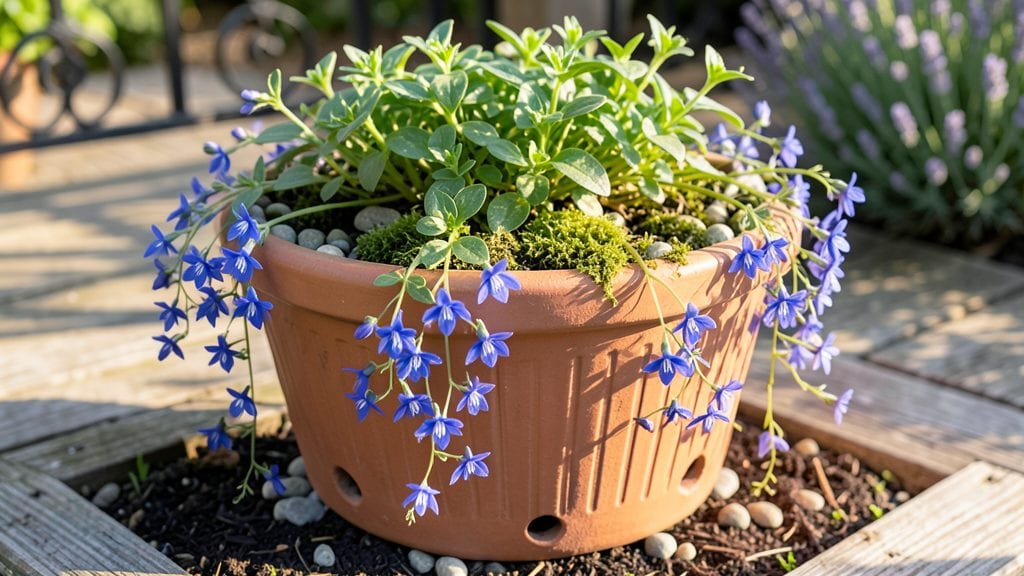
Looking for fresh garden tub ideas? This rustic wood-and-metal combo turned a dull corner into a thriving, year-round growing station. The best part? It’s not just functional—it’s the kind of planter that makes neighbors pause and ask questions.
I started with a simple galvanized steel tub for root crops and paired it with cedar planter boxes for herbs, creating a mix of textures that feels intentional yet easy to assemble.
You don’t need fancy tools or expensive materials—just a saw, drill, and some basic hardware. A 2-foot-wide metal tub holds potatoes or carrots perfectly, while the cedar boxes (built from 2x6s) add warmth and can be stacked for vertical growing.
The combo works in small patios, urban balconies, or even alongside fences. Plus, metal holds up better in wet climates, while wood adds that cozy, handmade feel.
By summer, you’ll be harvesting fresh greens from the cedar boxes while the metal tub yields crisp root vegetables. The contrast between the weathered wood grain and the cool metal creates a striking visual, but the real magic is how it extends your growing season.
Even in winter, the tubs stay sturdy, and you can add cold-hardy crops like kale or spinach. It’s the kind of project that keeps giving back.
Whether you’re working with limited space or just want a low-maintenance way to grow more, this setup adapts easily. The metal tubs can be lined with landscape fabric to prevent soil loss, and the cedar boxes can be painted or left natural.
Start small—maybe one tub and one box—and let your confidence (and garden) grow from there.
📚 In This Guide
- What you need
- Instructions
- Tips and common mistakes
- Wrapping up and next steps
What you need
- ● Main Tub Structure: 1–2 4x4 or 6x6 pressure-treated lumber (8–12 ft long, depending on tub size)
- ● 1–2 ½" or ¾" exterior-grade plywood sheets (cut to fit tub dimensions)
- ● OR 1–2 metal tubs or half-barrels (20–30 gallons, rust-resistant)
- ● Fasteners & Hardware: 2–3 lbs deck screws or exterior-grade nails (2½"–3")
- ● 1–2 corner braces or metal brackets (for reinforcement)
- ● 1 staple gun + staples (for securing fabric liners, if used)
- ● Drainage: 1 plastic or metal garden tub drain (with gasket)
- ● 1 ½" PVC pipe (6–12" long, for drainage outlet)
- ● Sealing & Protection: 1 quart outdoor wood sealant or paint (non-toxic, waterproof)
- ○ 1 roll landscape fabric (optional, for weed barrier)
- ● Circular saw or handsaw (for cutting lumber)
- ● Drill + drill bits (for screws and drainage holes)
- ● Measuring tape + pencil (for precision cuts)
- ● Safety gloves + goggles (because safety first!)
- ● Level (to keep your tub even)
- ● Sandpaper (80–120 grit, for smooth edges)
- ● Paintbrush or roller (for sealing)
- ● 1–2 wooden slats or lattice panels (for a rustic look)
- ● 1 waterproof liner (if using a DIY wooden tub)
- ● 1 garden hose adapter (for easy watering)
- ● 1–2 decorative stones or pebbles (for mulch or aesthetics)
Instructions for building a rustic wood and metal garden tub
This combo creates a durable, stylish planter that lasts seasons while protecting your garden from weather.
Select and Prepare Your Materials
Start with a wooden crate or cedar planter box for the base—cedar resists rot naturally. Pair it with a galvanized metal trough or copper rainwater collector for the upper section. Measure both pieces to ensure the metal piece fits snugly inside the wooden frame. If gaps exist, line the bottom with landscape fabric to prevent soil from spilling between layers.
Sand any rough edges on the wood with 80-grit sandpaper to avoid splinters, then apply outdoor wood sealant to protect against moisture. Let it dry completely before assembly. I like to stain the wood first for extra durability—just make sure it’s labeled for exterior use. This prep step keeps your tub looking fresh for years.
Assemble the Wooden Base
Place the wooden crate or planter box on a flat surface. If using a crate, reinforce the corners with metal brackets or corner braces to prevent warping over time. For a planter box, ensure the bottom is solid—add a plywood sheet if the wood is thin. Drill drainage holes along the bottom edges if they don’t already exist, using a 1/4-inch drill bit for adequate water flow.
Test the fit of the metal trough inside the wooden frame. If it’s too tight, sand the edges slightly. If too loose, add wooden strips along the inside bottom to create a snug base. This combo keeps the metal from shifting while allowing roots to expand naturally. A little patience here prevents future wobbling.
Layer and Secure the Metal Trough
Lift the metal trough into the wooden frame and center it evenly. If using a copper rainwater collector, bend the edges slightly outward to create a slight overhang—this helps with water runoff. Secure the metal to the wood with stainless steel screws or galvanized nails, driving them through the metal and into the wood at 4-inch intervals along the edges.
Line the bottom of the metal section with landscape fabric to prevent soil from leaking into the wooden base. This keeps your tub stable and extends its lifespan. If your metal piece has a lip, fold it inward slightly to create a small soil barrier—this trick prevents erosion during watering.
Add Soil and Planting Materials
Fill the metal trough with a mix of 60% potting soil and 40% compost for nutrient-rich growth. Avoid garden soil—it compacts too easily in containers. Leave 2 inches of space at the top for watering and plant growth. For a 4-tub setup, divide the 4 bags of potting soil and 2 bags of compost evenly among them.
Plant your chosen herbs or vegetables—this combo works great for basil, thyme, or lettuce. Space plants according to their mature size, and water deeply right after planting. The metal section retains moisture well, but the wood base helps regulate temperature swings. Watch for first true leaves in 7-10 days—that’s your sign the roots are settling in.
Position and Maintain Your Garden Tub
Place your tub in a spot with 6+ hours of sunlight daily. The metal section absorbs heat, so position it where afternoon shade is available in hot climates. Elevate the wooden base with bricks or cinder blocks if needed to improve drainage and prevent rot. Water when the top inch of soil feels dry, but avoid overwatering—the metal can trap excess moisture.
Check the wood annually for cracks or sealant wear, reapplying sealant as needed. The metal will develop a natural patina over time—this isn’t rust, but a protective layer. Prune plants regularly to encourage bushier growth, and harvest herbs in the morning for peak flavor. With this setup, you’ll enjoy fresh produce year-round with minimal effort.
Tips & tricks for building a rustic wood and metal garden tub
Building this garden tub combo is all about balancing durability with beauty—here’s how to make it last while keeping it looking great.
Material Selection: When choosing your cedar planter box or wooden crate, opt for thicker wood (at least 1-inch thick) to prevent warping over time. Cedar is ideal, but if unavailable, redwood or pressure-treated pine work too—just sand thoroughly to remove any chemical residue before sealing. For the metal section, galvanized steel offers the best balance of durability and rust resistance, while copper develops a beautiful patina but requires more maintenance.
Drainage Strategy: In Step 2, when drilling your 1/4-inch drainage holes, space them about 3-4 inches apart along the bottom edges. This prevents clogging while ensuring proper water flow. For extra protection, place a piece of hardware cloth over the holes before adding soil—this keeps critters from moving in while allowing water to escape. I’ve learned this the hard way after dealing with slugs in my first tub!
Assembly Precision: The fit between your metal and wood sections is everything. In Step 3, when securing with stainless steel screws or galvanized nails, pre-drill holes to prevent wood splitting—especially important if you’re using thicker cedar. For a snug fit without over-tightening, leave a 1/8-inch gap between the metal and wood. This small space allows for seasonal expansion while keeping everything stable.
Soil Mixing Tip: When combining your 60% potting soil and 40% compost in Step 4, add a handful of perlite or vermiculite to improve drainage. This lightens the mix while preventing compaction, which is especially important in metal containers that can trap moisture. For a 4-tub setup, I like to mix everything in a wheelbarrow first to ensure even distribution across all tubs.
Pro Tips for Garden Tub Ideas
- Building this garden tub combo is all about balancing durability with beauty—here’s how to make it last while keeping it looking great.
- Material Selection: When choosing your cedar planter box or wooden crate, opt for thicker wood (at least 1-inch thick) to prevent warping over time.
- Drainage Strategy: In Step 2, when drilling your 1/4-inch drainage holes, space them about 3-4 inches apart along the bottom edges.
Frequently asked questions
Got questions about transforming your garden tub into a rustic, functional space? Here are some of the most common inquiries—and their answers—to help you get started with confidence!
What’s the best time of year to build a garden tub?
The ideal time to build a garden tub is early spring or late fall when temperatures are mild. This allows enough time for plants to establish roots before extreme heat or frost sets in. If you’re in a warmer climate, you can build year-round—but avoid winter if freezing temps are expected.
How much does a DIY garden tub cost compared to buying one pre-made?
A DIY garden tub made from repurposed wood or metal typically costs $50–$200, depending on materials. Pre-made tubs (like cedar or galvanized steel) range from $150–$500+. DIY saves money but requires time and effort—perfect if you love hands-on projects!
Can I use treated lumber for my garden tub?
While pressure-treated lumber is durable, it’s not ideal for edible gardens due to chemical leaching. Opt for untreated cedar, redwood, or recycled wood instead. For metal tubs, galvanized steel or copper are safe, rust-resistant choices that last for years.
How do I keep pests out of my garden tub?
Use fine mesh hardware cloth to cover drainage holes and add a 1–2 inch layer of gravel at the bottom for airflow. Plant pest-repellent herbs like basil, mint, or marigolds around the edges. Avoid overwatering, which attracts slugs and snails.
Will a garden tub survive winter frost?
Most garden tubs can handle light frost, but empty and drain them before freezing temps hit. For metal tubs, add a layer of straw or mulch to insulate soil. Wooden tubs may warp if saturated—store them indoors or cover with a tarp if possible.
Wrapping up and next steps
Transforming your garden tub into a rustic wood-and-metal combo isn’t just about aesthetics—it’s a game-changer for year-round growing! Whether you’re drawn to the charm of reclaimed wood or the durability of galvanized steel, these ideas blend functionality with serious style. 🌱✨ The key?
Start small, gather inspiration, and let your creativity (and plants!) lead the way.
Ready to dive in? Sketch your design, gather supplies, and turn that empty space into a thriving oasis. Grab your tools, and let’s grow something beautiful—one tub at a time!