Size
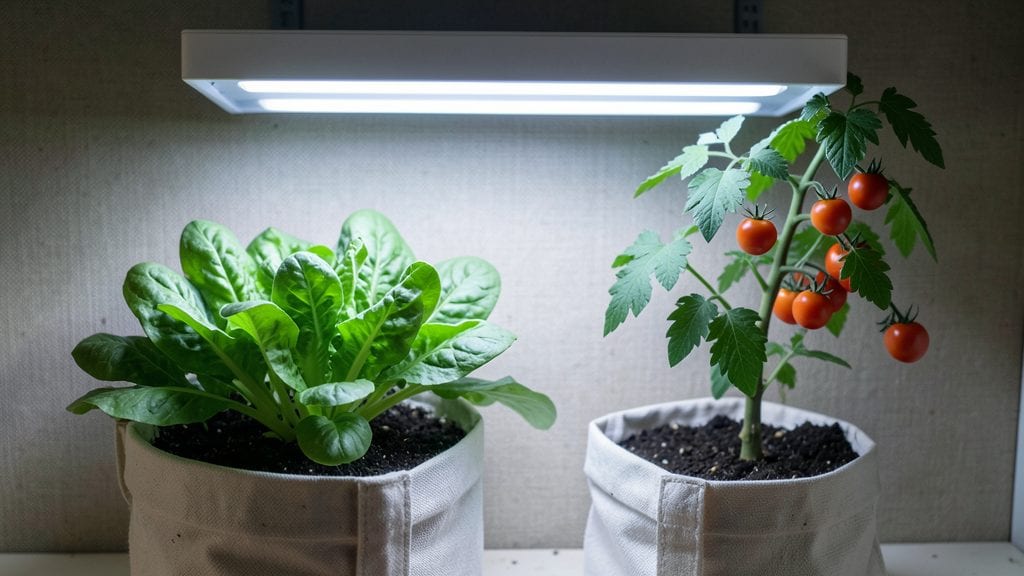
My indoor vegetable garden thrives under full-spectrum LED lights, proving you don’t need a sunroom to grow tomatoes and herbs year-round. 🌱 The right setup transforms any space into a productive growing zone, and I’ll show you how to pick lights that actually work—not just the cheapest options that leave plants stretching toward nothing.
Start with LED grow lights rated for 10,000+ lumens and full-spectrum coverage (blue for veggie growth, red for fruiting). A 24-inch grow light bar covers a 2x4-foot space perfectly, and you’ll need 12-16 hours of light daily for most vegetables.
My setup cost under $200 and pays for itself in homegrown food within a season.
You’ll end up with compact, bushy plants producing 2-3 times more than store-bought herbs or leggy seedlings that flop over. The key is keeping lights 6-12 inches above plants and adjusting as they grow—no more sad, stretched-out greens begging for sunlight.
This works for any indoor space, from basements to kitchens, and scales from a single pepper plant to a full windowsill garden. Let’s get your setup dialed in before your next seed packet arrives.
📚 In This Guide
- What you need
- Instructions
- Tips and common mistakes
- Wrapping up and next steps
What you need
- ● Full-spectrum LED grow lights: 1-2 lights (depending on garden size). Look for 10,000K-12,000K color temperature and 200-400W power for optimal veggie growth.
- ● Grow light fixture: 1 adjustable or hanging fixture with a height-adjustable arm (18-36" above plants).
- ○ Grow tent or reflective surfaces: 1 (optional but recommended) to maximize light efficiency. Use Mylar or aluminum foil if DIY-ing.
- ● Timer: 1 (12-16 hours/day for veggies) to automate lighting cycles.
- ● Seedlings or starter plants: 3-10 (depending on container size). Choose fast-growing veggies like lettuce, herbs, or cherry tomatoes.
- ● Growing containers: 5-10 (5-10" deep) with drainage holes. Use fabric pots, plastic trays, or ceramic pots.
- ● High-quality potting mix: 1-2 bags (sterile, peat-based or coco coir blends work well).
- ● Watering can or spray bottle: 1 (gentle watering prevents root disturbance).
- ○ Fan (optional but critical): 1 small oscillating fan to prevent heat buildup and strengthen plants.
- ● pH meter & nutrient solution: 1 kit to monitor soil health (ideal pH: 6.0-7.0 for most veggies).
- ● Humidity tray: 1 (keeps air moist for seedlings).
- ● Smart plug or app-controlled timer: 1 for remote adjustments.
- ● Reflective paint: 1 can (white or silver) to boost light reflection in DIY setups.
- ○ Grow light spectrum analyzer (optional): 1 to ensure your LEDs cover blue (400-500nm) and red (600-700nm) wavelengths.
How to set up full-spectrum LED grow lights for indoor vegetables
Here’s my battle-tested method for creating a thriving indoor garden—no seasonal limits, just consistent harvests.
💡 Step 1: Select the Right Grow Light and Position It Strategically
For a 4-plant indoor vegetable garden, a 24-inch full-spectrum LED grow light with adjustable height is ideal. I recommend a model with a cool-white and red-blue spectrum to mimic natural sunlight. Position the light 2-4 inches above the tallest plants—closer for seedlings, farther as they mature. Too high, and your veggies stretch leggy; too low, and leaves burn.
Mount the light on an adjustable arm or hang it from a ceiling hook so you can raise it as plants grow. A timed plug-in (14-16 hours of light daily) automates the process, saving you from manual adjustments. If using a basic plug-in, set a reminder—overlighting stresses plants just as much as underlighting.
🌱 Step 2: Acclimate Seedlings Gradually to Prevent Shock
When seedlings first emerge, they’re sensitive to intense light. Start with half the recommended light intensity for the first 3-5 days to avoid leaf scorch. You’ll see this as pale, wilted leaves—your cue to lower the light slightly. After a week, gradually increase brightness until the light covers the full 14-16 hour photoperiod.
Watch for first true leaves (the second set after the initial cotyledons). Once they appear, your plants are ready for full-strength light. If leaves yellow or curl, you’re either overwatering or the light is too intense—adjust immediately. A thermometer near the plants helps; ideal leaf temperature is 65-75°F during light hours.
☀️ Step 3: Adjust Light Height and Spectrum as Plants Mature
Every 2-3 weeks, raise the grow light 1-2 inches higher to prevent burning. You’ll know it’s time when the top leaves show light brown or crispy edges—a sign the light’s too close. For leafy greens like lettuce or kale, keep the light 3-6 inches away once mature. For fruiting plants like tomatoes or peppers, maintain 4-8 inches of distance to encourage strong stems.
Swap to a red-heavy spectrum when plants flower or fruit—this boosts pollination and yield. Most full-spectrum LEDs have a switch for this; use it 4-6 weeks before harvest for best results. If your light lacks this feature, supplement with a separate red LED bulb for 2-3 hours daily during flowering.
⏰ Step 4: Monitor Light Quality and Plant Health Weekly
Check for uneven growth—if one side of plants leans toward the light, rotate them quarter-turn daily. You’ll see this as stems bending or leaves clustering on one side. A reflective surface (like aluminum foil on walls) helps distribute light evenly, reducing the need for constant rotation.
Inspect leaves for powdery mildew or yellowing—both signs of poor light quality or overwatering. Increase airflow with a small fan (set to low speed) to prevent fungal issues. If your grow light hums excessively, it’s overheating; move it 6 inches farther away immediately. A digital light meter ($20) ensures you’re hitting 1,000-2,000 foot-candles at plant height.
🌿 Step 5: Harvest and Maintain the System for Long-Term Success
Harvest leafy greens when they reach 3-4 inches tall for peak flavor. For fruiting plants, pick when produce is firm and fully colored—overripe veggies spoil faster. After harvest, clean the grow light with a damp microfiber cloth (never spray water directly on it) to remove dust, which blocks light output.
Replace LED bulbs every 18-24 months—output dims noticeably after that. Store extra seeds in a cool, dark place (like a fridge) to maintain viability. With this setup, I’ve grown basil, lettuce, and cherry tomatoes year-round, even in a basement with no natural light. The key? Consistency in light, water, and attention to detail.
Tips & tricks for perfect indoor vegetable grow light setup
A few strategic adjustments can transform your indoor garden from struggling seedlings to thriving harvests. Here's what I've learned after years of trial and error with full-spectrum LED systems.
The Light Intensity Spectrum: That initial 3-5 day acclimation period with half-intensity light is non-negotiable for seedlings. I've seen delicate leaves crisp up in hours when rushed into full strength too soon. Use a dimmer switch if your grow light has one, or tape a piece of white paper over the bulb for the first few days. The goal is to mimic the gradual light increase plants experience outdoors.
Temperature Matters More Than You Think: Maintaining leaf temperatures between 65-75°F during those critical 14-16 hours of light makes all the difference. I place a small thermometer at plant height to monitor this—especially important if your grow space gets warm. If leaves feel hot to touch, raise the light immediately or increase airflow with a gentle fan. Overheating causes stress that shows up as yellowing or curled leaves.
Harvest Timing Secrets: For leafy greens, I harvest every 7-10 days when they reach 3-4 inches tall—this keeps production continuous. With fruiting plants, the 4-6 week window before harvest for red-heavy spectrum is crucial. I mark my calendar when I switch spectrums to ensure I'm ready for peak production. The flavor difference between plants grown with proper spectrum timing and those without is night and day.
Equipment Upgrade: Invest in a digital light meter ($20) to verify you're hitting 1,000-2,000 foot-candles at plant height. I've seen lights labeled "full spectrum" that deliver only 500 foot-candles—enough to keep plants alive but not thrive. Most grow lights dim over time, so check your levels every 3-6 months. If readings drop below 1,000, it's time to replace the bulb.
Pro Tips for Grow Lights For Indoor Vegetable Garden
- A few strategic adjustments can transform your indoor garden from struggling seedlings to thriving harvests.
- The Light Intensity Spectrum: That initial 3-5 day acclimation period with half-intensity light is non-negotiable for seedlings.
- Temperature Matters More Than You Think: Maintaining leaf temperatures between 65-75°F during those critical 14-16 hours of light makes all the difference.
Frequently asked questions
Got questions about setting up and optimizing your indoor vegetable garden with grow lights? You’re not alone! Here are some of the most common concerns—plus straightforward answers to help you grow like a pro.
What’s the best type of grow light for indoor vegetables?
For vegetables, full-spectrum LED grow lights are the gold standard—they mimic sunlight across the visible and UV spectrums, promoting healthy growth and fruiting. Avoid cheap fluorescent or incandescent bulbs; they lack the intensity and range needed for robust veggie production. Look for LEDs with a color temperature of 5000K-6500K for optimal results.
How long should I leave grow lights on each day?
Most vegetables thrive with 12-16 hours of light daily, but it depends on the plant. Leafy greens (like spinach or kale) do well with 12-14 hours, while fruiting plants (tomatoes, peppers) need 14-16 hours for flowering and harvest. Use a timer to automate cycles—consistency is key!
Are there affordable alternatives to high-end LED grow lights?
Yes! If budget is tight, consider T5 fluorescent bulbs (cheaper upfront) or used/refurbished LED panels from reputable sellers. For DIYers, DIY full-spectrum setups (combining red/blue LEDs) can work, but they require more tweaking. Just ensure the light intensity (measured in micromoles per square meter) meets your plants’ needs.
Why are my plants stretching or turning yellow under grow lights?
This is usually a sign of light deficiency or imbalance. If leaves stretch (etiolation), your plants aren’t getting enough light—move them closer to the bulb (6-12 inches away). Yellowing? They might be overheating or lacking blue spectrum light. Check your light’s spectrum and adjust the distance or runtime. A reflector or diffuser can also help distribute light evenly.
How do I prevent grow lights from overheating my plants?
Overheating can stress plants, so keep lights 12-24 inches above seedlings and 6-12 inches for mature plants. Use cool-white or red/blue LED combinations (they emit less heat than white LEDs). Add a fan or ventilation system to circulate air, and avoid placing lights too close to plastic containers (they trap heat). Monitor leaf temperature—if they feel warm, adjust the setup!
Wrapping up and next steps
Growing your own vegetables indoors with grow lights isn’t just a trend—it’s a game-changer for fresh, homegrown produce year-round! 🌱 With the right full-spectrum LED setup, you can enjoy crisp greens, juicy tomatoes, and flavorful herbs without relying on seasons or weather.
Whether you’re a beginner or a seasoned gardener, the key is consistency: light quality, duration, and placement make all the difference.
Ready to take the next step? Start small—pick one or two easy crops like lettuce or herbs, gather your supplies, and let the light guide your harvest. Before you know it, you’ll be feasting on homegrown goodness, no matter what’s outside! 🚀