Pests
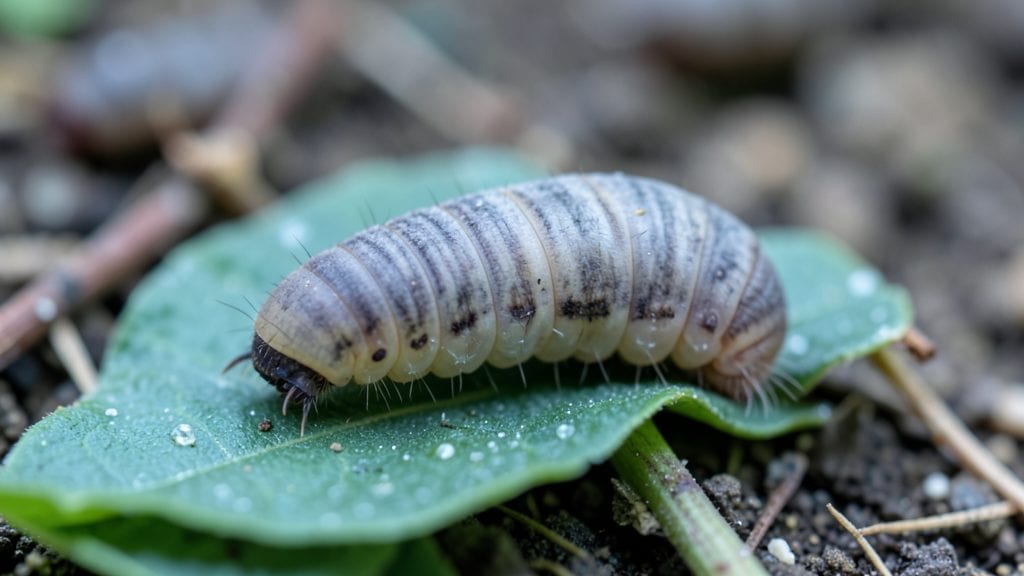
Not all worms are harmless—some of the harmful garden worms can decimate your plants in a single night, leaving seedlings severed and lawns reduced to squishy ruins. stop them.
The worst offenders include cutworms that sever young stems at soil level, grubs that munch grass roots, and slugs that leave silvery trails on leaves. These pests thrive in moist, shaded areas, so prevention starts with good garden hygiene and strategic planting.
The key is acting fast before damage becomes visible.
You’ll learn to identify their telltale signs—chewed stems, brown patches in grass, or shiny slime trails—and use simple, organic methods like diatomaceous earth or beer traps. Most solutions take less than 30 minutes and work without harsh chemicals.
Whether you’re dealing with a small infestation or a full-blown outbreak, these techniques will help you reclaim your garden. The best time to act is before the pests spread—so let’s get started with the right tools and methods.
📚 In This Guide
- What you need
- Instructions
- Tips and common mistakes
- Wrapping up and next steps
What you need
- ● Garden gloves (2 pairs): Heavy-duty, waterproof gloves (e.g., nitrile-coated) to protect your hands from cuts and irritants.
- ● Hand trowel or small spade (1): A 5-inch stainless steel trowel for digging and relocating worms.
- ● Garden fork (1): A heavy-duty, 12-inch fork for aerating soil and extracting deep-burrowing pests.
- ● Bucket or wheelbarrow (1): A 5-gallon container for collecting worms and debris.
- ● Spray bottle (1): A 16-ounce bottle for applying organic sprays (e.g., neem oil or soapy water).
- ● Hose with adjustable nozzle (1): For rinsing tools and flushing out worms from soil crevices.
- ● Pesticide or organic worm repellent (1 bottle): Choose one of these: Diatomaceous earth (food-grade, 5-pound bag)
- ● Neem oil concentrate (16-ounce bottle)
- ● Beauveria bassiana (biological fungicide, 1-pound)
- ● Plastic sheeting or tarp (1 roll): 6-foot x 10-foot to smother affected areas temporarily.
- ● Flashlight or headlamp (1): For spotting worms in low-light conditions.
- ● Magnifying glass (1): To identify specific worm species accurately.
- ● Compost bin or designated disposal area: For safely discarding collected worms (avoid composting harmful varieties like cutworms).
- ● Beneficial nematodes (1-2 million per 1,000 sq. ft.): For long-term organic pest control.
- ● Soil moisture meter (1): To check if dry conditions are contributing to worm outbreaks.
Step-by-step instructions for identifying and eliminating harmful garden worms
Here’s how to spot destructive worms and restore your soil’s health without harming beneficial organisms.
Identify the Worm by Visual Clues and Damage Patterns
The first step is distinguishing harmful worms from their harmless cousins. Cutworms, for example, are smooth-bodied, stout, and often green or brown, hiding near soil during the day and slicing through young stems at night. Look for cleanly severed plants at soil level—this is their signature damage. Wireworms, another culprit, are slender, yellowish-brown, and hard-bodied, burrowing deep into roots and tubers. You’ll notice stunted growth or hollowed-out underground parts.
Earthworms, on the other hand, have segmented bodies, no visible legs, and leave behind castings that improve soil structure. If you’re unsure, dig up a few worms after dark with a flashlight—their behavior (cutworms will drop to the ground, wireworms will burrow deeper) confirms their identity. A magnifying glass helps spot distinguishing features like the wireworm’s shiny, wire-like body or the cutworm’s smooth, velvety texture.
Remove Visible Worms Manually for Immediate Control
For cutworms, handpicking is the most effective method. Wait until evening when they’re active, then carefully inspect the base of plants, especially young seedlings. Gently lift the worm from the soil with a pair of tweezers or your fingers and drop it into a bucket of soapy water to kill it instantly. Avoid crushing them—this can release pheromones that attract more worms to the area. Focus on areas with recent stem damage, as these are hotspots for infestation.
Wireworms are trickier because they burrow deep, but you can still reduce their numbers. Use a garden fork to loosen the soil around affected plants, then sift through it with your hands or a fine mesh screen. Look for the characteristic yellowish-brown, wire-like bodies. Once removed, dispose of them far from your garden to prevent reinfestation. This method works best in early spring before wireworms become deeply embedded in the soil.
Apply Organic Barriers to Deter Future Infestations
To prevent cutworms from attacking your plants, create a physical barrier using the diatomaceous earth you’ve gathered. Sprinkle a thin, even layer around the base of seedlings, focusing on the soil line where cutworms cut stems. The microscopic particles dehydrate the worms’ soft bodies, but they’re harmless to plants and beneficial insects. Reapply after heavy rain, as water washes away the effectiveness. Avoid overapplying—just enough to form a visible dusting is sufficient.
For wireworms, use coarse sand as a deterrent. Mix it into the top 2 inches of soil in planting beds, especially where you’ve noticed damage. Wireworms dislike the gritty texture and will avoid burrowing through it. This method is most effective in newly planted areas or when preparing soil for seeds. Pair it with regular soil checks to monitor worm activity, as wireworms can still penetrate deeper layers over time.
Encourage Natural Predators to Balance the Ecosystem
Introduce beneficial predators like ground beetles and birds to your garden to naturally control worm populations. Ground beetles feed on cutworms and wireworms, so create habitats for them by leaving leaf litter in undisturbed corners of your garden. Birds, particularly robins and starlings, also hunt worms, so avoid using pesticides that could harm them. Planting native shrubs and providing shallow water sources will attract these helpers.
Another effective strategy is to plant marigolds around vulnerable areas. Their strong scent repels many soil-dwelling pests, including cutworms and wireworms, while also attracting predatory insects. Interplant marigolds with your vegetables or flowers to create a protective perimeter. Over time, this approach reduces worm populations without chemical intervention, leading to a more balanced and resilient garden ecosystem.
Monitor and Maintain Long-Term Soil Health
Regularly inspect your garden for signs of worm activity, especially after rain or irrigation, when worms are most active. Check the undersides of leaves, the soil surface, and the base of plants for cutworms, and look for stunted growth or hollowed roots that signal wireworm presence. Keep a garden journal to track worm sightings and the effectiveness of your control methods. This helps you adjust strategies as needed and prevents future outbreaks.
Improve soil health with compost to encourage the growth of beneficial microorganisms that outcompete harmful worms. Healthy soil supports a diverse ecosystem where predators naturally keep worm populations in check. Avoid over-fertilizing, as excess nitrogen can attract cutworms. Instead, focus on balanced organic matter and proper drainage to create an environment where worms—both harmful and helpful—thrive in harmony.
Tips & tricks for identifying and eliminating harmful garden worms
Proper identification and targeted action are key to protecting your garden without disrupting beneficial soil organisms. Here's what I've learned from years of managing worm populations in organic gardens.
Visual Inspection Timing: The most effective time to identify cutworms is during the evening hours when they're active. Use a flashlight to examine the base of plants—look for their characteristic smooth, velvety texture and stout bodies. For wireworms, early spring is critical as they're most vulnerable before deeply embedding in the soil. I've found that a magnifying glass reveals distinctive features like the wireworm's shiny, segmented body that's often missed with the naked eye.
Manual Removal Technique: When handpicking cutworms, I recommend using a pair of tweezers rather than fingers to avoid accidental crushing which releases attracting pheromones. For wireworms, focus on loosening soil in newly planted areas where they're most active. I've discovered that sifting through soil with a fine mesh screen catches more wireworms than hand-picking alone, especially when done in early spring before they burrow deeply.
Barrier Application Strategy: When applying diatomaceous earth as a cutworm barrier, I've learned that a thin, even layer is most effective. Focus application around the soil line where cutworms cut stems, and remember to reapply after heavy rain as water washes away its effectiveness. For wireworms, mixing coarse sand into the top 2 inches of soil creates an immediate deterrent that prevents burrowing without harming beneficial organisms.
Long-Term Monitoring System: I've developed a simple garden journal system to track worm activity. After each inspection, I record the date, location, worm type identified, and control methods used. This helps me identify patterns and adjust strategies before problems escalate. Regular checks after rain or irrigation are particularly important as these conditions trigger worm activity.
Pro Tips for Harmful Garden Worms
- Proper identification and targeted action are key to protecting your garden without disrupting beneficial soil organisms.
- Visual Inspection Timing: The most effective time to identify cutworms is during the evening hours when they're active.
- Manual Removal Technique: When handpicking cutworms, I recommend using a pair of tweezers rather than fingers to avoid accidental crushing which releases attracting pheromones.
Frequently asked questions
Got questions about harmful garden worms? You're not alone!
Here are some of the most common concerns—and straightforward answers—to help you tackle these unwanted visitors like a pro.
What are the most common harmful worms in my garden?
Look out for cutworms (they slice plants at ground level), grubs (white, C-shaped larvae that munch roots), and wireworms (hard, brown larvae that chew through seeds and seedlings). Earthworms (usually harmless) are often mistaken for pests—check for damage first!
When is the best time to treat harmful garden worms?
Act fast if you spot signs like wilting plants, chewed leaves, or tunnels in the soil. Early spring and late summer are peak times for grubs and cutworms. Pro tip: Monitor your garden weekly during these seasons to catch infestations before they spread!
Are there natural ways to get rid of harmful worms without chemicals?
Try these eco-friendly methods:
- Handpick cutworms at night (they’re sluggish then).
- Use beneficial nematodes (microscopic worms that target grubs).
- Apply diatomaceous earth around plants—it dehydrates soft-bodied pests.
- Encourage predatory birds (like robins) with shallow dishes of water.
Why do I keep seeing worms even after treatment?
Worms can be stubborn! If they persist, they might be hiding deep in the soil or laying new eggs. Try rotating treatments (e.g., nematodes one week, handpicking the next) and check the soil’s moisture—dry conditions can push grubs deeper, making them harder to reach.
Can harmful garden worms damage my lawn or just plants?
Yes! While they target plants, grubs and wireworms can also devastate lawns by feasting on grass roots. Look for brown, spongy patches that pull up easily—this is a classic sign of grub damage. Treat both garden beds and lawns if you suspect an infestation.
Wrapping up and next steps
Identifying and addressing harmful garden worms is key to protecting your plants and maintaining a thriving garden.
By learning their signs, using natural or targeted solutions, and acting early, you can keep your soil healthy and pest-free. Don’t wait—take action now! Start by inspecting your garden weekly and applying the methods that work best for your situation. Your green space will thank you! 🌱