Pests
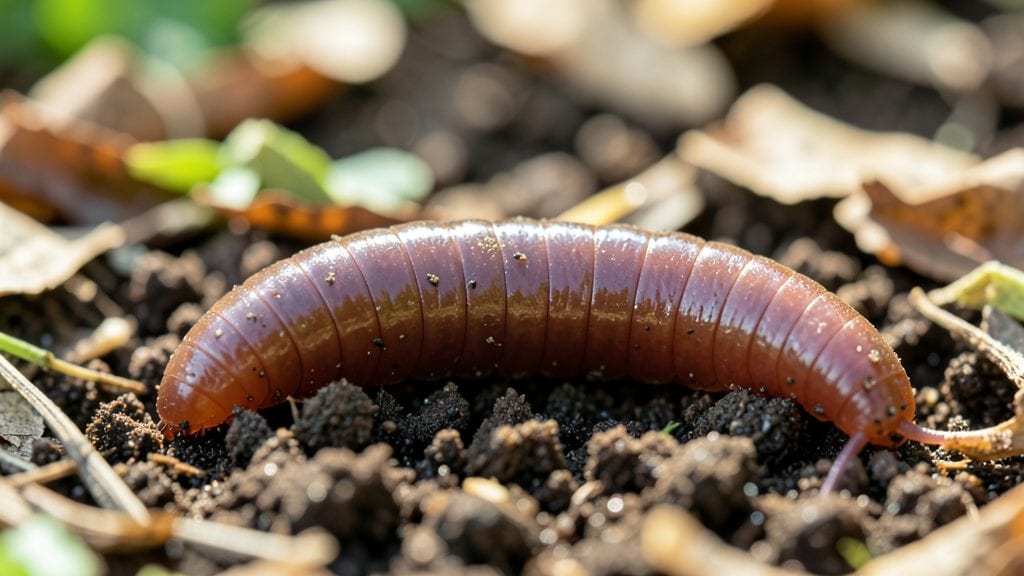
Getting garden worms into your soil is like inviting tiny plows that turn your dirt into black gold. 🌱 I used to struggle with compacted, lifeless soil until I learned how to create the perfect worm magnet—now my garden thrives with their help.
The secret isn’t complicated: worms need moisture, shade, and organic matter to feel at home. Without these, they’ll stay hidden or leave entirely, taking their soil-improving magic with them.
You’ll need just a few simple things to get started: a shady spot, some compost or leaf litter, and a consistent watering routine. Avoid chemical fertilizers—they’ll drive worms away faster than you can say "dead soil."
Instead, focus on mulching with straw or grass clippings and adding kitchen scraps (like fruit peels and coffee grounds) to your beds. Within weeks, you’ll start seeing their tunnels and castings, which improve drainage and plant nutrition.
Once they arrive, your plants will grow stronger and healthier—roots spread easier through aerated soil, and nutrients become available exactly when plants need them. You’ll notice fewer weeds too, since worms help break down organic matter before it can sprout.
The best part? They multiply quickly, so one happy worm today could mean dozens next season.
This works in any garden, from raised beds to in-ground plots, and even small containers. The key is patience and consistency—worms don’t move in overnight, but once they’re settled, your soil will thank you for years to come. Let’s get those tunnels digging!
📚 In This Guide
- What you need
- Instructions
- Tips and common mistakes
- Wrapping up and next steps
What you need
- ● Organic compost or aged manure: 2–3 gallons (rich in nutrients and worm-friendly bacteria).
- ● Leaf litter or shredded leaves: 1–2 inches thick (provides moisture and shelter).
- ● Cardboard or newspaper (unglazed, unbleached): 1–2 sheets (for bedding and moisture retention).
- ● Water (dechlorinated if possible): A spray bottle or small watering can (keep soil damp, not soggy).
- ● Garden bed or container: A shady, moist spot (6+ inches deep for burrowing).
- ● Garden gloves: To protect your hands from rough bedding.
- ● Small shovel or trowel: For mixing materials gently.
- ● Worm attractant: Coffee grounds (1–2 tbsp), banana peels, or crushed eggshells (worms love these!).
- ● Mulch: Straw or wood chips (to retain moisture and block light).
Step-by-Step instructions for attracting garden worms
Here’s how to turn your soil into a worm magnet—naturally and without chemicals.
🌱 Step 1: Create a Worm-Friendly Environment
Worms thrive in moist, slightly acidic soil with plenty of organic matter. Start by testing your soil’s moisture—it should feel like a damp sponge, not a dry brick or a soggy sponge. If your soil is too dry, worms will avoid it. If it’s too wet, they’ll suffocate.
Break up compacted soil with a garden fork to create air pockets. Worms need oxygen just like we do. Work the soil to a depth of 6-8 inches, but avoid disturbing the deeper layers where worms already live. This keeps their tunnels intact and encourages them to stay.
💧 Step 2: Add Organic Matter as Bait
Worms are drawn to decaying plant material, so spread 1-2 inches of compost or well-aged manure over the soil surface. Avoid fresh manure—it’s too strong and can burn worms. Instead, use composted materials like leaf mold, shredded leaves, or grass clippings.
Lightly scratch the surface with a rake to mix the compost into the top inch of soil. This creates a food source that worms can’t resist. If you’re in a new garden bed, add a thin layer of mulch (like straw or wood chips) to retain moisture and provide extra organic matter as it breaks down.
☀️ Step 3: Maintain Moisture and Shade
Worms need consistent moisture but hate standing water. Water the soil until it’s damp to a depth of 4-6 inches, then let it settle. You’ll know it’s right when a handful of soil holds together but doesn’t crumble or drip. Overwatering will drive them away, so avoid soggy conditions.
If your garden gets intense afternoon sun, provide some shade during the hottest hours. Worms are sensitive to extreme heat and dryness. A simple shade cloth or even a row of taller plants can make a big difference. Check the soil daily—if the top inch feels dry, give it a light watering.
⏰ Step 4: Wait and Observe (Patience Pays Off!)
Give it 2-4 weeks before expecting to see worms. They’ll start appearing as they’re drawn to the organic matter. Look for them after a light rain or in the early morning when the soil is moist. You’ll spot them moving through the surface layer or tunneling just below it.
If you don’t see worms after a month, try adding a small amount of worm castings (worm poop!) to the soil. The scent acts like a beacon, signaling to nearby worms that this is a great place to live. Avoid chemical fertilizers—they’ll repel worms faster than anything else.
🌿 Step 5: Encourage Long-Term Worm Habitation
Once worms start moving in, keep feeding them by adding small amounts of organic matter every few weeks. Think of it like a buffet—just enough to keep them interested without overwhelming the soil. Overfeeding can create anaerobic pockets, which worms avoid.
Leave garden debris (like leaf litter or chopped weeds) on the soil surface instead of bagging it up. Worms will tunnel through it, breaking it down and enriching your soil. Avoid synthetic mulches or plastics—they’re worm repellents in disguise.
Tips & tricks for perfect earthworm attraction
Here's what I learned after years of trying—and failing—to create a worm-friendly garden. These are the tricks that actually work.
Soil Texture is Everything: In Step 1, when you're working the soil to 6-8 inches, focus on creating a crumbly texture—not powdery, not compacted. Worms need that perfect balance where air can circulate but moisture stays retained. Think of it like a well-aerated sponge. I use my fingers to gently break up clumps rather than tilling aggressively, which can damage their existing tunnels.
Organic Matter Selection Matters: For Step 2, while compost is ideal, don't overlook the power of coffee grounds! I mix in about 1/4 cup of used coffee grounds per square foot—they're like worm catnip. Just make sure they're fully composted first, as fresh grounds can be too acidic. Also, avoid anything treated with pesticides or chemicals, even in small amounts.
Moisture Maintenance Hack: The key to Step 3 is consistency. I set up a simple drip irrigation system on a timer for 10 minutes every other day during dry spells. This keeps the moisture at that perfect damp sponge level without overwatering. You'll know you've got it right when a handful of soil leaves a slight imprint when squeezed but doesn't stick together.
Patience Pays Off: In Step 4, don't be discouraged if you don't see worms immediately. I've found that the first signs often appear after a light rain when the soil is most inviting. Try creating a small "worm hotel" by burying a shallow container with some compost—it gives them a safe place to explore. Remember, worms are nocturnal, so check after dark with a flashlight when they're most active.
Pro Tips for Get Garden Worms
- Here's what I learned after years of trying—and failing—to create a worm-friendly garden.
- Soil Texture is Everything: In Step 1, when you're working the soil to 6-8 inches, focus on creating a crumbly texture—not powdery, not compacted.
- Organic Matter Selection Matters: For Step 2, while compost is ideal, don't overlook the power of coffee grounds!
Frequently asked questions
Got questions about attracting garden worms? You’re not alone!
Here are answers to the most common queries to help you get started with ease.
How long does it take to attract worms to my garden?
With the right conditions—moisture, organic matter, and shade—you may see worms within 2–4 weeks. Patience is key! Heavy rain or dry spells can delay results, so monitor your soil regularly.
Can I just buy worms instead of attracting them?
Yes! Buying worms (like red wigglers) is a fast way to boost compost or soil, but attracting native worms is free and sustainable. If buying, opt for live, healthy worms from garden centers or online suppliers. Pro tip: Acclimate them gradually to your garden’s conditions to avoid stress.
What if I don’t see any worms after trying these methods?
Check these troubleshooting steps:
- Soil pH: Worms thrive in neutral (6.0–7.0) soil. Test your pH and amend with lime (to raise) or sulfur (to lower) if needed.
- Predators: Birds, moles, or roaches may be eating them. Use barriers or natural deterrents like diatomaceous earth.
- Timing: Worms are nocturnal—check at dusk or dawn with a flashlight.
Are there worms I shouldn’t attract to my garden?
Most garden worms (like Lumbricus terrestris or red wigglers) are beneficial, but avoid earthworm species that burrow deeply (e.g., Amynthas), which can disrupt plant roots. Focus on native, surface-dwelling worms for compost and soil health.
What’s the best time of year to attract worms?
Spring and fall are ideal—mild temps (50–70°F) and consistent moisture encourage worm activity. Avoid extreme heat or freeze; worms slow down or die in these conditions. Water deeply in summer to keep soil hospitable.
Bonus Tip:
Need a quick worm check? Dig a small hole (6–8 inches deep) after rain—worms will migrate upward for air. If you find none, your soil may need more organic matter or better drainage.
Wrapping up and next steps
Getting garden worms into your soil is easier than you think—and the rewards are huge! Whether you’re using nightcrawler bait, compost tea, or simply creating a worm-friendly habitat, these little helpers will transform your garden into a thriving ecosystem.
Start small, stay patient, and watch your soil (and plants) thank you with lush growth!
Ready to take the next step? Pick one method from this guide and give it a try this weekend—your future harvests will thank you! 🌱✨