Landscaping
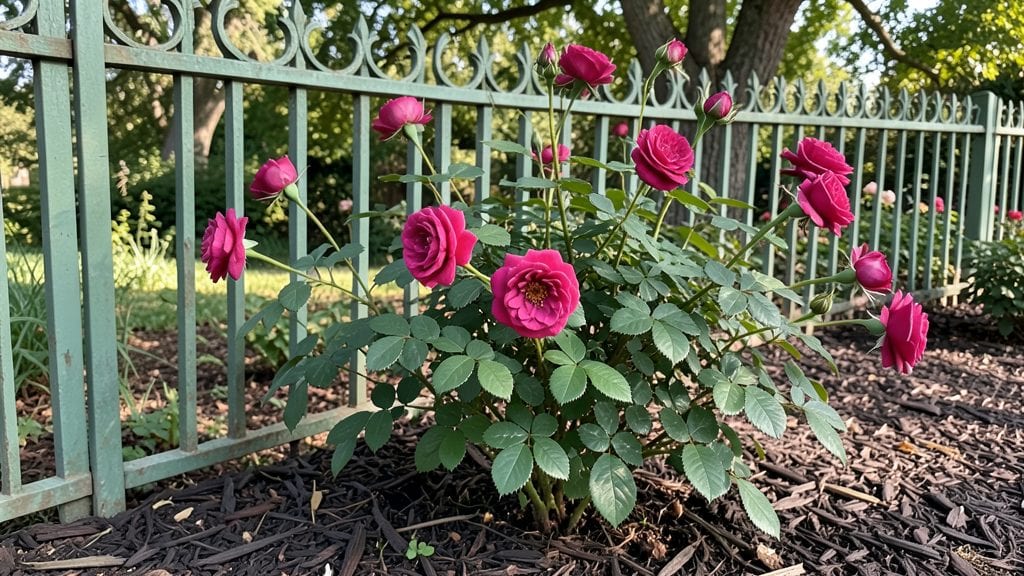
An iron garden fence isn’t just a boundary—it’s a statement piece that transforms your yard into a bold, timeless retreat. 🌿 I’ve seen how these classic fences elevate even the simplest garden layout, adding height, texture, and a touch of old-world charm that no wood or vinyl can match.
The way it catches the light at dusk? Unmatched. And unlike flimsy alternatives, it stands firm against wind, rain, and curious critters.
The real magic happens when you pair it with the right design. Think tall, slender panels for a sleek modern look or ornate scrollwork for a cottage garden vibe. You can even paint it to match your home’s exterior or let the natural metal patina age gracefully over time.
The best part? It’s not just pretty—it’s built to last decades with minimal upkeep, making it a smart investment for any outdoor space.
By the end, your garden will feel like a private sanctuary, with layers of privacy and a vertical garden effect when you add climbing roses or ivy. The fence becomes a canvas for your plants to climb, while its sturdy structure keeps everything contained.
Plus, it adds value to your home—neighbors will be asking where you got yours.
Whether you’re framing a cozy seating area or defining a vegetable patch, an iron fence works for any style. The key is choosing the right height and pattern to match your vision. Let’s get into what makes these fences so special—and how to make them your own.
📚 In This Guide
- What you need
- Instructions
- Tips and common mistakes
- Wrapping up and next steps
What you need
- ● Iron fence panels: Pre-cut to your desired height (typically 6–8 ft tall) and length (measure your property line). Opt for powder-coated or galvanized iron for durability.
- ● Concrete footings: 4–6 bags of quick-setting concrete mix (check coverage per bag) for securing posts.
- ● Iron fence posts: 4–6 posts (depending on fence length), 4–6 ft long, with threaded ends for easy attachment.
- ● Post caps: Decorative or functional caps to protect post tops (match your fence style).
- ● Landscape fabric: A roll to prevent weeds and grass from growing near the base.
- ● Measuring tape (25+ ft for accuracy).
- ● Post hole digger (manual or auger) or shovel for digging.
- ● Level (4-ft for fence alignment).
- ● Wrench set (adjustable and socket wrenches for post bolts).
- ● Drill/driver (for assembling panels and posts).
- ● Safety gear: Gloves, goggles, and steel-toe boots (iron is heavy!).
- ○ Optional: Concrete mixer (if mixing large batches), post leveling brackets, or fence tension tools for extra stability.
- ● Check local building codes for height restrictions or permits (iron fences often require approval).
- ● Clear the installation area of rocks, debris, and vegetation.
- ● Mark post locations with spray paint or stakes for precision.
- ● Have a helper on hand—iron panels are heavy and tricky to maneuver alone! 💪
Step-by-Step guide to installing an iron garden fence
Here's how I install a sturdy, wind-resistant iron fence that lasts for decades.
🪴 Step 1: Measure and Mark Your Layout
Start by measuring your space with a tape measure—iron fence sections are typically 4-6 feet wide, so plan your layout accordingly. Use a notepad to sketch your design, marking where posts will go every 6-8 feet along the fence line. This spacing ensures stability even in windy conditions.
Transfer your measurements to the ground using spray paint or stakes. Double-check diagonals to confirm your layout is square. I always verify the corners first—they're the most critical for alignment. If you're working with curves, bend the fence sections slightly before installation to follow the natural contour.
🌱 Step 2: Dig Post Holes and Set Concrete Footings
Dig holes 12 inches wide and 24 inches deep at each marked post location using a post hole digger. The depth ensures your fence won't shift in strong winds or seasonal soil movement. Remove any rocks or debris from the bottom of each hole.
Mix the concrete according to the bag instructions—you'll need about 1 gallon per hole. Pour the concrete into each hole, then insert the post immediately. Use a level to ensure the post stands perfectly vertical before the concrete sets. I tap the post gently with a rubber mallet while checking alignment—this prevents crooked sections later.
☀️ Step 3: Assemble and Attach Fence Sections
Start assembling your fence sections on the ground before attaching them to the posts. Most iron fences connect with bolt-and-nut hardware, so follow the manufacturer's torque specifications—over-tightening can warp the metal. Leave a ¼-inch gap between sections to allow for thermal expansion.
Lift each section into place and secure it to the posts with the provided hardware. I use a wrench to tighten bolts in a diagonal pattern—this keeps pressure even and prevents warping. Check for level after every other section to catch any misalignment early. For extra stability in windy areas, add a horizontal brace between posts every 4 feet.
✂️ Step 4: Finish and Maintain for Longevity
Once all sections are installed, clean any concrete splatter from the fence with a wire brush and water. Apply a metal primer and paint to protect against rust—this is especially important if your fence faces direct sunlight or moisture. I use a high-quality outdoor paint designed for iron, which lasts 3-5 years before needing touch-ups.
After installation, check for tightness every 6 months—wind and temperature changes can loosen bolts over time. Keep the area around the fence clear of debris to prevent moisture buildup. With proper maintenance, an iron fence will stand strong for decades, offering both privacy and curb appeal.
⏰ Step 5: Add Optional Decorative Touches
For a finished look, consider adding lattice panels or climbing plants to soften the fence's appearance. I often plant ivy or roses along the base to blend the metal with the garden. If you're installing near a walkway, add 2-3 inches of gravel around the base to improve drainage and prevent rust.
This final step is purely aesthetic, but it makes all the difference in how your fence integrates with your outdoor space. A well-decorated iron fence not only provides privacy but also enhances your garden's overall design. Take your time here—it's the last chance to make your fence truly your own.
Tips & tricks for perfect iron garden fence installation
A few key strategies will help you avoid common pitfalls and ensure your iron fence stands strong for years to come.
Precision in Step 1 Pays Off: When marking your layout in Step 1, use a helper to hold the tape measure at both ends for accuracy. I've learned the hard way that even a 1-inch error over 20 feet creates noticeable misalignment. For curves, bend sections gradually—don't force them, or you'll risk warping that's hard to fix later.
Concrete Setting Secret: In Step 2, don't rush pouring concrete—work in batches so you can properly level each post. I mix just enough for 2-3 holes at a time, then use a 2x4 board as a guide to keep posts perfectly vertical while the concrete sets. This prevents the common issue of posts leaning after curing.
Bolt-Tightening Technique: When assembling sections in Step 3, follow the manufacturer's torque specs exactly—over-tightening can warp the metal. I use a diagonal tightening pattern (like a star) to distribute pressure evenly. For extra wind resistance, add horizontal braces every 4 feet as mentioned, but make sure they're flush with the fence line to maintain a clean look.
Paint Application Pro Tip: After finishing in Step 4, apply paint when temperatures are between 50-85°F for best adhesion. I use a high-quality outdoor paint designed for iron and apply two thin coats rather than one thick one. This prevents drips and ensures full coverage, especially important for sections facing direct sunlight or moisture.
Pro Tips for Iron Garden Fence
- A few key strategies will help you avoid common pitfalls and ensure your iron fence stands strong for years to come.
- Precision in Step 1 Pays Off: When marking your layout in Step 1, use a helper to hold the tape measure at both ends for accuracy.
- Concrete Setting Secret: In Step 2, don't rush pouring concrete—work in batches so you can properly level each post.
Frequently asked questions
Got questions about installing or maintaining an iron garden fence?
You’re not alone! Here are answers to the most common concerns—so you can confidently add that striking vertical privacy to your space.
How long does it take to install an iron garden fence?
Installation time varies, but a typical 6-foot iron fence (for a 100-foot run) usually takes 2–4 days for a DIY project or 1–2 days with pros. Factors like terrain, post depth, and custom designs (like scrollwork) can extend the timeline. Plan ahead—especially if you’re adding concrete footings!
Is an iron fence more expensive than wood or vinyl?
Yes, iron fences are premium-priced—typically $25–$100 per linear foot installed, compared to $10–$30 for wood or vinyl. The cost reflects durability, low maintenance, and timeless style. Pro tip: Look for pre-galvanized or powder-coated options to cut long-term rust risks and save on repainting!
Will an iron fence hold up in high winds or storms?
Iron’s rigid structure and deep post embedment (3–4 feet below ground) make it storm-resistant. For extra security, choose wrought iron (heavier than steel) or add diagonal braces for windy areas. Just avoid flimsy decorative panels—they’re more prone to bending.
Can I paint or customize my iron fence after installation?
Yes! Iron fences are highly customizable. Start with a primer (like zinc chromate) to prevent rust, then use exterior-grade paint or powder coating. Popular styles include black wrought iron, antique bronze, or custom stenciled designs. Pro tip: Seal edges and weld points first—they’re prime spots for corrosion!
What’s the best alternative if I want privacy but not iron’s weight?
Consider these lighter but private options:
- Vinyl fencing: Low-maintenance, $15–$40/ft, but lacks iron’s durability.
- Aluminum fencing: Rust-proof, $10–$30/ft, but can dent easily.
- Composite wood: Mimics iron’s look with natural wood grain, $20–$50/ft.
- Living fence (bamboo/hedges): Eco-friendly but requires regular trimming.
Wrapping up and next steps
An iron garden fence isn’t just a boundary—it’s a statement of elegance, durability, and timeless style that actually holds up against the elements. Whether you’re drawn to its classic scrollwork, rustic charm, or modern minimalism, this fence delivers privacy, security, and curb appeal without sacrificing strength.
With the right materials and a little elbow grease, you’re well on your way to transforming your outdoor space into a serene, stylish retreat.
Ready to make your vision a reality? Start by sketching your design, gathering supplies, and taking it one panel at a time—your future backyard oasis is waiting! 🌿✨