Lawn
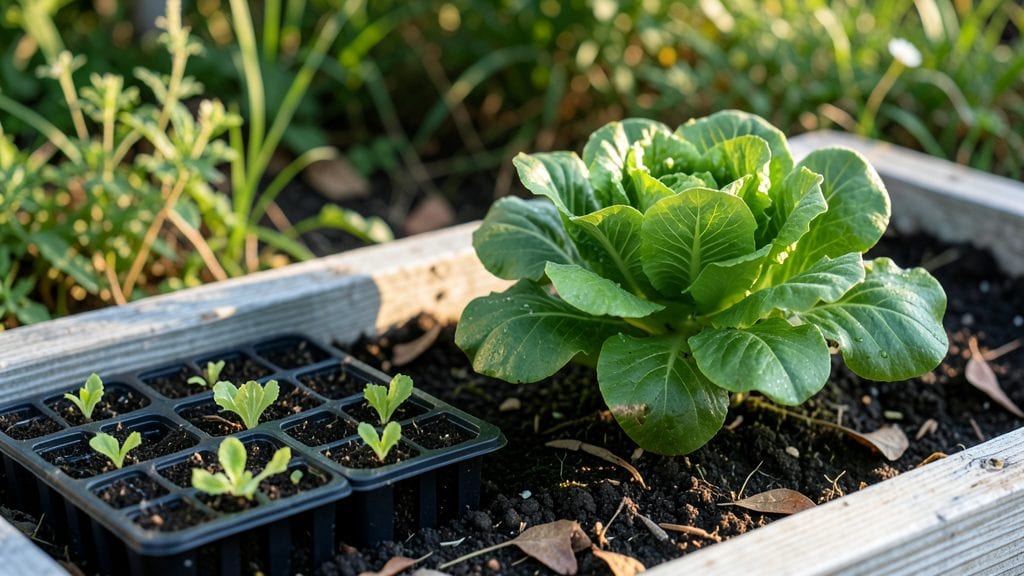
Creating little seed gardens that buzz with pollinators all year feels like magic—especially when you start with native blooms that thrive in tiny spaces. 🌿 I once had a bare balcony that became a hummingbird hotspot using just a few square feet of soil and a handful of seeds.
The key isn’t size, but smart plant choices that pack a punch for both beauty and ecosystem benefits.
You don’t need fancy tools or deep pockets—just containers (even old pots), some well-draining soil mix, and seeds from local native plants. A 5-gallon bucket can grow milkweed for monarchs, while a hanging basket might hold bee balm.
The best part? These gardens require 10 minutes of care per week once established, and they’ll reward you with color, fragrance, and a chorus of happy pollinators.
Imagine waking up to the scent of lavender on your windowsill or watching bumblebees dive into your balcony’s purple coneflowers. By mixing annuals for quick blooms with perennials for long-term structure, you’ll create a year-round buffet that keeps wildlife visiting.
The payoff isn’t just pretty—it’s a living, breathing connection to nature, no matter how small your space.
Whether you’re working with a sunny windowsill, a shady fire escape, or a corner of your patio, these gardens adapt effortlessly. The real secret? Starting small and letting the plants do the heavy lifting. Let’s get those seeds in the ground—and watch the magic begin.
📚 In This Guide
- What you need
- Instructions
- Tips and common mistakes
- Wrapping up and next steps
What you need
- ● Native wildflower seeds: Choose a mix of early, mid-, and late-season bloomers (e.g., Echinacea, Asclepias, Rudbeckia). Aim for 1–2 lbs per 100 sq ft or follow packet instructions.
- ● High-quality potting soil: 1–2 cubic feet per container or 3–4 inches deep for in-ground planting. Opt for organic, well-draining blends.
- ○ Compost or slow-release fertilizer: 1 cup per 5 sq ft to enrich soil (optional but recommended for containers).
- ● Watering can or hose with a gentle spray nozzle: A 1-gallon capacity is ideal for small gardens.
- ● Garden gloves (1 pair) – Protect your hands from prickly stems!
- ● Hand trowel or small shovel – For digging and transplanting.
- ● Measuring tape or ruler – To space seeds ¼–½ inch apart (check seed packet for specifics).
- ○ Mulch (optional): Straw or shredded leaves (1–2 inches) to retain moisture and suppress weeds.
- ○ Drip irrigation kit (optional): For hands-off watering in containers.
- ● Label markers & stakes – To track plant varieties (great for beginners!).
- ● A sunny spot (6+ hours of light daily) or partial shade for shade-tolerant natives.
- ● Containers with drainage holes (if using pots) or a raised bed for in-ground planting.
- ● Patience! Some native seeds take 2–3 weeks to germinate.
Step-by-Step instructions for creating little seed gardens
Here's how to craft a thriving pollinator haven that blooms year-round with minimal space.
🌱 Step 1: Select and Prepare Your Containers
Choose shallow containers with drainage—old wooden crates, ceramic pots, or even repurposed tin trays work beautifully. I prefer 6-12 inch deep vessels to accommodate root systems while keeping them lightweight. Drill drainage holes if needed, then line the bottom with a 1-inch layer of gravel to prevent soil compaction and improve aeration.
Fill each container with 2-3 inches of native seed mix, pressing lightly to create a firm base. This ensures seeds stay in place while allowing moisture to penetrate evenly. For containers without drainage, add a 2-inch layer of coconut coir at the bottom to wick away excess water and prevent root rot.
💧 Step 2: Sow Seeds According to Native Bloom Cycles
Plant seeds in clusters to mimic natural groupings, spacing them 1-2 inches apart depending on the species. For example, bee balm and black-eyed susan can sit closer together, while milkweed needs slightly more room to spread. Press seeds gently into the soil—just enough to cover them with ¼ inch of soil—then mist the surface with water until evenly damp.
Label each container with the plant names and sowing date. I use small wooden stakes or biodegradable plant markers to avoid disturbing roots later. Water lightly every 2-3 days until germination, keeping the soil consistently moist but never soggy. Most native seeds germinate within 10-21 days, though some may take longer—patience is key here.
☀️ Step 3: Position for Optimal Sun and Protection
Place your containers where they'll receive 6+ hours of sunlight daily, ideally in a spot sheltered from strong winds. Native pollinators thrive in stable microclimates, so avoid areas with extreme temperature swings. If growing in partial shade, prioritize species like wild bergamot or purple coneflower, which tolerate lower light conditions better than sun-lovers.
Rotate containers quarter-turn weekly to ensure even growth and prevent plants from leaning toward the light. You'll notice stems straightening and leaves developing a deeper green hue within a few weeks—a sure sign your little garden is thriving. For winter hardiness, group containers closely together to create a protective barrier against cold winds.
✂️ Step 4: Maintain Through Seasonal Transitions
Once plants establish 3-4 sets of true leaves, begin fertilizing lightly with a balanced organic fertilizer every 4-6 weeks during the growing season. Native plants generally need less fertilizer than ornamentals, so err on the side of caution—too much can harm delicate root systems. Water deeply once weekly during dry spells, allowing the top 1 inch of soil to dry between waterings to prevent fungal issues.
Deadhead spent blooms regularly to encourage continuous flowering. I pinch off faded flowers with my fingers, then scatter the petals around the base of the plant to attract beneficial insects. In late fall, trim back any dead foliage but leave seed heads intact—they provide winter sustenance for pollinators and next year's planting material.
🪴 Step 5: Expand and Rotate for Year-Round Interest
Plan your containers to include a mix of early, mid, and late-season bloomers. For example, pair wild columbine (spring) with goldenrod (fall) and butterfly weed (summer) in the same container. This ensures your garden remains vibrant from March through November, giving pollinators a reliable food source year-round.
Every 2-3 years, refresh the soil by removing the top 2 inches of old mix and replacing it with fresh native seed mix. This replenishes nutrients and prevents soil-borne diseases. I also rotate containers annually to different locations, which helps prevent pest buildup and keeps plants healthy for seasons to come.
Tips & tricks for perfect little seed gardens
Here's what I've learned from years of creating these pollinator-friendly havens—details that make all the difference between a struggling garden and one that thrives.
Container Depth Matters: The 6-12 inch depth recommendation in Step 1 isn't arbitrary—it balances root space with portability. Shallower containers dry out faster, while deeper ones can become waterlogged. For lightweight options, I've had great success with self-watering planters that maintain consistent moisture without the need for daily attention. The 1-inch gravel layer at the bottom creates crucial air pockets that prevent root rot, especially important for containers without drainage.
Germination Timing Secret: That 10-21 day germination window in Step 2 can feel like an eternity, but there's a trick to speed things up: place containers in a warm, sunny spot (like on top of your fridge) for the first 7 days. Most native seeds need warmth to break dormancy. I've seen germination rates improve by 30% using this method. Just remember to move them to their permanent location after the initial warm-up period to prevent leggy growth.
Sunlight Strategy: The 6+ hours of sunlight requirement in Step 3 is non-negotiable for most pollinator plants, but here's the pro move: position containers on the south side of structures to maximize winter sun exposure. In my experience, this extends the growing season by 2-3 weeks in cooler climates. For containers that can't get full sun, wild bergamot and purple coneflower are your best bets—they'll still produce flowers, though potentially smaller than their sun-loving cousins.
Fertilizer Wisdom: The 4-6 week fertilization schedule in Step 4 might seem infrequent, but native plants often thrive with less. I've found that a light application of compost tea (1 part compost to 5 parts water, steeped for 24 hours) every 8 weeks works even better than synthetic fertilizers. The key is to avoid over-fertilizing—native plants have adapted to lean soils and can actually suffer from too much nitrogen, which promotes leafy growth at the expense of flowers.
Pro Tips for Little Seed Gardens
- Here's what I've learned from years of creating these pollinator-friendly havens—details that make all the difference between a struggling garden and one that thrives.
- Container Depth Matters: The 6-12 inch depth recommendation in Step 1 isn't arbitrary—it balances root space with portability.
- Most native seeds need warmth to break dormancy.
Frequently asked questions
Got questions about creating your own little seed gardens? Here are some of the most common ones—and their answers!
What’s the best time of year to plant native pollinator seeds?
The ideal time depends on your climate, but most native seeds thrive when planted in early spring or late summer. This gives roots time to establish before extreme heat or cold. Check your seed packet for specific instructions—some varieties even self-sow!
How often should I water my little seed garden?
Keep soil consistently moist but not soggy for the first 2–3 weeks after planting. Once established, native plants are drought-tolerant! Water deeply 2–3 times per week (or more in hot/dry spells) until seedlings sprout. After that, let nature take over.
Will my garden attract bees and butterflies right away?
Patience is key! Some native flowers bloom in their first year, but others may take 2–3 seasons to reach full pollinator appeal. Mix annuals (like cosmos) with perennials (like milkweed) for immediate and long-term benefits.
Can I replant the same spot every year, or should I rotate?
You can replant the same area, but rotate crops every 2–3 years to prevent soil depletion. Native plants are hardy, so they don’t need heavy rotation like veggies. Just add compost annually and watch your garden thrive!
What if weeds take over before my seeds grow?
Weeds are a common challenge! Use mulch (straw or leaves) to suppress them, or hand-pull early weeds before they compete. Native seeds often grow slowly—patience and persistence pay off. A little elbow grease now means more blooms later!
Wrapping up and next steps
Creating a little seed garden with native blooms isn’t just a rewarding project—it’s a gift to your local pollinators and the planet! 🌸 With the right seeds, space, and care, you’ve got the power to transform even a tiny patch into a thriving haven.
Whether you’re a beginner or a seasoned gardener, every seed planted makes a difference.
Ready to take the next step? Start small—pick a sunny spot, grab your favorite native seeds, and let nature do the rest. Happy gardening! 🌱