Tools
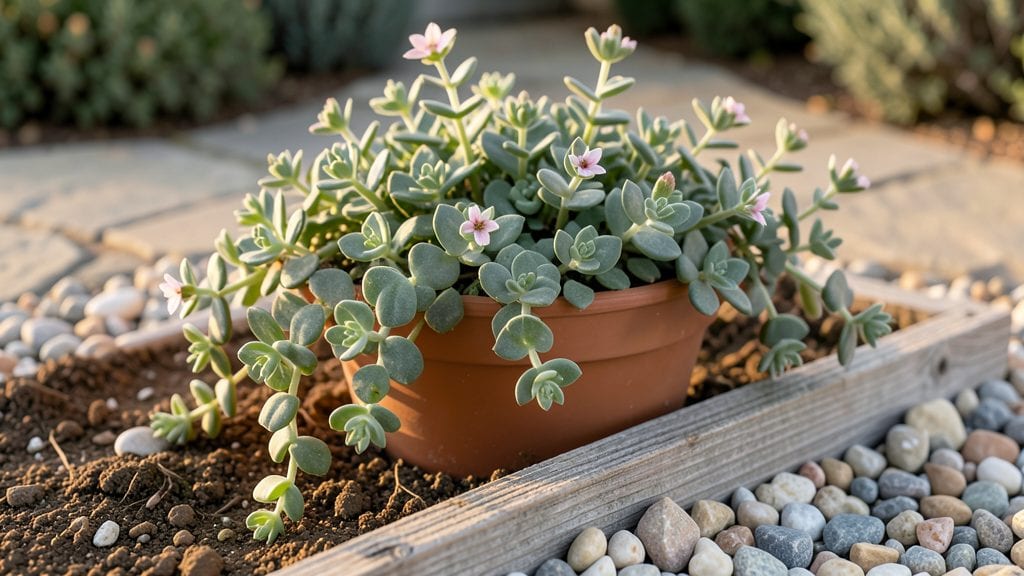
A mini rock garden transforms even the tiniest balcony or windowsill into a thriving, drought-tolerant oasis that looks like it belongs in a mountain meadow. 🌿 I built mine in a 12-inch-wide pot last spring, and now it’s the most talked-about corner of my patio—no matter the season.
The secret isn’t just the rocks; it’s the way moisture-loving moss and sun-seeking sedums play off each other, creating layers that stay green when other plants wilt.
You’ll need just three things to start: a shallow container with drainage holes, a mix of coarse sand and potting soil (about 60/40 ratio), and rocks in varying sizes—smooth river stones for pathways, flat slabs for seating spots, and pebbles for texture.
The plants? Think tiny: creeping thyme, hen-and-chicks, and alpine phlox thrive in these conditions, while moss softens the edges like a natural carpet. Even in my dry climate, this garden stays lush because the rocks regulate temperature and the soil drains fast.
By summer’s end, you’ll have a miniature landscape that feels like a retreat—complete with delicate blooms, velvety moss, and the satisfying crunch of stones underfoot. The best part? It’s nearly maintenance-free once established, so you can enjoy the view without the upkeep.
Whether you go for a Zen-inspired arrangement or a wild, desert-style mix, the possibilities are endless for creating something uniquely yours.
Works in containers as small as 6 inches or as large as a raised bed, and adapts to any style—from modern minimalism to cottage charm. Here’s how to bring it to life without overcomplicating it.
📚 In This Guide
- What you need
- Instructions
- Tips and common mistakes
- Wrapping up and next steps
What you need
- ● Rocks: 10–20 lbs of small to medium-sized rocks (1–3 inches in diameter). Mix textures for visual appeal—smooth river rocks, flat slabs, or jagged stones work great!
- ● Gravel: 2–3 lbs of coarse gravel (¼–½ inch) for drainage and base layer.
- ● Soil: 1–2 bags of well-draining potting mix or cactus/succulent soil (avoid heavy garden soil).
- ● Plants: 3–5 drought-tolerant plants (e.g., sedum, hens-and-chicks, or moss). Choose low-maintenance varieties!
- ● Container: A shallow tray, ceramic pot, or wooden box (12–18 inches wide) with drainage holes.
- ● Tools: Trowel or small shovel
- ● Garden gloves
- ● Measuring tape or ruler
- ● Spray bottle (for misting plants)
- ● Decorative pebbles or sand (for borders or accents)
- ● Miniature figurines (fairies, animals, or garden ornaments)
- ● Moss sheets (for a lush, carpet-like effect)
- ● Solar-powered LED lights (to highlight your garden at night)
- ● Pebble tray or saucer (to catch runoff)
Step-by-step instructions for building a mini rock garden
Here's how to create a charming, low-maintenance rock garden that thrives in small spaces.
🪴 Step 1: Choose and Prepare Your Container
Select a shallow, wide container with drainage holes—think 12-18 inches deep and at least 18 inches wide to accommodate your 4 plants. I like ceramic or plastic trays because they’re lightweight and easy to move. If using a natural stone dish, add a plastic liner first to prevent soil loss.
Line the bottom with 2-3 inches of small gravel or pebbles to create a drainage layer. This prevents root rot by ensuring excess water escapes quickly. Press the stones gently so they stay in place but don’t compact the soil above.
🌱 Step 2: Layer Soil and Rocks for Drainage
Add 3 inches of coarse sand over the gravel layer to further improve drainage. This is especially important for succulents or alpine plants, which hate soggy roots. Next, mix 2 gallons of potting soil with 1 cup of perlite to lighten the blend and encourage airflow.
Spread the soil mixture evenly, leaving 1-2 inches of space at the top for rocks. Press down lightly with your fingers—just enough to remove air pockets but not so much that you compact the soil. This layer will hold your plants while allowing water to drain freely.
☀️ Step 3: Arrange Rocks and Plants for Visual Appeal
Start by placing larger rocks along the edges or in clusters to create natural-looking groupings. Use flat stones to create pathways or ledges, and smaller pebbles to fill gaps. Arrange them first so you can see where plants will fit best—this is the fun part!
Dig small holes for your 4 plants, spacing them 4-6 inches apart depending on their mature size. Gently remove each plant from its nursery pot, loosen the roots if they’re circling, and place it in the hole. Fill around the roots with soil, pressing lightly to eliminate air gaps.
💧 Step 4: Water and Settle for the First Few Days
Water the garden thoroughly until water drains from the bottom holes. Let it sit for 10-15 minutes, then drain any excess from the saucer. This ensures your plants get a good drink without sitting in standing water. After the first watering, wait until the top inch of soil feels dry before watering again.
Place your rock garden in a spot with 4-6 hours of sunlight daily—most succulents and alpine plants thrive in bright light. If using shade-tolerant plants, choose a location with dappled sunlight or partial shade. Avoid moving it for the first week to let the roots settle in.
✂️ Step 5: Maintain with Minimal Effort
Water once a week during the growing season, reducing to every 2 weeks in winter when growth slows. Use a spray bottle for delicate plants to avoid disturbing the rocks. Remove any weeds that pop up—rock gardens stay tidy because weeds struggle to take hold in the rocky terrain.
Fertilize lightly once in early spring with a balanced, water-soluble fertilizer diluted to half strength. Over-fertilizing can burn plants in rocky soil, so less is always better. Prune spent flowers or leggy growth as needed to keep your garden looking fresh and whimsical.
Tips & tricks for perfect mini rock garden
These little details make all the difference in creating a rock garden that looks stunning and stays healthy for years.
Drainage is Everything: Don't skip the 2-3 inches of gravel at the bottom—this is the secret to preventing root rot. I learned this the hard way when my first garden's plants wilted after just two waterings. The gravel creates a reservoir that lets excess water drain while still keeping moisture available for roots. For extra insurance, add a layer of landscape fabric between the gravel and soil to prevent fine particles from clogging the drainage layer.
Soil Mix Matters: The combination of 2 gallons of potting soil with 1 cup of perlite creates the perfect balance of moisture retention and aeration. I recommend sifting the soil before mixing to break up any clumps—this ensures even distribution when you spread it. For a bonus, add a handful of worm castings to give your plants a nutrient boost without over-fertilizing.
Rock Placement Strategy: Start with your largest rocks first—they anchor the design and create visual interest. I like to place them along the edges or in clusters of three, which mimics natural rock formations. For the 1-2 inches of space you leave at the top, use smaller pebbles to fill gaps while keeping the look natural. Pro tip: Save any rocks that look like they belong together and place them near each other for a cohesive look.
Watering Wisdom: That 10-15 minute drainage time after watering is crucial—it prevents waterlogging while ensuring roots get properly hydrated. I use a spray bottle for delicate plants during maintenance to avoid disturbing the rocks. For the top inch of soil dry rule, stick your finger in the soil about an inch deep; if it feels dry, it's time to water again. This method works perfectly for both succulents and shade-tolerant plants.
Pro Tips for Mini Rock Garden
- These little details make all the difference in creating a rock garden that looks stunning and stays healthy for years.
- Drainage is Everything: Don't skip the 2-3 inches of gravel at the bottom—this is the secret to preventing root rot.
- Soil Mix Matters: The combination of 2 gallons of potting soil with 1 cup of perlite creates the perfect balance of moisture retention and aeration.
Frequently asked questions
Got questions about creating or maintaining your mini rock garden? You’re not alone! Here are some of the most common queries—and their answers—to help you design, plant, and enjoy your tiny oasis with ease.
What’s the best time of year to start a mini rock garden?
Aim for early spring or fall when temperatures are mild. This gives plants time to establish roots before extreme heat or cold. If you’re in a warm climate, late winter works too—just avoid planting during frost or peak summer heat. Pro tip: Start with hardy succulents or alpine plants if your zone has harsh winters!
How often should I water a rock garden?
Rock gardens need less water than traditional gardens because rocks retain moisture. Water deeply but infrequently—about once a week (or every 10 days in dry climates). Check soil moisture by lifting a rock: if the top inch is dry, it’s time to water. Morning watering prevents evaporation, and mulch (like gravel or bark) helps lock in moisture.
Can I use regular potting soil for a rock garden?
Not ideal! Rock gardens thrive with well-draining, gritty soil to prevent root rot. Mix 50% potting soil with 50% perlite, coarse sand, or pumice for aeration. For alpine plants, use a specialized cactus/succulent mix. Add a handful of orchid bark for extra drainage if needed.
How do I keep pests out of my mini rock garden?
Rock gardens are naturally pest-resistant, but slugs, snails, and aphids might still visit. Prevent issues with:
- Diatomaceous earth (food-grade) around the base.
- Neem oil spray for soft-bodied pests.
- Encouraging beneficial insects like ladybugs.
What are some low-maintenance alternatives to rocks?
If rocks aren’t your style, try:
- Gravel or pebbles (easier to clean, still drains well).
- Wood chips or bark mulch (great for woodland-themed gardens).
- Terra-cotta shards or broken pottery (adds texture and hides weeds).
Why are my plants wilting even though I’m watering?
Wilting often signals overwatering or poor drainage. Check:
- Is water pooling at the bottom? Add more rocks or adjust the container’s slope.
- Are roots sitting in soggy soil? Let it dry out between waterings.
- Is the soil compacted? Loosen it gently with a fork to improve airflow.
Wrapping up and next steps
A mini rock garden is more than just a decorative addition—it’s a low-maintenance, year-round green space that brings nature’s charm to your home or office.
Whether you’re drawn to its rustic beauty, drought-resistant appeal, or the joy of nurturing tiny plants, this project is perfect for gardeners of all levels. 🌿
Ready to transform a small corner into a thriving oasis? Start by gathering your materials, sketch a simple design, and let your creativity flow. Your mini rock garden awaits—happy planting! 🌱