Container Gardens
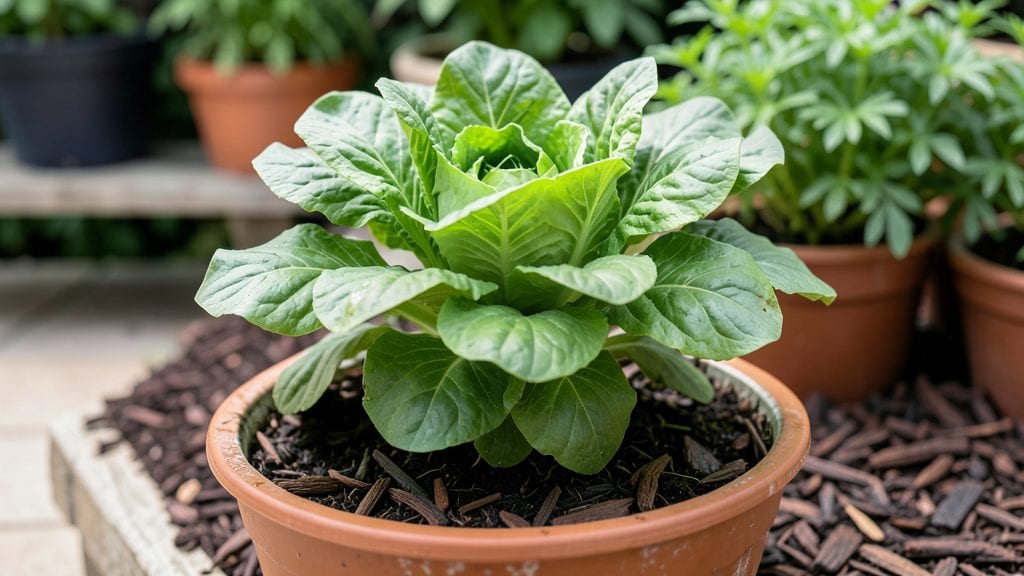
My mulch container garden saved my struggling herbs last summer when temperatures hit 95°F every afternoon. 🌿 The right mulch layer kept roots cool, locked in moisture, and even cut down on watering by half—without turning my pots into soggy messes.
I’d been dumping mulch in my in-ground beds for years, but containers need a smarter approach, and once I figured it out, my basil and peppers thrived when they should’ve been wilting.
The secret isn’t just any mulch—it’s matching the type to your plants and pots. Organic options like shredded bark or straw work great for moisture control, while inorganic choices like pebbles or landscape fabric reflect heat better for sun-loving plants.
I use a 2-inch layer of organic mulch on my herbs (it breaks down faster) and a 1-inch layer of pebbles on my heat-sensitive lettuce. The key is keeping it loose enough to let air reach roots but thick enough to insulate.
By mid-summer, my containers stayed consistently moist without daily watering, and the soil temperature never spiked above 85°F—ideal for root health. The mulch also kept weeds from popping up in my shallow pots, which was a game-changer for my balcony garden.
You’ll notice less stress on plants, fewer wilting leaves, and even extended blooming seasons for flowers. The best part? It’s a 10-minute job that pays off all season.
Works for everything from window-box herbs to 5-gallon tomato pots, and it’s especially critical in hot climates or small spaces where soil dries out fast.
Just avoid piling mulch right against stems—keep it 1-2 inches away to prevent rot. Once you try it, you’ll wonder how you ever gardened without it.
📚 In This Guide
- What you need
- Instructions
- Tips and common mistakes
- Wrapping up and next steps
What you need
- ● Container: A sturdy, weather-resistant container (plastic, wood, or fabric) with drainage holes. Size: At least 12" deep and wide (bigger = better for roots!).
- ● Drainage layer: Small rocks (½"–1"), gravel, or broken pottery shards (2–3" thick).
- ● Mulch: Organic mulch like straw, shredded leaves, or wood chips (3–4" layer). Pro tip: Avoid fresh wood chips—they can rob nitrogen from soil!
- ● Soil: High-quality potting mix (avoid garden soil—it compacts!). Quantity: Enough to fill the container ¾ full after drainage.
- ● Compost: 1–2 cups per container to boost nutrients.
- ● Plants: Choose cold-hardy or mulch-loving varieties (e.g., lettuce, kale, or strawberries).
- ● Garden trowel or small shovel
- ● Gloves (to keep hands clean!)
- ● Watering can or hose with a gentle spray nozzle
- ○ Optional: Thermometer (to monitor soil temp in winter) or a moisture meter.
- ● A sunny or partially shaded spot (check your plants’ light needs!).
- ● Access to water (mulch gardens dry out faster in containers!).
- ● Bonus: A small wheelbarrow or bucket for mixing soil and mulch.
Step-by-step instructions for creating a mulch container garden
This method keeps roots cool, conserves water, and prevents weeds—perfect for small spaces.
🪴 Step 1: Choose and Prepare Your Containers
Pick containers with drainage holes—terracotta pots, fabric grow bags, or even repurposed buckets work. I like to use 12-18 inch deep containers for most vegetables and herbs, as they provide enough root space while staying manageable. If your containers are new, give them a quick rinse with water to remove any manufacturing residue.
Line the bottom with a 1-2 inch layer of gravel or broken pottery if your containers lack drainage. This prevents soil from clogging the holes and ensures excess water escapes. For fabric grow bags, skip this step—they drain naturally, but check for tears before planting.
🌱 Step 2: Layer the Base Soil and Initial Mulch
Fill the bottom third of your container with a lightweight potting mix. Avoid garden soil—it compacts in containers and suffocates roots. Press it down gently to remove air pockets, but don’t pack it tightly. This base layer gives roots room to establish before hitting the mulch.
Top this with a 1-2 inch layer of coarse mulch, like wood chips or straw. This isn’t the final mulch layer—it’s a temporary barrier to prevent soil from mixing with the top mulch later. Water this layer lightly until the soil below feels damp but not soggy. You’ll see moisture seep through the mulch, signaling it’s ready for the next step.
💧 Step 3: Add Plants and Apply the Mulch Layer
Plant your chosen small-space crops—herbs, shallow-rooted veggies, or even dwarf fruit trees—spaced according to their mature size. For example, basil thrives in 6-inch spacing, while dwarf tomatoes need 12-18 inches between plants. Water them in thoroughly after planting to settle the roots.
Now, apply a 2-3 inch layer of finished mulch on top of the soil. Use materials like shredded bark, pine needles, or straw—just avoid fresh wood chips, which can rob nitrogen from the soil. Leave a 1-inch gap around plant stems to prevent rot. This layer will insulate roots, retain moisture, and block weeds.
☀️ Step 4: Maintain Moisture and Insulation
Water deeply every 2-3 days in hot weather, but check the soil first—mulch slows evaporation, so you’ll notice the top layer stays drier longer. Stick your finger 1 inch into the soil; if it feels dry, it’s time to water. Avoid wetting the mulch itself, as this can create a soggy, anaerobic layer that stunts roots.
Top up the mulch layer every 2-3 months as it breaks down. You’ll see it decompose into the soil, enriching it naturally. This is normal—just replenish to maintain the 2-3 inch thickness. In winter, add an extra inch of mulch to protect roots from freezing temperatures.
✂️ Step 5: Prune and Refresh as Needed
Monitor your plants for signs of stress—yellowing leaves often mean the mulch is too thick or compacted. Gently fluff the mulch with a fork or your hands to restore airflow. If weeds poke through, pull them immediately—they’ll compete with your plants for nutrients and water.
When harvesting, trim plants back by one-third to encourage bushier growth. This also prevents overcrowding, which can lead to fungal issues in thick mulch layers. After heavy rains, check for water pooling on top of the mulch and adjust your watering schedule to prevent soggy soil.
Tips & tricks for perfect mulch container gardens
Here's what I've learned after perfecting this system over years of small-space gardening—these tricks make all the difference.
Container Depth Matters: That 12-18 inch depth recommendation isn't arbitrary—it gives roots room to grow without becoming root-bound. For deeper-rooted plants like dwarf fruit trees, I actually use 24-inch containers to accommodate their full root systems. The extra depth also helps maintain consistent moisture levels during hot spells.
Mulch Layering Strategy: The two-step mulch approach in Step 2 and Step 3 is genius—it creates a perfect balance. The initial 1-2 inch layer prevents soil from mixing with the final mulch, while the top 2-3 inch layer does all the heavy lifting for insulation and moisture retention. Pro tip: Use different mulch types for each layer—coarse wood chips on bottom, finer shredded bark on top—for maximum effectiveness.
Watering Wisdom: The "every 2-3 days" guideline works for most climates, but I've found that checking soil moisture at 1 inch depth is more reliable than counting days. In containers, water penetrates quickly, so you'll often need to water more frequently than you'd think. A moisture meter is worth the investment if you're serious about container gardening—it takes the guesswork out of watering.
Seasonal Adjustments: That extra inch of mulch in winter is crucial for protecting roots from freezing temperatures, but don't forget summer adjustments too. In extreme heat, I add a light shade cloth over containers during peak sun hours to prevent the mulch from overheating the soil beneath it. This simple step can mean the difference between thriving plants and heat-stressed ones.
Pro Tips for Mulch Container Garden
- Here's what I've learned after perfecting this system over years of small-space gardening—these tricks make all the difference.
- Container Depth Matters: That 12-18 inch depth recommendation isn't arbitrary—it gives roots room to grow without becoming root-bound.
- Mulch Layering Strategy: The two-step mulch approach in Step 2 and Step 3 is genius—it creates a perfect balance.
Frequently asked questions
Got questions about mulch container gardens?
You’re not alone! Here are answers to the most common queries—from setup to troubleshooting—so you can dive in with confidence.
How often should I add mulch to my container garden?
Top off mulch whenever it drops below 2-3 inches—usually every 3-6 months, depending on decomposition. Organic mulches (like straw or shredded leaves) break down faster than inorganic (gravel or bark). Check moisture levels too: if the top inch feels dry, it’s time to refresh!
Can I reuse mulch from last year’s container garden?
Yes, but with caution! Sterilize reused mulch by baking it in the oven at 200°F for 30 minutes to kill pests/diseases. Avoid mulch from containers with fungal issues (like powdery mildew). For safety, mix old mulch with fresh compost or new organic matter.
What’s the best mulch for container gardens with poor drainage?
Opt for permeable mulches like coconut coir, orchard wood chips, or never use dense materials (e.g., whole leaves or peat moss). Add a 1-inch layer of perlite or pumice beneath mulch to improve airflow. Elevate containers with feet to prevent waterlogging.
Why are my container plants dying despite mulching?
Common culprits:
- Over-mulching (suffocates roots—keep 2-3 inches max).
- Compacted soil (mix in perlite or vermiculite).
- Pests (check for slugs or fungal gnats under mulch).
- Nutrient depletion (fertilize every 4-6 weeks).
Do I need to remove mulch in winter?
Not necessarily! In cold climates, mulch insulates roots—leave it on. In mild winters, remove it to prevent rot, but replace it in early spring. For tender plants, add an extra 1-2 inches of straw for frost protection.
Wrapping up and next steps
Creating a mulch container garden is a game-changer for small-space gardeners—it’s simple, sustainable, and packed with benefits!
By layering organic materials, you’ll retain moisture, suppress weeds, and give your plants the cozy, nutrient-rich environment they crave. 🌱 Whether you’re a beginner or a seasoned green thumb, this method proves that even the tiniest balcony or patio can yield a thriving garden.
Ready to get growing? Start by gathering your materials, follow the steps, and watch your plants flourish. Your next step? Grab a container, roll up your sleeves, and turn that empty space into a lush, low-maintenance oasis! 🌿