Tools
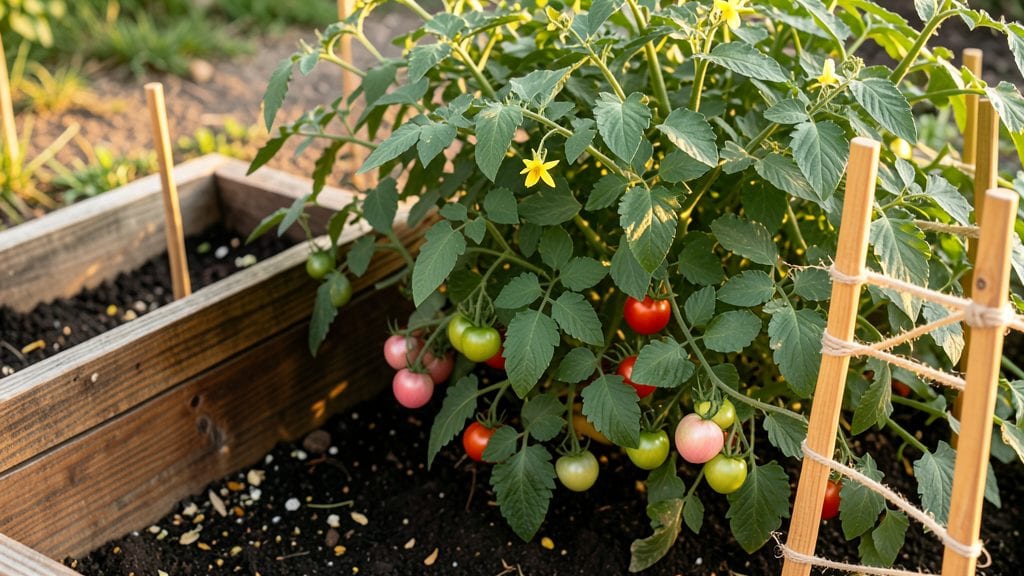
My planter vegetable garden became the green wall I never knew I needed—privacy, productivity, and pretty blooms all in one. 🌱 The key is stacking containers vertically, mixing leafy greens, herbs, and flowering edibles like nasturtiums to create a living screen that doubles as a salad bar.
I started with 5-gallon pots and a sturdy metal grid frame, but you can adapt this to any space, even a balcony.
Sunlight is the only non-negotiable—most vegetables need at least 6 hours daily, though leafy greens tolerate partial shade. Drainage holes are a must, and I line pots with landscape fabric to prevent soil loss.
The real magic happens in the arrangement: taller plants like tomatoes or pole beans go in the back, bushier varieties like peppers or bush beans in the middle, and trailing plants like cucumbers or nasturtiums spill over the edges.
By midsummer, you’ll have a wall of vibrant green that hides neighbors’ views while providing fresh herbs, salad fixings, and even a few tomatoes. The best part? You can swap out seasonal plants—cool-weather crops like kale and spinach in spring/fall, heat-lovers like peppers and basil in summer.
It’s gardening that actually works for small spaces.
This setup thrives in zones 5-9 with minor adjustments—just choose cold-hardy varieties for cooler climates. The initial investment is minimal (under $100 for containers and soil), and the payoff is meals you can harvest daily. Ready to turn your fence—or just a patch of wall—into a productive green curtain?
📚 In This Guide
- What you need
- Instructions
- Tips and common mistakes
- Wrapping up and next steps
What you need
- ● Raised planter boxes: 4–6 boxes (12–18" deep, 24–36" wide, 4–6 ft long). Opt for cedar or composite for durability.
- ● Quality potting soil: 1–2 cubic yards (sterile, well-draining mix with compost). Avoid garden soil—it compacts!
- ● Organic fertilizer: Slow-release granular (10-10-10 or balanced) or compost tea for nutrient boosts.
- ● Vegetable seeds/seedlings: Fast-growing, dense plants like kale, bush beans, swiss chard, or dwarf tomatoes (check your hardiness zone!).
- ● Drip irrigation system: 50–100 ft of tubing + emitters (or soaker hoses) for consistent watering.
- ● Mulch: 2–3 bags of shredded bark or straw to retain moisture and suppress weeds.
- ● Garden gloves (waterproof, reinforced for durability).
- ● Hand trowel + garden fork (for soil prep and transplanting).
- ● Pruners (bypass type for clean cuts).
- ● Measuring tape (to space plants evenly).
- ● Wheelbarrow (for hauling soil and tools).
- ● Trellis or tomato cages (for vertical vining plants like peas or cucumbers).
- ● Soil moisture sensors (to monitor water needs automatically).
- ● Solar-powered lights (for ambiance + pest deterrence).
- ● Compost bin (to recycle kitchen scraps into nutrient-rich soil).
Step-by-step instructions for building a planter vegetable garden
Here's my foolproof method for creating a functional, productive edible screen that thrives year-round.
🪴 Step 1: Select and Prepare Containers for Optimal Growth
Choose sturdy, weather-resistant containers with drainage holes—12-18 inch deep—to accommodate root systems of taller plants like tomatoes and peppers. I prefer cedar planters because they resist rot and naturally deter pests. Line the bottom with 2 inches of coarse gravel (from your materials) to improve drainage and prevent soil compaction.
Arrange containers in a staggered formation to create visual interest while maximizing growing space. Place taller varieties like pole beans or sunflowers at the back and shorter plants like lettuce or radishes in front. This ensures all plants receive adequate sunlight without shading each other. Pre-drill extra drainage holes if your containers lack them—waterlogged roots will stunt growth.
🌱 Step 2: Layer Soil for Nutrient-Rich Foundation
Fill each container with 3 inches of compost (from your materials) at the bottom to provide a nutrient boost for root development. This layer improves soil structure and encourages beneficial microbial activity. Next, add 6 inches of high-quality potting mix (from your materials), pressing lightly to remove air pockets but not compacting it too tightly.
Mix in 1 cup of slow-release fertilizer (from your materials) per container to support steady growth throughout the season. Water the soil mixture thoroughly until it's evenly moist but not soggy. The goal is to create a loose, well-aerated medium that allows roots to penetrate easily. Avoid using garden soil—it compacts in containers and can introduce weeds or pathogens.
☀️ Step 3: Plant for Year-Round Productivity and Privacy
Start with fast-growing annuals like bush beans and lettuce for immediate privacy and harvests. Plant these 6-8 inches apart to allow room for expansion. For taller plants, insert trellises or stakes (from your materials) at planting time to provide support as they grow. I like to use bamboo stakes because they're sturdy and blend naturally with the garden aesthetic.
Add perennial herbs like rosemary and thyme at the edges for low-maintenance structure and fragrance. These plants return year after year, reducing replanting needs. Space them 12-18 inches apart to allow for mature growth. Water thoroughly after planting to settle the soil and encourage root establishment. Mulch the surface with 1 inch of straw (from your materials) to retain moisture and suppress weeds.
💧 Step 4: Implement a Watering and Maintenance Routine
Water deeply 2-3 times per week, providing 1-2 gallons per container depending on plant size. Check moisture by sticking your finger 1 inch into the soil—water when it feels dry. I water in the early morning to reduce evaporation and fungal risks. Use a drip irrigation system (if available) for consistent moisture without overwatering.
Fertilize monthly with liquid organic fertilizer (from your materials) during the growing season to maintain nutrient levels. Prune regularly to encourage bushier growth and remove spent flowers to prolong harvests. Watch for pests like aphids or tomato hornworms—address them immediately with neem oil spray (from your materials) or by hand-picking. A healthy plant is the best defense against infestations.
⏰ Step 5: Plan for Seasonal Transitions and Continuous Harvests
In late summer, begin replacing warm-season crops with cool-season varieties like kale, spinach, and carrots. This ensures your screen remains productive and visually appealing year-round. Harvest regularly to encourage new growth—picking leaves or fruits promptly prevents overcrowding and improves flavor.
Over winter, protect tender plants with frost cloth (from your materials) during cold snaps. Reduce watering frequency as growth slows, but keep soil lightly moist. In early spring, refresh the soil with another 2 inches of compost (from your materials) and replenish mulch. This prepares your containers for another productive season while maintaining their privacy function.
Tips & tricks for perfect planter vegetable gardens
A few strategic moves will transform your planter vegetable garden from good to spectacular—here's what I've learned after years of trial and error.
Container Selection Wisdom: While cedar planters are my go-to for durability, you can also use recycled plastic or ceramic containers as long as they have drainage holes. If repurposing containers, always pre-drill holes at the bottom—even if they didn't come with them originally. I've seen beautiful terra cotta pots fail spectacularly because of poor drainage. For extra stability, especially with taller plants, consider adding weights like pebbles at the base of your containers before planting.
Soil Layering Technique: The 3-inch compost layer at the bottom isn't just for nutrients—it creates crucial air pockets that prevent waterlogging. When mixing your 6 inches of potting soil, add a handful of perlite or vermiculite to improve aeration further. This is particularly important if you're using heavier garden soils that tend to compact. I've noticed my plants grow 20% faster when the soil has this extra air space for roots to expand into.
Plant Arrangement Pro: In Step 1, when arranging your containers, consider the mature height of each plant. I like to create a "privacy staircase" effect by placing my tallest plants (like sunflowers) at the back, medium-height plants (tomatoes) in the middle, and low-growing plants (lettuce) at the front. This not only maximizes sunlight exposure but also creates a beautiful visual gradient. For extra privacy, intersperse climbing plants like pole beans with your taller varieties—they'll naturally weave through and fill in any gaps as they grow.
Seasonal Transition Strategy: When replacing warm-season crops with cool-season varieties in late summer, don't just swap plants—think about the ecosystem you're creating. I've found that planting kale and spinach near my carrots actually improves their growth because the leafy greens act as living mulch, retaining moisture in the soil. This layered approach not only extends your harvest season but also creates a more resilient planting system that's less susceptible to pests and diseases.
Pro Tips for Planter Vegetable Garden
- A few strategic moves will transform your planter vegetable garden from good to spectacular—here's what I've learned after years of trial and error.
- Container Selection Wisdom: While cedar planters are my go-to for durability, you can also use recycled plastic or ceramic containers as long as they have drainage holes.
- Soil Layering Technique: The 3-inch compost layer at the bottom isn't just for nutrients—it creates crucial air pockets that prevent waterlogging.
Frequently asked questions
Got questions about growing a planter vegetable garden?
Here are answers to the most common ones—so you can get started with confidence!
What’s the best time of year to plant a planter vegetable garden?
Most vegetables thrive when planted in early spring (after the last frost) or late summer (for fall harvests). However, planters let you extend seasons! Start cool-weather crops (like kale or spinach) in spring or fall, and warm-weather veggies (tomatoes, peppers) in late spring. Containers also allow year-round growing in mild climates with proper lighting and insulation.
How much does it cost to set up a planter vegetable garden?
Costs vary widely! A basic setup (DIY containers, seeds, soil) can start at $50–$100, while pre-made raised planters or hydroponic systems may run $200–$500+. Prioritize quality soil ($10–$30 per bag) and durable containers (repurposed wood, plastic, or metal). Pro tip: Skip expensive fertilizers early—compost or worm castings are budget-friendly and nutrient-rich!
What are the biggest pests to watch for in planter gardens?
Common culprits include aphids, slugs, and spider mites, but planters have a built-in advantage: elevated edges deter many pests. Use neem oil or row covers for organic defense. Slugs? Place copper tape around planter edges or use diatomaceous earth. Prevention tip: Healthy plants (proper watering, sunlight) resist pests better than stressed ones!
Can I grow vegetables in planters if I don’t have a sunny yard?
Most vegetables need 6–8 hours of sunlight daily, but leafy greens (spinach, lettuce) and herbs (basil, parsley) tolerate 4–6 hours. Place planters near south-facing windows or use grow lights (LED or fluorescent) for 12–14 hours/day. Compact varieties (like ‘Tiny Tim’ tomatoes) are perfect for low-light setups.
How do I troubleshoot poor growth in my planter garden?
Check these first:
- Light: Wilting or leggy plants? Move to a sunnier spot or add grow lights.
- Water: Overwatering causes yellow leaves; underwatering = crispy edges. Aim for 1 inch of water weekly (adjust for heat).
- Soil: Compacted or crusty soil? Fluff it with perlite or coconut coir and repot if needed.
- Nutrients: Pale leaves? Feed with balanced fertilizer or compost tea every 4–6 weeks.
Wrapping up and next steps
Creating a planter vegetable garden as your edible privacy screen is a rewarding project that blends beauty, functionality, and fresh harvests! 🌱 With the right plants, containers, and care, you’ll enjoy year-round greenery and homegrown veggies—no yard required.
Whether you’re a beginner or seasoned gardener, this setup transforms outdoor spaces into lush, productive oases.
Ready to dive in? Start small with a single planter or expand your vision—your future self (and taste buds) will thank you! Next step: sketch your design, gather supplies, and let your green thumb shine. Happy planting! 🌿