Landscaping
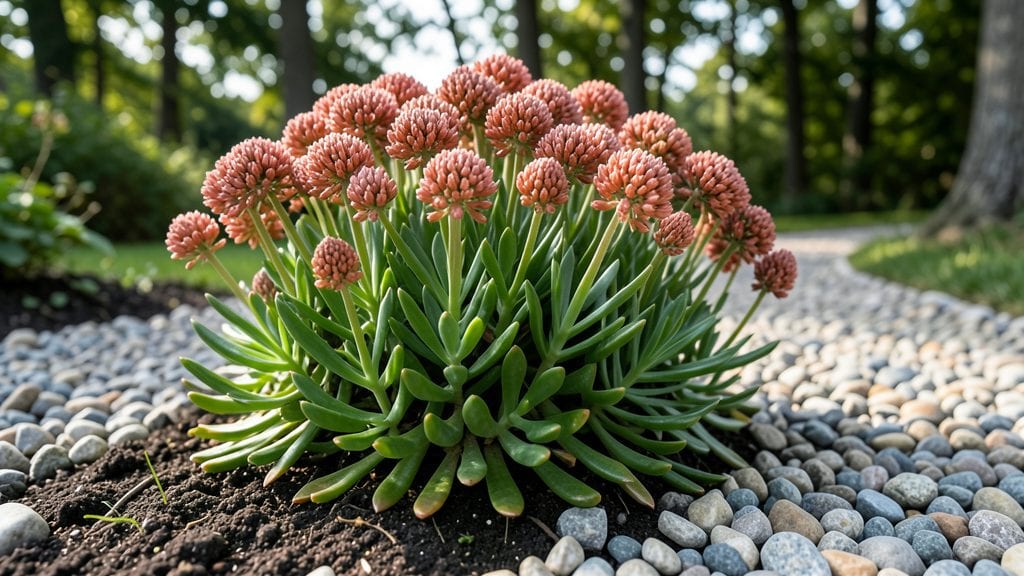
A sedum garden design starts with bold layers that defy drought while demanding almost no effort from you. I designed mine after killing three other "low-maintenance" gardens—this one thrives on neglect, with plump stems and jewel-toned blooms that last from summer into frost.
The secret lies in pairing different sedum varieties by height, color, and bloom time, creating a tapestry that stays vibrant even when you forget to water.
You’ll need just three things: sunny spots (even full sun), well-draining soil (even rocky ground works), and a mix of upright, mounding, and trailing sedums to build texture. My favorite combo?
Tall Sedum 'Autumn Joy' as a backdrop, mid-height Sedum 'Matrona' for structure, and creeping Sedum 'Dragon's Blood' to spill over edges. The colors—deep burgundy, soft pink, and chartreuse—shift with the seasons without a single dead leaf in sight.
By midsummer, your garden will hum with pollinators while staying crisp and drought-proof. The foliage turns velvety in fall, and some varieties even hold their color through winter.
Best of all, you’ll spend less than an hour a year on maintenance—no weeding, no wilting, just pure, stubborn beauty that outlasts trends. Here’s how to layer yours for maximum impact.
Works for modern minimalist yards, cottage-style borders, or even rooftop containers. The same principles apply whether you’re filling a 4-foot border or a 400-square-foot meadow. Let’s get growing—your future self will thank you.
📚 In This Guide
- What you need
- Instructions
- Tips and common mistakes
- Wrapping up and next steps
What you need
- ● Sedum Plants: 10–20 mature sedum plants (e.g., Sedum spectabile, Sedum spurium, or Sedum acre), depending on garden size.
- ○ Optional: Native sedum varieties for local climate resilience.
- ● Soil: 50–100 sq. ft. of well-draining soil mix (60% topsoil, 30% coarse sand, 10% perlite or gravel).
- ● Alternative: Gravel or decomposed granite (for ultra-dry conditions).
- ● Mulch: 1–2 bags of gravel, pebbles, or bark chips (to retain moisture and suppress weeds).
- ● Tools: Garden trowel or spade
- ● Wheelbarrow (for soil/mulch transport)
- ● Rake (for leveling)
- ● Measuring tape (for spacing plants 12–18" apart)
- ● Gloves & knee pads (for comfort!)
- ● Drought-resistant companions: Lavender, thyme, or ornamental grasses for texture.
- ● Edging: Stone borders or metal edging to define the garden.
- ● Drip irrigation system: Low-flow emitters for automated watering (even in droughts!).
- ● Fertilizer: Slow-release, organic granules (e.g., compost or bone meal).
- ● Decorative accents: Solar lights, stepping stones, or a small water feature.
Instructions for designing a sedum garden with four drought-resistant layers
Here's how to create a layered sedum garden that stays vibrant through drought and seasons.
Prepare the Foundation With Soil and Mulch
Start by amending the soil with 3 inches of compost mixed into the top 12 inches of native soil. Sedums thrive in well-draining conditions, so avoid heavy clay—amend with 1 part perlite or coarse sand per 3 parts soil if needed. Test drainage by digging a 6-inch hole, filling it with water, and checking if it drains within 15 minutes. If it pools, add more gritty material.
Spread 2 inches of mulch (such as pine bark fines or gravel) over the amended soil to suppress weeds and retain moisture. Avoid organic mulches like wood chips, which can compact over time and reduce drainage. Keep mulch 2 inches away from plant stems to prevent rot.
Plant the Structural Layer With Tall Sedums
Begin with 4-6 tall sedum varieties (like Sedum 'Autumn Joy' or Sedum 'Matrona') spaced 2-3 feet apart at the back of the bed. These act as vertical anchors and provide seasonal interest. Dig holes twice as wide as the root ball to encourage root spread, then backfill with native soil mixed with a handful of slow-release fertilizer. Water deeply to settle roots.
Plant in late spring or early fall when temperatures are mild. Avoid transplanting in extreme heat, as sedums are drought-tolerant but still need time to establish. Use a stake or small rock to support taller varieties if needed, though most sedums self-support well.
Add Mid-Height Sedums for Texture and Color
Fill the middle layer with 6-8 medium-height sedums (such as Sedum 'Dragon's Blood' or Sedum 'Angelina') spaced 1-2 feet apart. These create visual depth and contrast with the taller back layer. Plant them in clusters of 3-5 plants for a natural, full look. Mix foliage colors—purples, blues, and yellows—to add visual interest.
Dig holes slightly deeper than the root ball to encourage stability, then firm soil gently around the base. Water lightly after planting to avoid displacing roots. Avoid overwatering; sedums in the mid-layer should only need supplemental water during prolonged dry spells (more than 2 weeks without rain).
Layer Ground-Cover Sedums for Spill and Filler
Fill gaps with low-growing sedums (like Sedum 'Angelina' or Sedum album) spaced 8-12 inches apart to create a dense, drought-proof carpet. These sedums spread quickly, so plant them 6 inches apart if you want faster coverage. Press the soil firmly around each plant to eliminate air pockets.
Water lightly after planting, but avoid soaking the soil—these sedums prefer dry conditions once established. They’ll fill in over time, reducing weed competition and moisture loss. Use them to spill over edges or fill between larger plants for a seamless, layered effect.
Incorporate Accent Plants for Seasonal Contrast
Add 2-4 ornamental grasses (like Pennisetum or Carex) or drought-tolerant perennials (such as Salvia or Echinacea) to complement the sedums. Place these strategically—one per 4-square-foot section—to avoid overwhelming the sedum’s star role. Dig holes twice as wide as the root ball and mix in compost for extra vigor.
Water deeply after planting, then taper off as the sedum garden matures. These accents should blend with the sedums’ structure while adding height, texture, or seasonal blooms. Avoid fast-growing plants that might outcompete the sedums for water.
Tips & tricks for perfect sedum garden design
A few strategic moves can transform your layered sedum garden from good to spectacular. These tips ensure your drought-resistant design thrives while maintaining its natural beauty through every season.
Drainage is Non-Negotiable: The 15-minute drainage test in Step 1 is critical—don't skip it. Sedums will thrive only in soil that mimics their natural rocky habitats. If your test hole holds water beyond 15 minutes, add more perlite or coarse sand until you achieve proper drainage. Remember, sedums hate soggy roots, which can lead to rot even in drought-tolerant varieties. Between us, I've seen many beautiful sedum gardens fail because of overlooked drainage.
Layering Strategy for Visual Impact: When planting your mid-height sedums in Step 3, stagger the clusters rather than planting them in straight lines. This creates natural movement and prevents a rigid, geometric look. For example, plant three Sedum 'Dragon's Blood' together, then skip a foot before planting another cluster of five. This approach mimics how sedums grow in the wild and makes your garden feel more organic over time.
Mulch Placement Matters: The 2-inch mulch layer in Step 1 serves two purposes: weed suppression and moisture retention. However, maintaining that 2-inch clearance from plant stems is crucial. Too much mulch against stems can create moisture pockets that invite fungal diseases. I recommend using a small ruler or measuring tape to verify this spacing after mulching. This small detail prevents common sedum health issues that can derail your drought-proof design.
Seasonal Planting Timing: While late spring or early fall are ideal for planting, don't overlook the importance of temperature when working with sedums. In Step 2, I recommend avoiding extreme heat because sedums are drought-tolerant but still need time to establish roots. If you must plant during summer, do so in early morning or late evening when temperatures are cooler. This simple adjustment can mean the difference between a thriving garden and one that struggles to take hold.
Pro Tips for Sedum Garden Design
- A few strategic moves can transform your layered sedum garden from good to spectacular.
- Drainage is Non-Negotiable: The 15-minute drainage test in Step 1 is critical—don't skip it.
- Layering Strategy for Visual Impact: When planting your mid-height sedums in Step 3, stagger the clusters rather than planting them in straight lines.
Frequently asked questions
Got questions about creating a stunning, low-maintenance sedum garden?
You’re not alone! Here are answers to the most common queries to help you design with confidence.
What’s the best time of year to plant sedum?
For most climates, spring or early fall is ideal—when temperatures are mild, and plants can establish roots before extreme heat or frost. Avoid planting in peak summer unless you’re in a hot, dry region (like the Southwest), where sedum thrives year-round. Pro tip: Water deeply after planting to reduce transplant shock!
How much water do sedum gardens really need?
Once established, sedum is drought-tolerant—often needing only occasional watering (every 2–4 weeks, depending on climate). During the first growing season, keep soil consistently moist (not soggy) to help roots develop. After that, rainfall usually suffices! Mulch with gravel or bark to retain moisture.
Are sedum gardens pest- or disease-prone?
Sedum is resilient to pests, but you might spot aphids, slugs, or powdery mildew in rare cases. Improve airflow with proper spacing, and remove affected leaves promptly. Prevention tip: Choose disease-resistant varieties like Sedum ‘Dragon’s Blood’ for extra toughness.
Can I mix sedum with other drought-tolerant plants?
Pair sedum with lavender, yucca, ornamental grasses, or succulents for texture and color. Aim for 30–50% sedum (as a ground cover or focal point) and fill gaps with complementary plants. Design hack: Use taller species (like Sedum ‘Autumn Joy’) as vertical accents!
How do I refresh a tired sedum garden?
If your sedum looks leggy or overgrown, prune back by 1/3 in early spring to encourage bushier growth. For bare spots, divide mature clumps or add new varieties. Rebirth tip: Replace spent blooms with sedum cuttings—they root easily in water or soil!
What’s the cheapest way to start a sedum garden?
Skip nursery plants! Collect cuttings from friends’ gardens or wild sedum (check local laws first). Plant divisions from mature clumps or grow from seed (slower but cost-effective). Budget tip: Use free mulch (like crushed stone) from landscaping suppliers!
Wrapping up and next steps
Designing a sedum garden isn’t just about creating a stunning, low-maintenance space—it’s about crafting a resilient ecosystem that brings joy year-round. 🌿 From drought-resistant layers to seasonal interest, these gardens prove that beauty and sustainability go hand in hand.
Whether you’re a seasoned gardener or a beginner, the key is to start small, experiment with textures, and let your sedum collection grow (literally!) with confidence.
Ready to transform your outdoor space? Sketch a simple layout today, gather a few sedum varieties, and watch your garden flourish with minimal effort. Your future self—and the planet—will thank you! 🌱