Tools
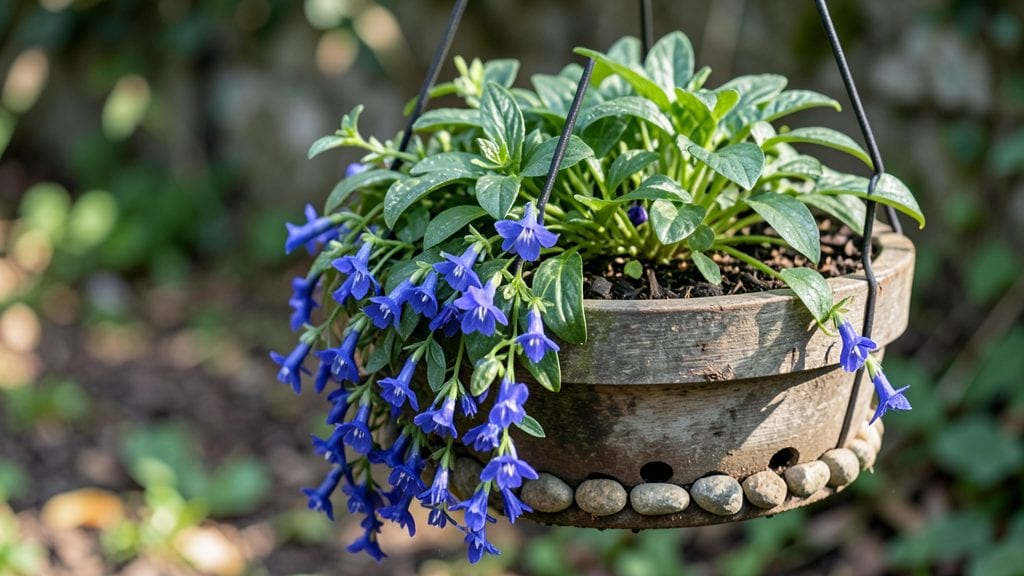
My swinging bed garden turned a boring corner into a lush vertical display that neighbors now ask about. These whimsical hanging planters solve two problems at once: they free up ground space while adding charm to any garden spot.
The gentle sway keeps pests away and makes watering easier—no more bending over for small plants.
You’ll need sturdy chains or ropes, weather-resistant fabric or wood, and a few hours to assemble. I used cedar slats for durability and a simple rope suspension system that costs less than $30 total.
The right plants make all the difference—trailing nasturtiums, petunias, or even dwarf vegetables like cherry tomatoes thrive in these beds.
Imagine fresh herbs within arm’s reach or vibrant flowers cascading from your porch ceiling. The design works for balconies, patios, or even indoors near bright windows. With proper care, your swinging bed will stay lush for months, becoming the garden’s most talked-about feature.
Fair warning: placement matters—avoid direct afternoon sun for delicate fabrics, and secure the chains tightly to prevent swaying in wind. Start small with one bed, then expand as you see how it transforms your space. The payoff? A garden that’s both beautiful and functional.
📚 In This Guide
- What you need
- Instructions
- Tips and common mistakes
- Wrapping up and next steps
What you need
- ● Swinging Bed Kit: 1 pre-made hanging planter bed (or DIY materials: heavy-duty fabric, waterproof liner, or wooden slats)
- ● 2 sturdy metal or wooden hooks (for hanging)
- ● 1-2 strong ropes, chains, or bungee cords (3/8"–1/2" thickness, 6–8 ft long)
- ● Support Structure: 1 tree, pergola, or freestanding metal frame (must support 20+ lbs per bed)
- ○ Optional: Ceiling-mounted hooks (for indoor/patio use)
- ● Soil & Drainage: 1–2 bags of lightweight potting mix (avoid garden soil—it’s too heavy!)
- ● 1–2 cups perlite or vermiculite (for drainage)
- ● Tools: Scissors or utility knife (for cutting fabric/rope)
- ● Measuring tape
- ● Drill (if mounting hooks into wood/metal)
- ● Self-watering reservoir (for drought-prone plants)
- ● Decorative paint or stain (to match your garden’s vibe)
- ● Plant labels & stakes (for tracking your greens)
- ● Solar-powered LED lights (for nighttime ambiance)
Step-by-step instructions for creating a swinging bed garden
Here's how to build a charming, space-saving hanging garden that adds vertical interest to any patio or balcony.
Select and Prepare the Hanging Bed
Choose a sturdy, weather-resistant hanging bed designed for at least 4 plants—look for one with reinforced stitching and drainage holes at the bottom. I prefer fabric beds with a 12-inch depth since they allow roots to establish properly. Before planting, soak the bed in water for 10-15 minutes to help it retain moisture and prevent shrinkage once filled with soil.
Once soaked, drain any excess water completely. This step ensures your bed won’t leak soil or collapse under the weight of plants. If your bed has a liner, make sure it’s intact—this prevents soil from escaping and keeps your space clean. Hang the bed at a height where you can comfortably reach the plants without straining, typically 3-4 feet above ground level.
Fill the Bed with Lightweight Potting Mix
Use 3 gallons of lightweight potting mix specifically formulated for containers—regular garden soil is too dense and will compact, suffocating roots. Mix in 1 cup of perlite to improve drainage and aeration, which is critical in hanging beds where water can escape quickly. Fill the bed to about 1 inch below the rim, leaving room for watering without spillage.
Gently press the soil down to remove air pockets, but don’t compact it too tightly. You want the mix to stay loose enough for roots to grow freely. Water the soil lightly before planting to help it settle and eliminate any dry pockets. This ensures your plants start with consistent moisture right from the beginning.
Plant Your Selected Varieties
For a swinging bed, choose trailing or bushy plants that thrive in containers, such as petunias, fuchsias, or cascading herbs like thyme or oregano. Plant 4-6 inches apart to allow room for growth—crowding leads to competition for nutrients and weak stems. Dig a hole for each plant twice as wide as the root ball and place it in the bed so the top of the root ball sits ½ inch below the soil surface. This helps stabilize the plant and encourages new root growth.
Fill the holes with soil and press gently around the base of each plant to remove air gaps. Water thoroughly after planting to help the soil settle and eliminate any air pockets. Avoid overwatering at this stage—you want the soil to be moist but not soggy. This step sets the foundation for healthy growth and prevents root rot.
Water and Maintain for Optimal Growth
Water your swinging bed every 2-3 days, checking the soil moisture by sticking your finger 1 inch deep. If it feels dry, it’s time to water. Since hanging beds dry out faster than ground-level planters, I like to water in the early morning to allow excess moisture to evaporate during the day. Avoid watering from above—use a watering can with a long spout to direct water to the soil level and prevent washing away the top layer.
Fertilize every 4-6 weeks with a balanced liquid fertilizer diluted to half strength. Swinging beds benefit from regular feeding because nutrients leach out faster in containers. Watch for signs of overwatering, like yellowing leaves or wilting, and adjust your watering schedule accordingly. This ensures your plants stay vibrant and healthy throughout the growing season.
Prune and Encourage Trailing Growth
As your plants grow, gently guide trailing varieties along the edges of the bed to create a lush, cascading effect. Pinch back leggy stems to encourage bushier growth and prevent the plants from becoming top-heavy. Remove any dead or yellowing leaves regularly to improve airflow and reduce the risk of disease. This keeps your swinging bed looking neat and encourages continuous blooming or foliage production.
Rotate the bed a quarter turn every week to ensure even sunlight exposure on all sides. Plants tend to grow toward the light, so this simple step keeps them balanced and prevents them from leaning in one direction. With regular care, your swinging bed will become a stunning vertical garden that adds charm and productivity to your space.
Tips & tricks for perfect swinging bed gardens
Creating a stunning swinging bed garden takes a little finesse, but these tips will help you avoid common pitfalls and get the most out of your vertical space.
Soaking the Bed: That 10-15 minute soak in Step 1 is crucial for preventing shrinkage once you add soil. I've found that fabric beds benefit most from this step—give them a good soak in a tub of water to help them hold their shape. After draining, give them a gentle squeeze to remove excess water, but don't wring them out completely. This helps maintain the bed's structure while preventing waterlogging.
Soil Preparation: When mixing your 3 gallons of potting mix with 1 cup of perlite, don't be afraid to get your hands in there! Gently work the perlite through the soil to ensure even distribution. This step is especially important in Step 2—uneven mixing can create pockets where water drains too quickly or collects in clumps. A well-aerated mix helps prevent root rot and keeps your plants thriving in their hanging home.
Plant Spacing: The 4-6 inch spacing in Step 3 might seem generous, but trust me on this. Crowding plants leads to competition for nutrients and weak stems that can't support their own weight in a swinging bed. For trailing varieties like petunias, you can plant slightly closer (4 inches apart) since they'll spread out beautifully. For bushier plants like fuchsias, stick with the 6-inch spacing to give them room to grow without touching neighbors.
Watering Strategy: The every-2-to-3-days schedule in Step 4 works well, but I've learned the hard way that timing matters. Water in the early morning as recommended, but check the soil at the same time each day to maintain consistency. Hanging beds dry out faster, so if your area gets particularly hot or windy, you might need to water daily. A self-watering hanging planter can be a game-changer if you travel frequently or have unpredictable schedules.
Pro Tips for Swinging Bed Garden
- Creating a stunning swinging bed garden takes a little finesse, but these tips will help you avoid common pitfalls and get the most out of your vertical space.
- Soaking the Bed: That 10-15 minute soak in Step 1 is crucial for preventing shrinkage once you add soil.
- Soil Preparation: When mixing your 3 gallons of potting mix with 1 cup of perlite, don't be afraid to get your hands in there!
Frequently asked questions
Got questions about swinging bed gardens? We’ve got answers!
Whether you're a newbie or a seasoned green thumb, these common queries will help you get the most out of your hanging planter paradise. Let’s dive in!
What’s the best time of year to plant in a swinging bed garden?
A swinging bed garden thrives in spring or early fall when temperatures are mild (50–85°F). Avoid extreme heat or frost, which can stress plants. For year-round growing, opt for cold-hardy herbs like thyme or heat-loving peppers in warmer climates. Pro tip: Start with seedlings for faster results!
How often should I water a swinging bed garden?
Watering frequency depends on your climate, but daily checks are key. Hanging beds dry out faster than ground-level planters—aim for 1–2 times per day in hot weather. Use a self-watering system or drip irrigation to maintain moisture. Test soil moisture by sticking your finger 1 inch deep; if dry, it’s time to water!
Can I grow vegetables in a swinging bed garden?
Compact, fast-growing veggies
like lettuce, cherry tomatoes, strawberries, and herbs (basil, mint) thrive in swinging beds. Avoid heavy root crops (like carrots or potatoes) due to limited space. Choose determinate tomato varieties or trailing plants to maximize vertical growth.
What are some alternatives if my swinging bed sways too much?
If your bed swings excessively, try these fixes:
- Add weight: Fill the bottom with rocks or a weighted planter liner.
- Secure the hanger: Use a sturdier hook or chain and reinforce with zip ties.
- Adjust placement: Hang near a wall or fence for stability.
- Opt for a wider base: Choose a deeper, wider bed designed for balance.
For extreme cases, consider a wall-mounted planter instead.
Why are my plants wilting or dying in the swinging bed?
Wilted plants often signal overwatering, underwatering, or poor drainage. Check for:
- Root rot (from soggy soil)—ensure drainage holes are clear.
- Sunburn (if moved abruptly)—acclimate plants gradually.
- Nutrient deficiency—fertilize every 4–6 weeks with a balanced formula.
- Pests (like aphids)—inspect leaves and treat with neem oil if needed.
Rotate the bed occasionally for even sunlight exposure!
Wrapping up and next steps
A swinging bed garden isn’t just a charming addition to your space—it’s a creative, space-saving solution that brings nature’s beauty to life with minimal effort. Whether you’re a seasoned gardener or just starting out, these hanging planters offer endless possibilities for vertical gardening, from vibrant flowers to lush herbs. 🌿
Ready to transform your outdoor (or indoor!) area? Start small—grab a swinging bed, pick your favorite plants, and let your green thumb shine. Your next step? Sketch a quick design, gather your supplies, and watch your garden sway into place! 🌟