Landscaping
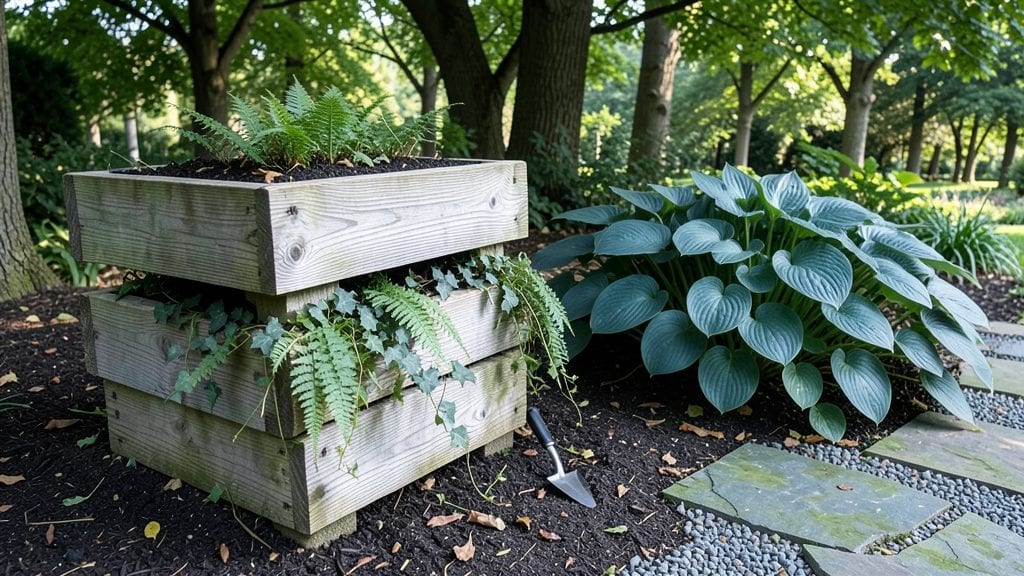
My tiered garden design transformed a cramped patio into a lush vertical paradise where every inch counts. 🌿 The key was stacking plants by height—tall grasses on the bottom, trailing ferns in the middle, and delicate flowers cascading over the edges.
It’s not just about saving space; it’s about creating a dynamic, layered look that draws the eye upward like a living waterfall.
You’ll need sturdy materials like cedar planters or metal shelves, plus lightweight soil mixes that won’t weigh down your structure. For small spaces, I swear by wall-mounted tiers—just 2 feet wide but packed with tomatoes, herbs, and peppers.
Larger areas can go wild with freestanding raised beds or even repurposed wooden crates. The best part? No more bending over to pick veggies or flowers.
By summer’s end, you’ll have a garden that’s both productive and stunning—think velvety basil spilling over edges, sunflowers reaching for the sky, and every layer bursting with color.
The trick is grouping plants by sunlight needs and watering from the top down. Maintenance stays simple if you choose drought-tolerant varieties for higher tiers.
This design works for balconies, rooftops, or backyard corners—just adjust the scale. Whether you’re growing food, flowers, or both, tiered gardens turn limitations into opportunities. Ready to build yours?
📚 In This Guide
- What you need
- Instructions
- Tips and common mistakes
- Wrapping up and next steps
What you need
- ● Tiered planter or risers: 3–5 levels (adjust based on height goals). Look for durable materials like: Cedar or redwood (naturally rot-resistant)
- ● Plastic (lightweight, budget-friendly)
- ● Metal (modern, sturdy—galvanized or powder-coated)
- ● Potting soil: 1–2 bags (10–20 lbs each) of high-quality, well-draining mix (e.g., Miracle-Gro Potting Mix or coco coir blends).
- ● Drainage: Small gravel or perlite (1–2 lbs) for bottom layers.
- ● Plants: Choose varieties suited to each tier (e.g., herbs on top, flowers in the middle, veggies on lower levels).
- ● Tools: Trowel or small shovel
- ● Measuring tape
- ● Level (to ensure stability)
- ● Drill + screws (if assembling wood/metal tiers)
- ● Decorative elements: Paint, stain, or mosaic tiles for a personalized touch.
- ● Watering system: Drip irrigation kit or self-watering trays for low-maintenance care.
- ● Mulch: Shredded bark or pebbles to retain moisture and add texture.
- ● Solar lights: String lights or LED chips for evening ambiance.
Step-by-step instructions for creating a tiered garden design
Here's how to build a stunning vertical garden that transforms any space into a lush, layered oasis.
🪴 Step 1: Choose and Prepare Your Containers
Start with 4 containers of varying heights—think stacked planters, shelves, or wall-mounted tiers. I like mixing materials like wood for warmth and metal for durability. Ensure each has drainage holes; if not, drill them yourself. Line the bottom with landscape fabric to prevent soil from clogging the holes while allowing water to drain.
Place the tallest container at the back or center, then stack progressively smaller ones in front. This creates natural depth and lets light reach all plants. For stability, place heavier containers on the bottom tier and lighter ones on top. If using wall-mounted shelves, secure them with sturdy brackets rated for the combined weight of soil and plants.
🌱 Step 2: Layer Soil and Add Drainage Material
Add 2 inches of gravel or coarse sand to the bottom of each container. This ensures excess water drains away from roots and prevents soggy soil. Next, fill each container ¾ full with well-draining potting mix—avoid garden soil, which compacts and suffocates roots. Mix in a slow-release fertilizer to give plants a nutrient boost right away.
For the top tier, use a lighter potting mix with added perlite to keep it airy. The top layer dries out faster, so this helps prevent overwatering. Press the soil down gently but don’t compact it—you want roots to spread easily. Leave about 1 inch of space at the top to accommodate watering without spilling.
☀️ Step 3: Select and Plant Your Layers
Start with the tallest plants at the back or bottom tier. Think trees, shrubs, or tall grasses like ornamental grasses or dwarf conifers. For the middle tiers, add medium-height plants such as bushes, perennials, or flowering shrubs. Finally, fill the top tier with trailing plants, annuals, or shallow-rooted perennials like creeping thyme or petunias.
Space plants according to their mature size—crowding leads to competition for light and nutrients. Dig holes just deep enough to cover the root ball, then water gently to settle the soil. For trailing plants, tuck them along the edges of the top tier so they spill over beautifully. This creates that signature tiered look while keeping everything balanced.
💧 Step 4: Water and Maintain for Long-Term Success
Water each tier thoroughly after planting, then let the soil dry out slightly before watering again. The top tier will dry fastest, so check it daily in hot weather. Use a watering can with a long spout to reach all layers without disturbing the plants. Water at the base to encourage strong root growth and prevent fungal diseases from overhead moisture.
Fertilize every 4-6 weeks during the growing season with a balanced, water-soluble fertilizer. Monitor for pests like aphids or spider mites, especially on the top tier where they’re easier to miss. Prune leggy growth or spent blooms regularly to keep your design neat and encourage bushier growth. With proper care, your tiered garden will thrive for years.
Tips & tricks for perfect tiered garden design
Here's what I've learned after creating tiered gardens that stand the test of time—and how to avoid the rookie mistakes that can ruin your design before it even begins.
Container Stability is Everything: I learned this the hard way after watching a heavy wooden planter topple during a summer storm. For wall-mounted tiers, use brackets rated for at least 50 pounds each—that accounts for soil, plants, and future growth. If using freestanding containers, place the heaviest ones on the bottom tier and secure them with sandbags or weights if needed. This creates a stable base that won't wobble when you're watering or pruning.
Soil Mix Matters More Than You Think: The ¼ full space you leave at the top of each container isn't just for watering convenience—it's for preventing compaction. I've seen gardeners fill containers to the brim, which leads to water pooling and root rot. Use that top inch as a buffer zone, and consider adding 1 inch of perlite or vermiculite to the top layer of soil to improve aeration. This is especially important for the top tier where evaporation happens fastest.
Plant Placement Secrets: Don't just throw plants in based on height—think about their mature spread too. I once placed a creeping thyme too close to the edge of the top tier, and it completely took over, spilling onto the middle tier. For trailing plants, leave 2-3 inches of space between them and the container edge. This gives them room to cascade beautifully without overwhelming lower layers. Also, place plants with similar water needs together—this makes maintenance so much easier.
Watering Strategy for Even Growth: The top tier might look like it needs watering every day, but that's not always the case. I've found that using a watering wand with a gentle spray setting lets me water all tiers simultaneously without disturbing plants. Water the base of each plant rather than overhead to prevent fungal diseases. And here's a pro tip: water the bottom tier first, then work your way up. This ensures water seeps through to lower layers where it's needed most.
Pro Tips for Tiered Garden Design
- Here's what I've learned after creating tiered gardens that stand the test of time—and how to avoid the rookie mistakes that can ruin your design before it even begins.
- Container Stability is Everything: I learned this the hard way after watching a heavy wooden planter topple during a summer storm.
- Soil Mix Matters More Than You Think: The ¼ full space you leave at the top of each container isn't just for watering convenience—it's for preventing compaction.
Frequently asked questions
Got questions about transforming your space with tiered garden design? You’re not alone! Here are answers to the most common queries to help you plan like a pro.
What’s the best way to start a tiered garden if I’m a beginner?
Start small! Begin with one or two levels using sturdy containers or pre-made tiered planters. Choose easy-to-grow plants like herbs, succulents, or leafy greens to build confidence. Avoid overcrowding—leave 6–12 inches between tiers for airflow and maintenance.
How long does it take for a tiered garden to look established?
Most tiered gardens show noticeable growth in 4–8 weeks, depending on plant types. Fast growers like lettuce or basil may fill gaps quickly, while woody plants (e.g., rosemary) take longer. Patience pays off—layering plants with varying maturity speeds creates a lush, balanced look faster.
Are DIY tiered gardens cheaper than buying pre-made ones?
Yes!
DIY options (e.g., repurposed pallets, cinder blocks, or wooden crates) can cost $20–$50 for materials, while pre-made planters range from $50–$200+. Just ensure your DIY tiers are weatherproof and stable. Pro tip: Check thrift stores for unique containers!
How do I protect my tiered garden from heavy rain or wind?
Anchor tiers to the ground with screws or sandbags to prevent tipping. Use lightweight, breathable fabrics (like burlap) to shield delicate plants from wind. For rain, ensure proper drainage—add holes to containers or use saucers to catch excess water. Overhanging plants (like trailing ivy) can also act as natural windbreaks.
Can I mix edible and ornamental plants in the same tiered garden?
Pair herbs (basil, thyme) with flowers (nasturtiums, marigolds) for pest control and beauty. Just group plants with similar water/sun needs together. Avoid mixing heavy feeders (like tomatoes) with light eaters (like succulents)—they’ll compete for nutrients.
Wrapping up and next steps
A tiered garden design isn’t just about saving space—it’s about transforming your outdoor area into a lush, multi-level masterpiece. Whether you’re working with a balcony, patio, or backyard, vertical layers let you grow more, showcase creativity, and enjoy nature at every height. 🌿
Ready to bring your vision to life? Start small—sketch your design, gather materials, and take it step by step. Before you know it, your garden will be thriving with layers of beauty and functionality!