Tools
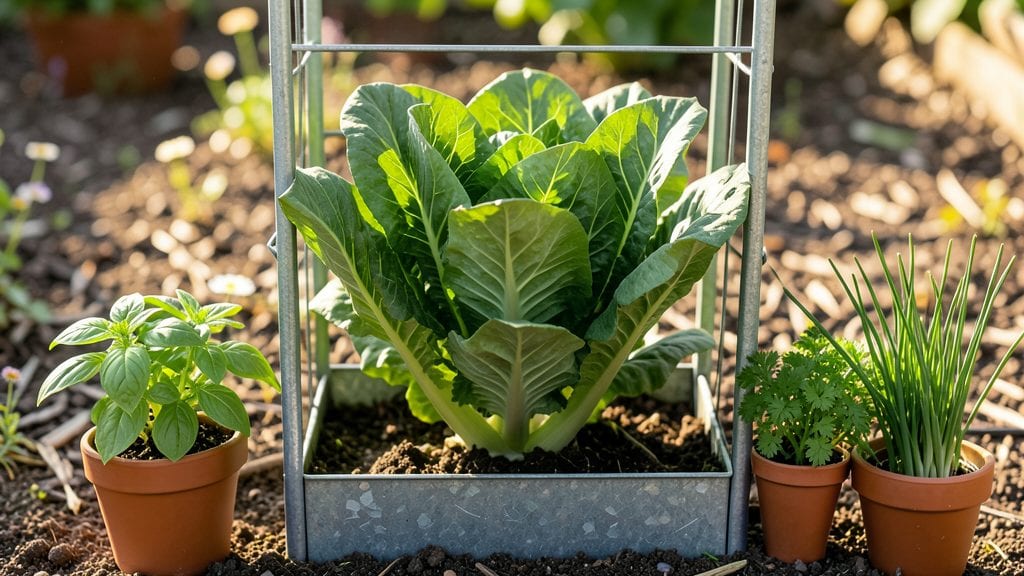
A vertical garden frame turns blank walls into lush herb and flower displays—no yard required. 🌿 I transformed my tiny balcony into a thriving garden by mounting a simple trellis system, and the results were shockingly productive.
The right frame saves space while giving plants the support they need to climb, cascade, or stand tall.
You don’t need fancy materials—just sturdy wood, metal, or even repurposed pallets to build one yourself. For store-bought options, look for frames with built-in pockets or modular panels that make planting and maintenance a breeze.
The best part? You can grow everything from fragrant herbs to trailing petunias in just a few square feet of space.
Imagine snipping fresh basil for cocktails or admiring cascading blooms from your kitchen window. A vertical garden frame keeps plants healthy by improving airflow and reducing soil-borne diseases. Plus, the aesthetic upgrade turns any wall into a living work of art—no green thumb required.
Whether you’re working with a sunny patio, a shady corner, or a high-rise balcony, these frames adapt to your space. Next, we’ll break down how to choose the right design for your plants and climate—so you can start growing upward today.
📚 In This Guide
- What you need
- Instructions
- Tips and common mistakes
- Wrapping up and next steps
What you need
- ● Frame Structure: 2x4 lumber (pressure-treated or cedar for durability) – 4 pieces, 8 ft long
- ● 1x2 lumber – 8 pieces, 2 ft long (for slats or pockets)
- ● Wood screws (2.5"–3") – 50–100 screws
- ○ Galvanized nails (optional, for extra reinforcement) – 20–30 nails
- ● Hardware & Fasteners: Wood glue (for extra stability)
- ○ Corner braces (optional, for added support)
- ● Tools: Drill & drill bits
- ● Saw (circular saw or miter saw)
- ● Measuring tape & pencil
- ● Level (to ensure your frame is straight!)
- ● Sandpaper (120-grit, for smooth edges)
- ○ Paint or stain (optional, for weatherproofing)
- ● Hanging planters or fabric pockets (for modular planting)
- ● Drip irrigation kit (for hassle-free watering)
- ● Weather-resistant sealant (to protect your frame outdoors)
- ● Decorative trim or lattice (for a polished look)
Step-by-Step instructions for building a vertical garden frame
This simple, sturdy design lets you grow herbs and flowers upward—no green thumb required.
🪴 Step 1: Gather Materials and Prep the Base
You’ll need two 8-foot 2x4s for the frame, four 1x12 cedar boards (8 feet long) for the pockets, wood screws (2.5 inches), and outdoor-rated wood glue. Start by cutting the 2x4s: two at 8 feet for vertical sides and two at 3 feet for horizontal top/bottom supports. Pre-drill holes for screws to prevent splitting—this is where most DIY projects go wrong.
Assemble the frame first by attaching the top and bottom 3-foot pieces to the vertical 8-foot pieces using four screws each. Double-check for square alignment (measure diagonals—they should be equal). Once the frame is sturdy, lay it flat and apply a thin bead of wood glue along the edges before securing the cedar boards vertically. Space them 4 inches apart for easy planting access.
☀️ Step 2: Attach the Planting Pockets
Slide the 1x12 cedar boards into the frame, spacing them evenly. Secure each board with two screws per side (top and bottom) to prevent wobbling. Cedar resists rot and holds up well outdoors, but if you’re in a humid climate, add a waterproof sealant to the edges after assembly. The pockets should sit flush with the frame—no gaps where soil could spill.
Here’s the thing—don’t over-tighten screws. You want the boards snug but able to expand slightly with moisture. Test by gently pressing each pocket; it should hold its shape but not feel rigid. Once secured, flip the frame upright and let it sit for 24 hours to ensure stability before planting.
💧 Step 3: Fill Pockets and Plant
Use lightweight potting mix (not garden soil—it compacts too much) to fill each pocket ¾ full. Pack it gently but firmly to eliminate air pockets. I like to add a handful of perlite to each pocket for drainage, then water it until moisture runs out the bottom. This pre-wetting step prevents dry pockets after planting.
Plant herbs or flowers directly into the pockets, spacing them 2-3 inches apart for small varieties like basil or 4-6 inches for larger plants like rosemary. Press the soil lightly around the roots—no need to bury stems deeper than they were in their pots. Water again until the soil is evenly damp but not soggy. You’ll know it’s right when excess water drips from the bottom without puddling.
✂️ Step 4: Mount and Maintain
Attach the frame to a wall or fence using L-brackets and heavy-duty screws (bury them 3 inches deep into studs or solid wood). Angle the frame slightly backward (5-10 degrees) so rainwater drains away from the wall. For extra stability, add horizontal supports (like a third 2x4) if your frame is taller than 4 feet.
Water deeply every 2-3 days in the first week, then adjust based on rainfall. Herbs need 1 inch of water weekly, while flowers may need slightly more. Watch for yellowing leaves—this usually means overwatering. Mulch the top of each pocket with ½ inch of shredded bark to retain moisture and suppress weeds. Rotate the frame quarter-turn weekly so plants grow evenly toward the light.
Tips & tricks for perfect vertical garden frame assembly
Between us, I've built enough of these to know where beginners stumble—and how to avoid those pitfalls completely.
Pre-Drilling is Non-Negotiable: In Step 1, when you pre-drill those holes for the screws, use a bit that's 1/16-inch smaller than your screw diameter. This prevents splitting the cedar boards, which is where most DIY garden frames fail. I've seen too many projects ruined because someone skipped this step. Trust me on this—it's worth the extra 5 minutes.
The 24-Hour Stability Test: That 24-hour wait in Step 2 isn't just arbitrary—it lets the wood glue set properly and gives you time to catch any wobbly pockets before planting. Use this time to test each pocket by gently pressing down. If any feel loose, add an extra screw at the corners. This small check prevents your entire frame from collapsing later when plants are established.
Soil Science for Pockets: When filling those pockets in Step 3, think of it like making a cake batter—you want it light but packed just right. Tap the sides of the frame gently after adding soil to eliminate air pockets. The ¾ full measurement is critical—any more and roots won't have room to grow downward, any less and plants will dry out faster. I like to add a sprinkle of compost to the bottom for extra nutrients before the potting mix.
Mounting Angle Matters: That 5-10 degree backward angle in Step 4 isn't just decorative—it's functional. It prevents water from pooling against your wall, which can cause rot over time. Use a level to check before securing, and if you're mounting to a fence, consider adding corner braces for extra stability against wind. For larger frames, that third horizontal support really makes the difference when plants are heavy with blooms.
Pro Tips for Vertical Garden Frame
- Between us, I've built enough of these to know where beginners stumble—and how to avoid those pitfalls completely.
- Pre-Drilling is Non-Negotiable: In Step 1, when you pre-drill those holes for the screws, use a bit that's 1/16-inch smaller than your screw diameter.
- The 24-Hour Stability Test: That 24-hour wait in Step 2 isn't just arbitrary—it lets the wood glue set properly and gives you time to catch any wobbly pockets before planting.
Frequently asked questions
Got questions about transforming your space with a vertical garden frame? You’re not alone! Here are some of the most common queries—and their answers—to help you grow with confidence.
What’s the best way to attach a vertical garden frame to my wall?
Use L-brackets or heavy-duty adhesive hooks for lightweight frames (under 20 lbs). For heavier setups, lag bolts or toggle bolts into studs are ideal. Always check your wall type—drywall needs extra support, while brick/concrete can handle screws directly. Pro tip: Pre-drill holes to avoid cracking!
How long does it take for plants to thrive in a vertical garden frame?
Most herbs (like basil or mint) sprout in 2–4 weeks, while flowers (e.g., petunias) may take 4–6 weeks to fill out. Success depends on light, water, and soil quality. Start with fast-growing plants for quick wins, then expand to slower varieties like rosemary.
How often should I water a vertical garden frame?
Check soil moisture daily—vertical gardens dry out faster than ground plots. Water every 1–2 days in hot climates or when the top inch feels dry. Use a drip irrigation system or spray bottle to avoid overwatering. Watch out: Overwatering causes root rot!
Can I use a vertical garden frame indoors without sunlight?
Yes! Pair your frame with grow lights (LED or fluorescent) for 12–16 hours/day. Leafy greens (kale, spinach) thrive indoors, while sun-lovers (tomatoes, peppers) need a south-facing window or supplemental lighting. Rotate plants weekly for even growth.
What do I do if my plants look wilted or yellow?
Yellow leaves often signal overwatering or poor drainage. Check for root rot (smelly, mushy roots) and repot if needed. Wilting? It could be underwatering or heat stress. Trim damaged leaves, adjust watering, and move to a shadier spot if scorched. Quick fix: Fertilize with seaweed extract for a nutrient boost!
Still stumped? Drop your question in the comments—we’re happy to help your vertical garden flourish!
Wrapping up and next steps
A vertical garden frame isn’t just a clever way to save space—it’s a game-changer for urban gardeners, small-space enthusiasts, and anyone craving a touch of greenery without sacrificing square footage! 🌿 Whether you’re growing fragrant herbs for your kitchen or vibrant flowers to brighten your patio, this simple yet versatile tool makes gardening accessible and rewarding.
Ready to transform your walls into a lush oasis? Start by gathering your materials, follow the steps with confidence, and soon you’ll be harvesting fresh flavors or admiring blooms that only a vertical garden can provide. Your green thumb is about to get a major upgrade! 🌱