Landscaping
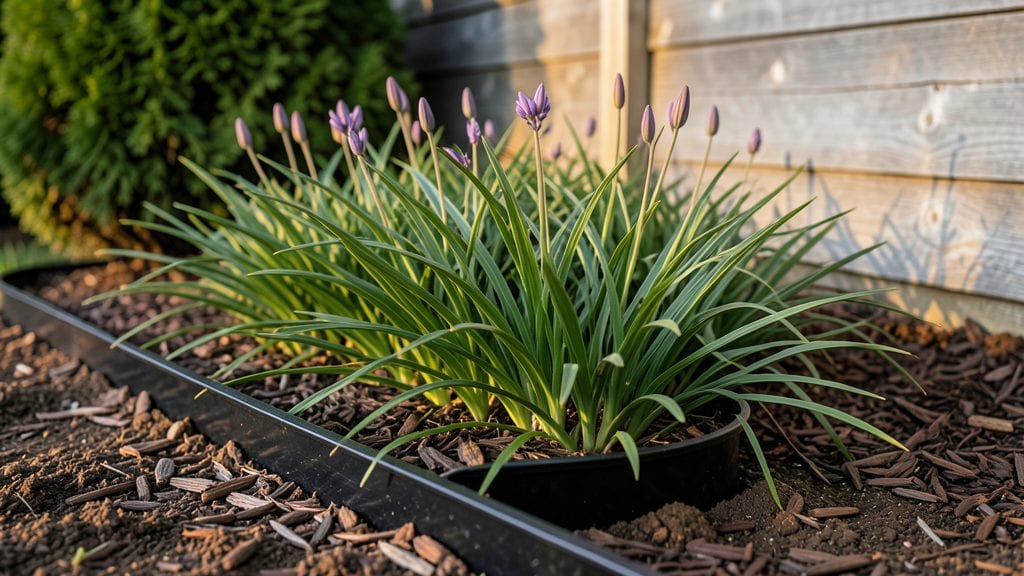
A durable steel border like Vevor garden edging transforms your garden from a casual patch to a polished, intentional space. I remember the first time I installed edging—my flower beds suddenly looked finished, not just thrown together.
The clean lines make weeding easier, keep mulch in place, and prevent soil from spilling into walkways.
Steel edging stands up to decades of weather, unlike flimsy plastic or crumbling stone. You’ll need basic tools—a shovel, mallet, and measuring tape—and about 2 hours for a 10-foot section.
The interlocking design means no screws or cement, so installation is surprisingly simple. Plus, it won’t rust like other metals if you choose galvanized steel.
Beyond function, edging adds design flair—curved borders soften formal gardens, while sharp edges create modern contrast. My favorite trick? Using it to frame raised beds or create geometric patterns. The result? A garden that looks like it belongs in a magazine, not just your backyard.
Works for flower beds, vegetable gardens, or even pathways. Once installed, it’ll outlast any other material you try. Ready to make your garden look intentional? Here’s how to get started without the hassle.
📚 In This Guide
- What you need
- Instructions
- Tips and common mistakes
- Wrapping up and next steps
What you need
- ● Vevor Steel Garden Edging: Lengths to match your garden’s perimeter (e.g., 6 ft, 8 ft, or 10 ft sections—measure twice to avoid waste!)
- ● Pro tip: Opt for galvanized steel for rust resistance or powder-coated options for color!
- ● Measuring Tape: 25 ft or longer for accuracy.
- ● Stakes or Spikes: 4–6 per section (included with some Vevor kits or sold separately).
- ● Garden Gloves: Heavy-duty to protect hands while handling spikes or soil.
- ● Shovel or Edging Tool: For digging trenches (1–2 inches deep).
- ● Level or String Line: Ensures edging stays straight and even.
- ● Hammer or Mallet: For securing stakes into the ground.
- ○ Sand or Gravel: (Optional but recommended) 1–2 bags to create a stable base.
- ● Concrete or Landscape Fabric: Underneath edging for extra stability in high-traffic areas.
- ● Post Hole Digger: For rocky or hard soil.
- ● Paint or Sealant: To match your garden’s aesthetic (if using powder-coated steel).
- ● Knee Pads: Because gardening is not a back-breaking sport! 😉
Step-by-Step instructions for installing Vevor garden edging
Here's how to create a clean, long-lasting border that defines your garden beds beautifully.
Measure and Mark Your Garden Bed Layout
Use a tape measure to determine the perimeter of your garden bed, accounting for the width of the edging material—typically 4 to 6 inches for Vevor steel edging. Mark the layout with spray paint or wooden stakes at 4-foot intervals to create a straight, even line. Double-check your measurements before proceeding, as adjustments after installation are difficult.
For curved beds, use a flexible garden hose to trace the shape onto the ground. This ensures smooth, professional-looking edges without sharp turns. If your garden has multiple levels, mark each tier separately to maintain consistent height throughout.
Dig a Narrow Trench Along the Marked Line
Using a shovel or trenching tool, dig a trench that’s 2 to 3 inches deep and 2 to 3 inches wide along your marked line. The depth should accommodate the bottom flange of the Vevor steel edging while allowing the top to sit flush with the ground. Keep the trench uniform—uneven depths will cause the edging to wobble or tilt.
Remove any rocks, roots, or debris from the trench to create a clean base. A smooth, level trench ensures the edging stays in place and looks polished. If working in clay soil, lightly loosen the sides of the trench to help the edging settle more securely.
Position and Secure the First Section of Edging
Start at one corner of your garden bed and insert the first section of Vevor steel edging into the trench, pressing it firmly into the soil until the bottom flange sits flat against the trench base. Use a rubber mallet to gently tap the edging into place if needed—this prevents bending or warping. Align the top edge with your marked line for a crisp, straight appearance.
For corners or mitered joints, use the pre-cut connectors included with Vevor edging. Slide the ends together tightly and secure with stainless steel screws or landscape staples to prevent shifting. If your bed has a 90-degree turn, pre-bend the edging slightly to create a smooth transition.
Continue Installing and Connecting Sections
Work your way around the garden bed, inserting each section of edging into the trench and connecting them end-to-end. Overlap sections by 1 to 2 inches for extra stability, especially in high-traffic areas or windy locations. Use the included hardware to fasten joints securely—this prevents gaps where soil or mulch could spill over.
Check for level frequently with a 2-foot level or by eye along the top edge. Adjust any sections that sag by pressing them deeper into the trench or adding a small amount of gravel or sand beneath for support. For long, straight sections, use stakes or pins every 3 to 4 feet to hold the edging in place until backfilled.
Backfill and Finish for Long-Term Stability
Once all sections are installed, fill the trench with native soil or a mix of soil and sand to secure the edging. Tamp the soil lightly with a hand tamper or the back of a shovel to eliminate air pockets. Avoid over-compacting, which can cause the edging to shift over time.
For added durability, especially in clay-heavy soils, top the backfill with a 1-inch layer of gravel before adding mulch. This prevents soil erosion and keeps the edging in place during freeze-thaw cycles. Finish by trimming any overhanging grass or weeds along the top edge for a polished look.
Tips & tricks for perfect Vevor garden edging installation
A few strategic moves will help you achieve a flawless, long-lasting garden border that stands the test of time and weather.
Precision in Step 1: When measuring your garden bed perimeter, account for the 4- to 6-inch width of the Vevor steel edging to ensure proper spacing. For curved sections, use the flexible garden hose technique to create smooth transitions—this eliminates the need for awkward mitered cuts later. I've found that marking every 4 feet with wooden stakes provides better alignment than spray paint, especially in windy conditions where paint markings can blur.
Trench Preparation Matters: The 2- to 3-inch deep trench specified in Step 2 is critical for stability, but don't overlook the importance of uniform width. Use a straight board as a guide while digging to maintain that 2- to 3-inch width consistently. In clay-heavy soils, I recommend loosening the trench sides with a garden fork rather than a shovel—this prevents compaction that could cause the edging to shift over time. The goal is to create a snug fit where the bottom flange rests securely.
Corner and Joint Reinforcement: For 90-degree turns, pre-bending the edging slightly creates a more natural look than sharp corners. When using the included connectors, I've found that stainless steel screws provide better long-term hold than landscape staples, especially in freeze-thaw climates. For extra security in high-traffic areas, consider adding an additional screw at each joint—this prevents the subtle movement that can loosen connections over time.
Leveling and Backfilling Strategy: The 3- to 4-foot spacing for stakes during installation is perfect, but I recommend checking level every 2 feet along the edging. For particularly long sections, use a 4-foot level> to verify alignment before backfilling. When backfilling, I've had the best results using a 50/50 mix of native soil and coarse sand>—this provides drainage while maintaining stability. The 1-inch gravel layer> mentioned for clay soils is worth the extra effort, as it creates a drainage barrier that prevents soil buildup against the edging.
Pro Tips for Vevor Garden Edging
- A few strategic moves will help you achieve a flawless, long-lasting garden border that stands the test of time and weather.
- Precision in Step 1: When measuring your garden bed perimeter, account for the 4- to 6-inch width of the Vevor steel edging to ensure proper spacing.
- Trench Preparation Matters: The 2- to 3-inch deep trench specified in Step 2 is critical for stability, but don't overlook the importance of uniform width.
Frequently asked questions
Got questions about Vevor garden edging?
You’re not alone! Here are some of the most common concerns—and straightforward answers—to help you make the best choice for your outdoor space.
What’s the best time of year to install Vevor garden edging?
Spring or early fall are ideal! Avoid extreme heat or frozen ground, which can make installation tricky. Spring lets you prep before summer planting, while fall gives roots time to settle before winter. Just avoid muddy conditions—wait for soil to dry slightly for easier digging.
Can I install Vevor edging myself, or do I need a pro?
Absolutely DIY-friendly! Vevor’s lightweight steel design makes it easy to cut, bend, and secure with basic tools (like a shovel, stakes, and landscape fabric). Follow the included instructions, and you’ll have a polished look in a few hours. For large or complex projects, though, a pro can save time.
Will Vevor edging rust over time, even if it’s steel?
Not with proper care! Vevor’s galvanized steel resists rust, but occasional cleaning (with a hose or mild soap) keeps it looking sharp. For extra protection in wet climates, apply a clear sealant. Avoid sharp tools that could scratch the coating—gentle maintenance is key!
What’s the best alternative if I want something cheaper or more flexible?
Consider these options:
- Plastic edging: Budget-friendly and lightweight, but less durable (lasts ~3–5 years).
- Brick/stone: High-end and permanent, but labor-intensive and costly.
- PVC: Mid-range durability (~5–10 years) and easy to install, but can fade in sun.
How do I fix Vevor edging that’s already bent or uneven?
No problem! Use a mallet to gently tap bent sections back into place. For uneven areas, dig slightly deeper, add a layer of gravel for stability, and re-secure the edging with stakes. If rust spots appear, sand lightly and reapply a galvanized coating. Most issues are quick fixes!
Wrapping up and next steps
Transforming your garden with Vevor garden edging isn’t just about aesthetics—it’s an investment in durability, low maintenance, and long-term beauty. 🌿 Whether you’re framing flower beds, defining pathways, or protecting lawns, this steel border delivers decades of reliable service with minimal upkeep. Ready to elevate your outdoor space?
🚀 Your Next Step: Start Small or Go Big!
Pick a section of your garden to try it out—maybe a high-traffic area or a prized flower bed. Measure, cut, and install with confidence, knowing Vevor’s edging will hold up against time, weather, and even curious pets! 🐾 Shop now and let your creativity (and curb appeal) shine.