Tools
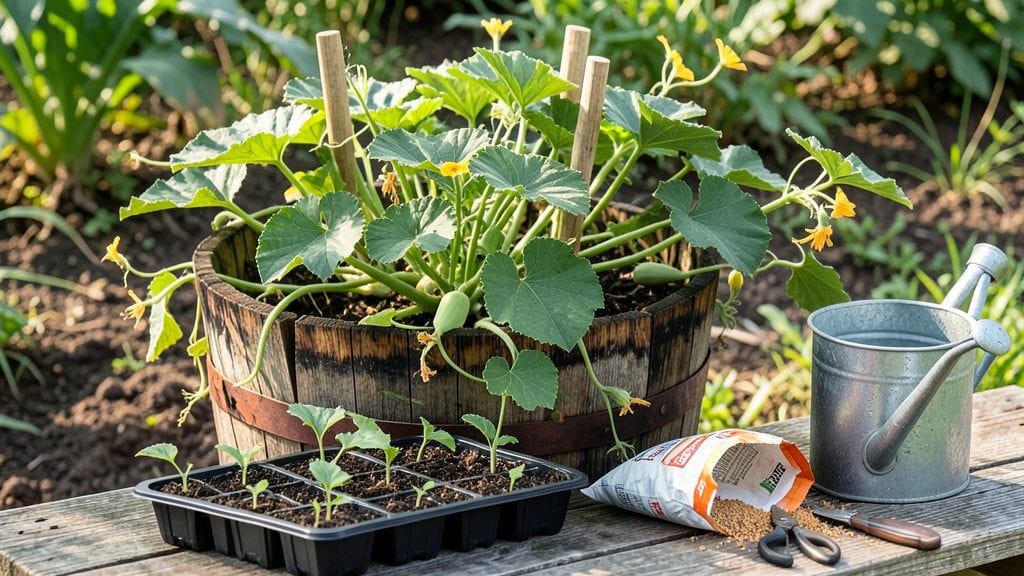
Transforming a whiskey barrel into a garden planter turns something old into something unexpectedly charming—while giving your space a rustic, functional upgrade. I’ve repurposed barrels for everything from fragrant herb gardens to drought-resistant succulents, and the best part?
They double as hidden storage for tools or seasonal decor. The charred wood adds instant character, and the sturdy shape holds up beautifully against weather or curious pets.
You’ll need a clean, food-grade barrel (check for "Bourbon" or "Whiskey" labels), basic tools like a drill and sandpaper, and a waterproof liner if you want to plant directly. Drainage is key—drill a few holes near the bottom or add a saucer underneath to catch overflow.
For extra durability, seal the inside with a non-toxic liner or paint the outside with weather-resistant stain. The whole project takes under an hour, and the results? Pure eye-catching appeal with minimal effort.
Imagine a whiskey barrel overflowing with lavender and rosemary, its scent wafting through your patio, or a vertical display of succulents cascading down the sides like a living centerpiece. These planters work equally well on decks, porches, or even as part of a larger garden bed.
The rustic aesthetic ties into cottage-core vibes, farmhouse decor, or even a whiskey-themed garden—because why not lean into the inspiration?
Pro tip: Group barrels in odd numbers for visual balance, or stack them vertically for a dramatic focal point. If you’re feeling ambitious, add wheels or handles to create a movable planter that follows the sun.
The possibilities are as endless as your creativity—and your whiskey stash. Now, which barrel will you reclaim first?
📚 In This Guide
- What you need
- Instructions
- Tips and common mistakes
- Wrapping up and next steps
What you need
- ● Whiskey barrel: 1 used oak barrel (check local breweries, distilleries, or online marketplaces for donations—clean and food-safe is a must!)
- ● Drill: 1 cordless or corded drill with variable speed settings (for precision drilling).
- ● Drill bits: 1 1/2" spade bit (for drainage holes)
- ● 1 1/4" or 3/8" wood bit (for smaller drainage or decorative holes)
- ● Safety gear: 1 pair of safety goggles
- ● 1 pair of heavy-duty gloves
- ● 1 dust mask or respirator (for sanding)
- ● Sandpaper: 80- and 120-grit sandpaper (or an electric sander for efficiency)
- ● Wood stain or sealant: 1 exterior-grade stain or sealant (waterproof and UV-resistant, like Spar urethane or polyurethane)
- ● Paintbrush or roller: 1 wide-angle brush or foam roller for even coating
- ● Liner: 1 heavy-duty pond liner (4-6 mil thickness) or landscape fabric (cut to fit the barrel’s interior)
- ● Potting soil: 1 bag of high-quality, well-draining potting mix (avoid garden soil—it compacts too much!)
- ● Plants: Choose drought-tolerant, compact varieties like succulents, herbs (basil, thyme), or ornamental grasses.
- ● Decorative hardware: Rustic iron brackets or wooden handles to turn the barrel into a mobile planter.
- ● LED string lights: Solar-powered or battery-operated lights for a cozy nighttime glow.
- ● Barrel tap: A decorative tap (non-functional) to mimic the whiskey barrel’s original charm.
- ● Wheel kit: 1 4-wheel dolly kit (if you want mobility for your garden!).
- ● Stencils or decals: Custom wood-burning designs or vinyl decals for a personalized touch.
Step-by-step instructions for building a whiskey barrel garden planter
Here's how to transform a whiskey barrel into a functional, rustic garden planter that doubles as storage.
Prepare the Whiskey Barrel for Gardening
Begin by thoroughly cleaning the whiskey barrel to remove any residual alcohol or debris. Scrub the interior and exterior with warm, soapy water, then rinse completely. Let it dry in a well-ventilated area for at least 24 hours—this ensures no moisture remains that could encourage mold or rot. Once dry, inspect the barrel for cracks or weak spots. If you find any, reinforce them with waterproof wood glue and sand the area smooth. The barrel should be sturdy enough to hold soil and plants without collapsing under weight.
Next, line the interior with a heavy-duty landscape fabric. This prevents soil from draining too quickly and keeps roots from escaping through the barrel's staves. Cut the fabric to fit snugly, leaving a few inches to fold over the top edge. Secure it with staples or strong twine, ensuring no gaps remain. This step is critical—without it, your soil will erode, and roots will struggle to establish properly.
Add Drainage and Soil Mix
Drill two to three drainage holes near the bottom of the barrel if they don’t already exist. These are essential to prevent waterlogging, which can suffocate roots and lead to fungal diseases. Place a plastic nursery pot or broken clay shard over each hole to keep soil from washing out while allowing excess water to escape. Fill the bottom 2 inches with gravel or coarse sand to create a drainage layer. This ensures water flows freely and doesn’t pool at the base.
Now, fill the barrel with a well-draining potting mix. Avoid garden soil—it compacts easily and retains too much moisture. Instead, use a blend of 50% potting soil, 30% perlite, and 20% compost. This mixture provides aeration and nutrients while preventing waterlogged conditions. Fill the barrel to within 4-6 inches of the top, leaving room for mulch and plants. Press the soil lightly to remove air pockets, but don’t compact it too firmly—roots need space to grow.
Plant and Arrange Your Garden
Choose plants that thrive in containers and complement the barrel’s rustic aesthetic. Succulents, herbs like rosemary or thyme, and ornamental grasses work beautifully. For a 4-barrel garden, select a mix of 4-6 plants per barrel, spacing them according to their mature size. Dig small holes in the soil, gently remove plants from their nursery pots, and place them in the barrel. Cover the roots with soil, pressing lightly to secure them. Water immediately after planting to settle the soil and eliminate air gaps around the roots.
Arrange the barrels in a way that maximizes both aesthetics and functionality. Place them on a flat, stable surface like a patio or deck, ensuring they’re level to prevent water from pooling. If you’re using the barrels for storage as well, position them near your outdoor kitchen or entertaining area. Grouping them in a square or circle creates a cohesive look, while staggering them adds visual interest. Mulch the soil surface with 2-3 inches of shredded bark or straw to retain moisture and suppress weeds.
Maintain and Enjoy Your Whiskey Barrel Garden
Water your whiskey barrel garden deeply once a week, adjusting for rainfall or extreme heat. The top 2 inches of soil should feel dry before watering again—overwatering is the fastest way to kill container plants. Use a soaker hose or watering can to deliver moisture directly to the roots without disturbing the plants. Fertilize every 4-6 weeks with a balanced, slow-release fertilizer to keep plants thriving. Since whiskey barrels have limited soil volume, nutrients deplete faster than in-ground gardens.
Monitor your plants for signs of stress, such as yellowing leaves or wilting. These are often early warnings of overwatering, underwatering, or nutrient deficiencies. If you notice pests like aphids or spider mites, treat them promptly with neem oil or insecticidal soap—these are safe for plants and won’t harm beneficial insects. Prune plants as needed to maintain their shape and encourage bushier growth. With proper care, your whiskey barrel garden will provide years of charm, storage, and beauty.
Tips & tricks for perfect whiskey barrel garden planters
Transforming whiskey barrels into garden planters is all about balancing functionality with rustic charm. Here are the key insights that'll help you avoid common pitfalls and create a planter that lasts for years.
The Drying Factor: That 24-hour drying period after cleaning isn't just about removing moisture—it's about preventing mold spores that could hitch a ride from your soapy water. I've seen barrels develop mold within days when rushed, so take this step seriously. Place the barrel in a spot with good airflow, like near an open window or under a fan, to speed up the process without compromising safety.
Drainage Design: When drilling those two to three drainage holes, position them near the bottom but not too close together. I recommend spacing them about 3 inches apart to ensure even water distribution. For extra protection against soil loss, use plastic nursery pots that sit just above the holes—this creates a natural filter while maintaining proper drainage. The gravel layer should be at least 2 inches deep to prevent clogging over time.
Soil Science: The 50-30-20 soil blend isn't arbitrary—it's about creating the perfect balance. The potting soil provides structure, perlite creates air pockets for roots, and compost delivers nutrients. For larger barrels, consider adding a handful of worm castings to boost microbial activity. When pressing the soil lightly, think "fluffy cloud" rather than "packed snow"—you want to eliminate air pockets without compressing the soil too tightly.
Plant Placement Strategy: For that 4-6 plant per barrel guideline, think about mature sizes. A small succulent might stay at 4 inches, while a rosemary bush could reach 18 inches. I arrange plants by height—tallest in the center, medium around the edges, and smallest near the front. This creates visual interest while ensuring all plants get adequate sunlight. The immediate watering after planting helps settle the soil and eliminates air gaps that could dry out roots.
Pro Tips for Whiskey Barrel Garden
- Transforming whiskey barrels into garden planters is all about balancing functionality with rustic charm.
- The Drying Factor: That 24-hour drying period after cleaning isn't just about removing moisture—it's about preventing mold spores that could hitch a ride from your soapy water.
- Drainage Design: When drilling those two to three drainage holes, position them near the bottom but not too close together.
Frequently asked questions
Got questions about turning a whiskey barrel into a garden? You’re not alone! Here are some of the most common queries—and answers—to help you get started with confidence.
Can I use any whiskey barrel for gardening?
A whiskey barrel can work, but not all are ideal. Look for bourbon or rye barrels (often labeled as "used" or "ex-bourbon")—they’re sturdy and treated for durability. Avoid barrels with leaky staves or toxic stains (like paint or chemicals). If repurposing, ensure the wood is food-safe and properly sanitized. Pro tip: Check for wormholes—small holes won’t ruin the look but may need patching for heavy plants!
How long does it take to set up a whiskey barrel garden?
Most DIYers finish in 2–4 hours, depending on your skill level. Here’s the breakdown:
- Prep (30–60 mins): Cleaning, sanding, and sealing the barrel.
- Drilling & Drainage (20–30 mins): Adding holes for water flow.
- Lining & Filling (1–2 hours): Adding landscape fabric, soil, and plants.
What plants thrive in a whiskey barrel garden?
Whiskey barrels work best for medium-sized plants with shallow roots. Top picks:
- Herbs: Basil, rosemary, thyme (love the drainage!).
- Vegetables: Tomatoes, peppers, lettuce (use dwarf varieties).
- Flowers: Petunias, marigolds, or succulents (drought-tolerant = less watering!).
Is a whiskey barrel garden cheaper than buying planters?
Yes! A used barrel costs $30–$80 (depending on condition), while a comparable ceramic or metal planter can run $100–$300+. DIY savings add up when you:
- Skip store-bought liners (use landscape fabric instead).
- Repurpose old tools (like a wooden pallet for drainage).
- Avoid pricey soil mixes (amend with compost).
My whiskey barrel garden is leaking—what do I do?
Leaks happen! Here’s how to fix them:
- Small gaps: Seal with waterproof wood glue or silicone caulk.
- Loose staves: Tighten with ratchet straps or metal bands.
- Bottom drainage issues: Add a plastic liner or pond liner as a temporary fix.
Wrapping up and next steps
A whiskey barrel garden isn’t just a stylish planter—it’s a creative way to blend rustic charm with functional storage while breathing new life into repurposed materials.
Whether you’re a seasoned gardener or a DIY enthusiast, transforming an old barrel into a thriving green space is a rewarding project that adds character to any outdoor space. 🌿✨
Now that you’re equipped with the materials, answers to common questions, and a clear vision, it’s time to roll up your sleeves and get crafting! Start by gathering your supplies, sketch out your design, and let your creativity flow.
Before you know it, you’ll have a stunning whiskey barrel garden that’s as practical as it is picturesque.