Pruning
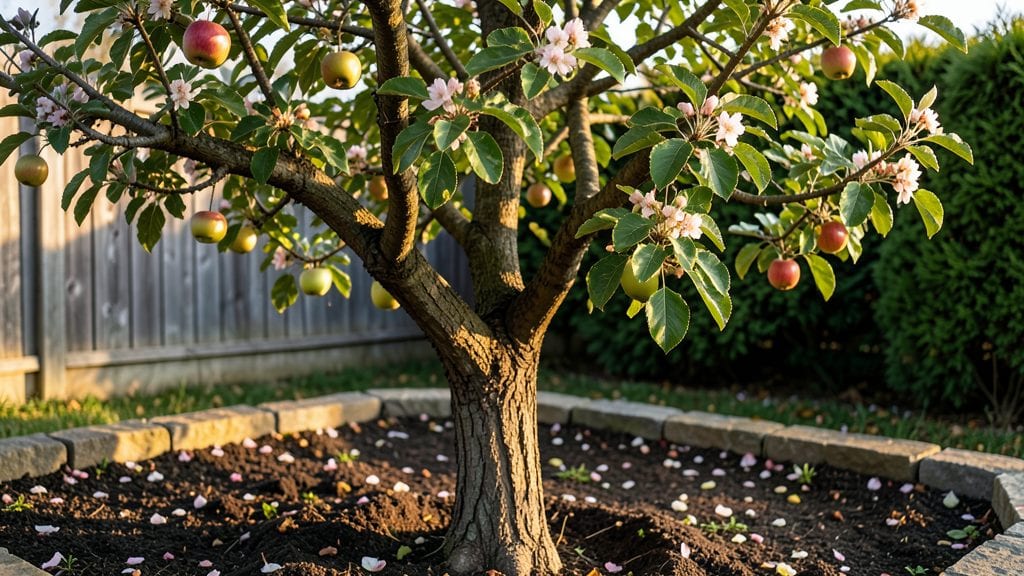
Apple tree gardening transforms blank spaces into fragrant orchards where homegrown fruit bursts with flavor far beyond store-bought. 🌱 I’ve planted, pruned, and nurtured my share of these giants, and the key to success isn’t just patience—it’s knowing when to dig, when to trim, and how to keep pests from turning your labor into lunch.
The right variety for your climate, proper soil prep, and a few simple pruning tricks can turn a backyard into an orchard within a decade.
Start with the basics: cold-hardy rootstocks for your zone, well-draining soil mixed with compost, and spacing that gives branches room to stretch without crowding. Most gardeners overlook winter care—mulching now saves you from cracked bark and frost heave later.
And yes, pruning in late winter (before buds swell) is the secret to strong structure and heavy fruit loads. I’ve seen trees go from leggy messes to productive powerhouses in just three years with consistent care.
By summer, you’ll be thinning fruit to improve size and quality, and by fall, you’ll harvest apples that burst with flavor. The best part? A well-cared-for tree lives for decades, rewarding you with harvests long after you’ve forgotten the first year’s struggles.
Whether you’re dealing with codling moths or fungal spots, I’ll show you how to spot problems early and fix them without harsh chemicals.
This works for small urban yards (dwarf varieties) or sprawling homesteads, and I’ll break down the steps so even beginners can avoid the most common mistakes. Let’s get those roots in the ground—and those apples in the basket.
📚 In This Guide
- What you need
- Instructions
- Tips and common mistakes
- Wrapping up and next steps
What you need
- ● Apple Tree Variety: Choose disease-resistant varieties like Honeycrisp, Fuji, or Granny Smith (2-5 trees for cross-pollination if needed).
- ● Soil Amendments: Compost (5-10 gallons per tree)
- ● Well-draining potting mix (for container trees)
- ● Lime (if soil is acidic, test first!)
- ● Fertilizers: Balanced 10-10-10 fertilizer (1 lb per tree)
- ○ Organic options like fish emulsion or worm castings (optional)
- ● Pruning Tools: Bypass pruners (sharp, for clean cuts)
- ● Loppers (for thicker branches)
- ● Pruning saw (for large limbs)
- ● Disinfectant (rubbing alcohol or bleach solution)
- ● Support Structures: Stakes and ties (for young trees)
- ● Tree guards (to protect from pests)
- ● Mulch (wood chips or straw, 2-3 inches deep)
- ● Drip irrigation system or soaker hoses
- ● Pest control: Neem oil, horticultural oil, or row covers
- ● Fruit thinning shears (for managing harvest)
- ● Soil pH test kit (to monitor acidity/alkalinity)
Step-by-step guide to planting and caring for young apple trees
Here's how I ensure my young apple trees grow strong and healthy—from planting to fruit-bearing years.
🌱 Step 1: Choose the Right Location and Prepare the Soil
Apple trees need full sun—at least 6-8 hours daily—and well-draining soil. I pick a spot with afternoon shade in hot climates to prevent sunburn on tender leaves. Avoid low areas where water pools, as soggy roots invite rot.
Before planting, loosen the soil to a depth of 18 inches with a shovel or tiller. Mix in 2-3 inches of compost to improve fertility and drainage. Test the soil pH—apple trees thrive in slightly acidic soil (pH 6.0-7.0). If your soil is too alkaline, add sulfur to lower the pH gradually.
🪴 Step 2: Plant at the Correct Depth and Stake for Support
Dig a hole twice as wide as the root ball but no deeper. Gently remove the tree from its container and inspect the roots. If they’re circling, loosen them with your fingers to encourage outward growth. Place the tree in the hole so the graft union (the bump near the base) sits 2-4 inches above soil level—this prevents rot and encourages strong root development.
Backfill the hole with native soil mixed with compost, tamping down lightly as you go. Water deeply to settle the soil. Install a 5-foot stake next to the tree, tying it loosely with soft fabric strips to avoid girdling the trunk. Mulch around the base with 2-3 inches of organic mulch, keeping it 6 inches away from the trunk to prevent moisture buildup.
☀️ Step 3: Water Deeply and Monitor for Early Signs of Stress
Water the tree immediately after planting, providing 1-2 gallons of water to help settle the soil. For the first 2 weeks, keep the soil consistently moist—about 1 inch of water per week. Overwatering is worse than underwatering; let the top 2 inches of soil dry out slightly between waterings to encourage deep root growth.
Watch for signs of stress: wilting leaves, yellowing foliage, or leaves curling at the edges. These often signal overwatering or poor drainage. If you notice pests like aphids or mites, spray the tree with a neem oil solution (1 tablespoon per gallon of water) to protect young leaves without harming the tree.
✂️ Step 4: Prune for Shape and Health in Early Spring
Prune your apple tree in late winter or early spring before buds swell. Remove any dead, diseased, or crossing branches first—these compete for energy and invite pests. Cut back to an outward-facing bud or branch collar to promote healing. Thin out crowded branches to improve airflow, reducing humidity that encourages fungal diseases.
Shape the tree into an open-center form, keeping the central leader (main trunk) dominant. Aim for a vase-like structure with branches spaced 12-18 inches apart. Avoid heavy pruning in the first year; focus on removing only what’s necessary to establish a strong framework. Sterilize pruning tools with rubbing alcohol between cuts to prevent spreading disease.
🌿 Step 5: Fertilize and Protect Through the Growing Season
Apply a balanced, slow-release fertilizer (10-10-10 ratio) in early spring when buds swell, following package instructions. Avoid high-nitrogen fertilizers later in the season, as they promote leafy growth at the expense of fruit development. Instead, switch to a low-nitrogen, high-phosphorus fertilizer (5-10-10) in late summer to support root and fruit growth.
Protect young trees from pests with row covers or netting if birds or deer are a problem. Thin fruit in June to 6-8 inches apart on each branch—this ensures larger, higher-quality apples. Harvest when the fruit is fully colored and slightly soft to the touch, usually in late summer or fall, depending on the variety.
Tips & tricks for thriving young apple trees
Here's what I've learned from years of growing apple trees—these small details make all the difference between a struggling sapling and a productive fruit-bearing tree.
Location is Everything: That 6-8 hours of daily sun is non-negotiable for healthy apple trees. I always check the sun exposure throughout the day—morning sun is great, but afternoon shade in hot climates prevents leaf scorch. If your yard has limited sun, consider a dwarf variety that can thrive with slightly less light, though fruit production may be reduced.
Root Development Secret: When planting, focus on those roots! Circling roots are the enemy—they strangle the tree as it grows. I spend extra time gently loosening any roots that appear wound around the root ball. This encourages outward growth rather than a tangled mess underground. The 18-inch soil depth you loosen is perfect for establishing strong roots that can support the tree's future fruit load.
Watering Wisdom: Those first 2 weeks are critical—consistent moisture helps roots establish. I use a rain gauge to track exactly 1 inch of water per week, and I water deeply rather than frequently. The "let the top 2 inches dry out" rule prevents overwatering while still keeping roots happy. A soaker hose makes this easy and prevents leaf diseases that come from overhead watering.
Pruning Pro Tip: In Step 4, when shaping your tree, focus on creating that open-center form. I always look for branches that cross or rub against each other—these weak points can become entry points for disease. The 12-18 inch spacing between branches ensures good airflow, which is your best defense against fungal problems. And that graft union? Keep it visible—it's your tree's genetic passport to the variety you planted!
Pro Tips for Apple Tree Gardening
- Here's what I've learned from years of growing apple trees—these small details make all the difference between a stru...
- Location is Everything: That 6-8 hours of daily sun is non-negotiable for healthy apple trees. I always check the sun...
- Root Development Secret: When planting, focus on those roots! Circling roots are the enemy—they strangle the tree as ...
Frequently asked questions
Got questions about growing your own apple tree? You’re not alone—apple tree gardening can feel like a mix of science, patience, and a little bit of magic! Below, we’ve tackled the most common queries to help you navigate the journey from sapling to harvest with confidence.
How long does it take for an apple tree to bear fruit after planting?
Most apple trees take 3 to 5 years to produce their first fruit, depending on the variety and growing conditions. Dwarf trees may fruit sooner (2–3 years), while standard-sized trees can take longer. Patience is key—focus on proper care (watering, pruning, and soil health) to speed up the process!
When is the best time to prune an apple tree?
The ideal time to prune is late winter or early spring (just before buds swell), but you can also do light pruning in summer to remove suckers or water sprouts. Avoid heavy pruning in fall, as wounds may not heal before winter. Always use sterilized tools to prevent disease spread!
What are the most common pests or diseases affecting apple trees, and how do I prevent them?
Watch out for apple scab, fire blight, codling moths, and aphids. To prevent issues:
- Choose resistant varieties (e.g., Liberty or Enterprise).
- Space trees properly for airflow.
- Apply organic sprays (neem oil, copper fungicide) or beneficial insects like ladybugs.
- Clean up fallen fruit and debris yearly.
Can I grow an apple tree in a container, or do I need a yard?
Yes! Dwarf or semi-dwarf apple trees thrive in large containers (15+ gallons) with well-draining soil. Just ensure:
- The pot has drainage holes.
- You move it to a sunny spot (6+ hours of light).
- You fertilize regularly and water consistently.
Why aren’t my apple tree’s flowers turning into fruit?
Several factors could be at play:
- Lack of pollination: Apple trees need cross-pollination (plant two varieties).
- Environmental stress: Extreme heat, drought, or frost can drop flowers.
- Improper pruning: Over-pruning reduces energy for fruit production.
- Young tree: Trees under 3–5 years may focus on growth over fruiting.
Pro Tip: Need a quick reference?
Bookmark this apple tree care calendar for seasonal tasks like pruning, fertilizing, and pest control. Happy growing!
Wrapping up and next steps
Growing a thriving apple tree is all about patience, care, and a little know-how!
From selecting the right variety to mastering pruning techniques and seasonal maintenance, each step plays a crucial role in nurturing a fruitful harvest. 🍏 With the right tools, timing, and attention to detail, you’ll be well on your way to enjoying homegrown apples for years to come.
Ready to take the next step? Start by sketching a simple pruning plan for your tree—whether it’s a young sapling or a mature branch—then gather your tools and get hands-on! The best time to begin is now—your future apple harvest will thank you. 🌱