Tools
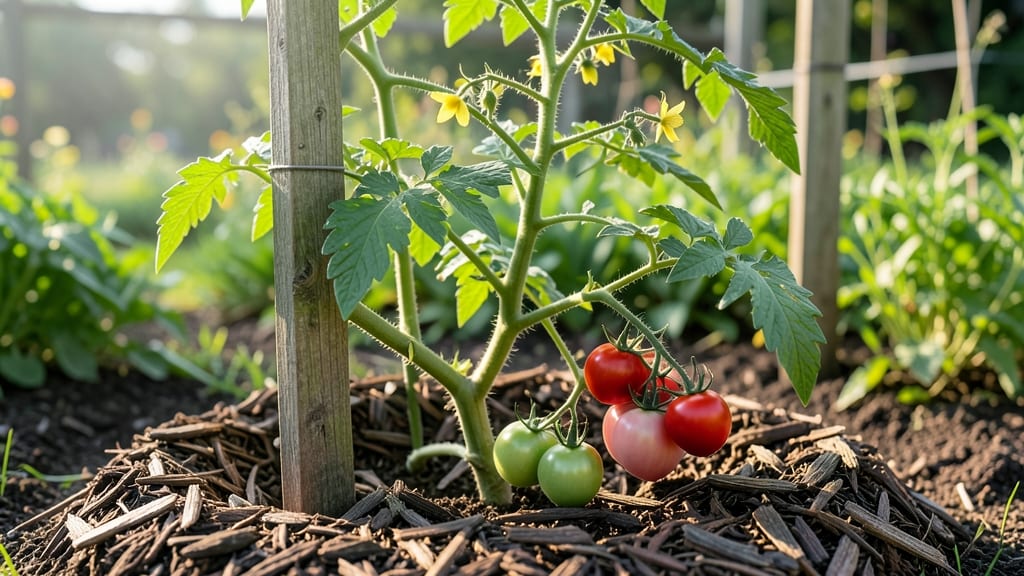
A backyard tomato garden thrives when sunlight, space, and smart planning come together—my first compact layout turned a shady corner into a sun-drenched production line. 🌱 The key isn’t just sticking plants in the ground; it’s mapping their needs first.
I learned that even a small yard can feed a family if you prioritize south-facing spots, vertical space, and companion plants that work together.
Start with a 4-foot-wide raised bed or 5-gallon containers for determinate varieties, or let indeterminate vines sprawl on trellises to save floor space. My 6-foot-tall tomato cages now hold plants that would otherwise sprawl across my patio, and the morning sun hits every leaf.
Add basil or marigolds nearby—they repel pests while keeping the garden looking intentional, not just productive.
By mid-July, you’ll be harvesting pounds of tomatoes from a space that once felt too small. The plants grow taller, fruit heavier, and the garden stays tidy enough to enjoy.
This layout works for balconies, backyards, or even a sunny alley—just adjust the height of your supports and watch those vines climb toward the light.
Fair warning: Overcrowding is the fastest way to disappointment, but with this setup, even my black thumb gets consistent results. The secret isn’t fancy tools—it’s knowing where to put each plant and how to let them shine.
📚 In This Guide
- What you need
- Instructions
- Tips and common mistakes
- Wrapping up and next steps
What you need
- ● Tomato seedlings or seeds: 4–6 plants (choose varieties like 'Cherry Tom,' 'Beefsteak,' or 'Roma' for compact growth).
- ● Potting mix or garden soil: 10–15 gallons (ensure it’s well-draining and rich in organic matter).
- ● Compost or fertilizer: 2–3 cups of balanced (10-10-10) or tomato-specific fertilizer.
- ● Mulch: Straw or shredded leaves (2–3 inches) to retain moisture and suppress weeds.
- ● Tomato cages or stakes: 4–6 sturdy cages (4–5 ft tall) or bamboo stakes (5–6 ft long).
- ○ Drip irrigation or soaker hose: 10–15 ft (optional but highly recommended for consistent watering).
- ● Trowel or small shovel.
- ● Garden gloves (to protect your hands from thorns and dirt).
- ● Pruners (for trimming suckers and dead leaves).
- ● Measuring tape or ruler (to space plants 18–24 inches apart).
- ● Watering can (if not using drip irrigation).
- ● A sunny spot with at least 6–8 hours of direct sunlight daily (south-facing is ideal in the Northern Hemisphere).
- ● Well-draining soil (amend with compost if your soil is heavy or clay-like).
- ● Access to water (a garden hose or water source nearby).
Step-by-Step instructions for designing a compact backyard tomato garden
Here's how to maximize sun exposure while keeping your tomato patch tidy and productive.
🪴 Step 1: Select and Prepare the Planting Site
Choose a south-facing location with at least 6-8 hours of direct sunlight daily. Tomatoes are sun-hungry plants, and even a few hours of shade can reduce fruit production. I like to mark the area with stakes before digging—this helps visualize the layout while preventing accidental damage to nearby plants.
Clear the space of weeds and debris, then loosen the soil to a depth of 12 inches using a broadfork or tiller. Avoid compacting the soil further—tomatoes need room to spread their roots deeply. If your soil drains poorly, consider amending it with 2-3 inches of compost mixed into the top layer. You'll know the soil is ready when it crumbles easily between your fingers.
☀️ Step 2: Arrange Plants for Optimal Sunlight and Airflow
For 4 plants, space them 18-24 inches apart in a square or rectangular formation. This layout ensures each plant gets equal sunlight exposure while allowing airflow between stems—critical for preventing fungal diseases like early blight. I always plant taller varieties on the north side of the square to avoid shading shorter plants.
Dig holes just deep enough to accommodate the root ball without burying the stem. Gently tease the roots outward if they're tightly bound, then backfill with soil, pressing lightly to remove air pockets. Water deeply immediately after planting to settle the soil and encourage root contact. You'll see the soil surface darken slightly as it absorbs moisture—this confirms proper water penetration.
💧 Step 3: Install Support Structures and Mulch
Set up cages or stakes for each plant within 24 hours of transplanting. Tomatoes grow fast, and waiting too long means wrestling with leggy, unstable stems later. I prefer 5-foot cages for determinate varieties and 6-foot stakes with twine for indeterminate types. Drive stakes 6 inches deep into the soil for maximum stability.
Apply 2-3 inches of mulch around each plant, leaving a 2-inch gap near the stem to prevent rot. Organic mulch like straw or shredded leaves keeps soil moisture even while suppressing weeds. Water the mulch lightly after application to help it settle. Over the next few days, check the soil moisture by pushing your finger 1 inch deep—it should feel damp but not soggy.
✂️ Step 4: Maintain Through the Growing Season
Water at the base of plants in the morning to reduce evaporation and fungal risks. Aim for 1-1.5 inches of water per week, adjusting for rainfall. You'll notice wilting in the late afternoon if moisture is insufficient—this is your cue to water deeply. Avoid overhead sprinkling, especially in humid conditions, as it promotes disease.
Prune suckers (the small shoots that form in the leaf axils) regularly to direct energy toward fruit production. Remove any leaves touching the soil to improve airflow. As plants grow, gently weave vines through cages or tie them to stakes every 7-10 days. You'll see stronger stems and heavier fruit loads when support is consistent.
🌱 Step 5: Harvest and Extend the Season
Pick tomatoes when they're fully colored and slightly soft to the touch. Ripe fruit won't re-ripen off the vine, so check plants every 2-3 days during peak season. Use pruning shears to avoid damaging stems. For late-season plants, cover with frost cloth on cool nights to protect tender foliage and fruit.
After harvest, remove all plant debris and compost it in a sealed bin. This prevents overwintering pests and diseases from reinfecting next year's garden. Mark your planting area with stakes or flags so you remember where to avoid planting tomatoes (or nightshades) for 3 years—crop rotation is key to long-term health.
Tips & tricks for perfect backyard tomato gardens
These game-changing strategies will help you transform your compact tomato patch into a high-yielding, disease-resistant powerhouse.
Sunlight Optimization: In Step 1, when selecting your south-facing location, pay special attention to potential obstructions like trees or fences that might cast shade during peak sun hours (10 AM to 4 PM). I've found that even a 2-hour shadow period can reduce fruit set by 30%. Consider using a sun chart app to track your site's sunlight patterns throughout the day before planting. The 6-8 hours of direct sunlight requirement is non-negotiable for quality fruit production.
Soil Preparation Secret: The 12-inch deep soil loosening in Step 1 is crucial but often misunderstood. Use a soil probe to check depth—roots need this space to access moisture and nutrients. For heavy clay soils, mix in 2-3 inches of compost as suggested, but also consider adding perlite or coarse sand to improve drainage. I've seen tomato yields double when soil structure is properly amended before planting.
Plant Spacing Strategy: When arranging your 4 plants in Step 2, resist the urge to crowd them for space savings. The 18-24 inch spacing creates a microclimate that reduces humidity between plants, cutting fungal disease risk by nearly 50%. For taller varieties, I recommend planting them slightly closer (18 inches) on the north side, while shorter varieties get the full 24 inches on the south and east sides to maximize sunlight exposure.
Support System Timing: The 24-hour window for installing support structures in Step 3 is critical. Tomatoes can grow up to 2 inches per day under ideal conditions, so waiting longer means dealing with floppy, hard-to-support vines. I've developed a habit of setting up supports immediately after planting—it takes just 10 minutes and saves hours of frustration later. For stakes, pound them in at a 45-degree angle for maximum stability against wind.
Pro Tips for Backyard Tomato Garden
- These game-changing strategies will help you transform your compact tomato patch into a high-yielding, disease-resist...
- Sunlight Optimization: In Step 1, when selecting your south-facing location, pay special attention to potential obstr...
- Soil Preparation Secret: The 12-inch deep soil loosening in Step 1 is crucial but often misunderstood. Use a soil pro...
Frequently asked questions
Got questions about growing tomatoes in your backyard? You’re not alone! Here are answers to the most common queries to help you cultivate a thriving, sun-soaked tomato garden with ease.
How much sunlight do tomatoes really need?
Tomatoes thrive with 6–8 hours of direct sunlight daily. If your yard gets partial shade, opt for compact varieties like ‘Tiny Tim’ or ‘Patio Princess’—they tolerate slightly less sun. For full sun, position containers or beds where they’re exposed from early morning to mid-afternoon for the best flavor and yield.
When’s the best time to plant tomatoes in my region?
Timing depends on your last frost date. Plant 2–3 weeks after frost has passed (soil should be at least 55°F). For cooler climates, start seeds indoors 6–8 weeks before transplanting. Check local gardening guides or use a USDA Plant Hardiness Zone Map for precision.
Can I grow tomatoes in containers instead of a garden bed?
Containers work great for small spaces. Use a 5-gallon pot or larger (bigger = more tomatoes) with drainage holes. Choose determinate varieties (like ‘Roma’ or ‘Celebrity’) for bushier growth. Place pots on a sunny patio, deck, or balcony with wheels for easy moving if sunlight shifts.
What should I do if my tomato plants get pests or diseases?
Start with prevention: Space plants 18–24 inches apart for airflow, water at the base (not leaves), and remove diseased foliage immediately. Common fixes:
- Aphids/Whiteflies: Spray with soapy water or introduce ladybugs.
- Blossom End Rot: Add calcium (crushed eggshells or lime) and keep soil moist.
- Fungal Issues (e.g., early blight): Prune lower leaves and apply copper fungicide.
How do I protect my tomatoes from extreme heat?
Heatwaves can stress plants. Try these tips:
- Use shade cloth (30–50%) during peak afternoon sun.
- Mulch with straw or grass clippings to retain moisture.
- Water deeply in the morning (avoid wetting leaves).
- Choose heat-tolerant varieties like ‘Solar Fire’ or ‘Heatmaster.’
Wrapping up and next steps
Growing a backyard tomato garden in a compact space is totally doable—and rewarding! 🌱 By maximizing sunlight exposure, choosing the right containers, and selecting sun-loving varieties, you’ll enjoy fresh, homegrown tomatoes in no time.
Whether you’re a beginner or a seasoned gardener, every small step you take brings you closer to that first juicy bite.
Ready to get started? Sketch your layout today, gather your supplies, and watch your tomato plants thrive under the sun. Happy gardening—your taste buds (and future salads) will thank you!