
Tools
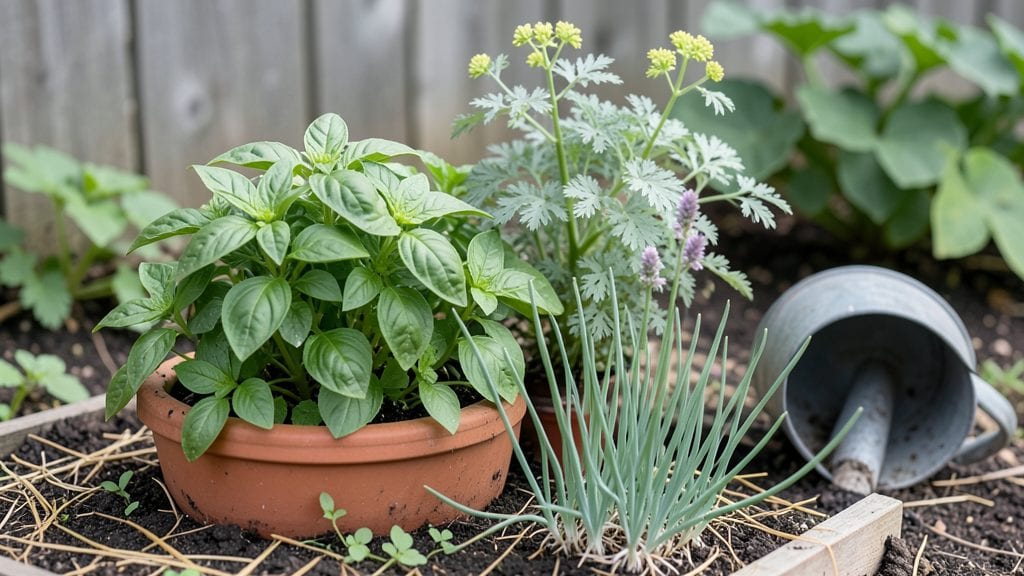
A beginner herb garden doesn’t need fancy tools or complicated layouts—just a few smart choices and you’ll have fresh basil, thyme, and parsley growing like crazy. 🌿 I started with a single windowsill and a handful of seeds, and now my kitchen garden produces more herbs than I can use before they wilt.
The secret isn't complicated: pick the right herbs, give them enough light, and keep the soil moist but not soggy.
You'll need five easy-to-grow herbs—basil, parsley, chives, thyme, and mint—and either a sunny windowsill, a small container, or a patch of ground that gets at least 6 hours of sunlight daily.
Containers work great for renters or small spaces, while in-ground beds let you expand as you gain confidence. The key is grouping herbs with similar needs together—like basil and parsley—that love consistent moisture—and keeping mint contained (it spreads like wildfire).
By mid-summer, you'll be snipping fresh leaves for cooking, and the garden will look lush and inviting. The best part? Once you master the basics, you can add more varieties or even experiment with companion planting to keep pests away naturally.
Start small, stay consistent, and you'll have a thriving herb garden before you know it.
This setup works for apartments, patios, or backyard plots—no green thumb required. The only thing standing between you and a kitchen garden full of homegrown flavors is getting started. Let's make it happen!
📚 In This Guide
- What you need
- Instructions
- Tips and common mistakes
- Wrapping up and next steps
What you need
- ● Containers: 5–10 pots (6–12 inches deep) with drainage holes. Options: Terracotta, plastic, or fabric grow bags.
- ● Potting Mix: 1–2 bags of high-quality organic potting soil (avoid garden soil—it compacts!).
- ● Herb Seeds or Seedlings: Beginner-friendly picks: Basil, parsley, chives, mint, or thyme (3–5 plants to start).
- ○ Optional: Pre-grown seedlings (check local nurseries or grocery stores).
- ● Watering Can or Spray Bottle: A gentle spray prevents overwatering. Pro tip: Use room-temperature water! 💡
- ● Fertilizer: Balanced liquid fertilizer (e.g., 10-10-10) or organic options like fish emulsion.
- ● Hand Trowel: For transplanting or mixing soil.
- ● Pruning Shears: Small, sharp scissors to harvest herbs cleanly.
- ○ Gloves: Optional but helpful for messy herbs like mint.
- ● Grow Lights (if indoors): LED lights (12–16 hours/day) for low-light spots.
- ● Location: 6+ hours of sunlight daily (south-facing window or balcony works).
- ● Space: Even a small windowsill or patio (3 sq. ft. minimum) suffices!
- ● Time: 10–15 minutes, 2–3 times per week for care.
Step-by-Step instructions for your zero-fuss beginner herb garden
Let’s make this simple—no overcomplicating, just a foolproof way to grow four herbs that thrive together.
🪴 Step 1: Choose and Prepare Your Containers
Start with four 6-inch pots (one for each herb) or a single 12-inch container if you prefer grouping. Make sure each has drainage holes—herbs rot quickly if their roots sit in soggy soil. I like terra cotta because it breathes, but plastic works too if you’re on a budget.
Fill each pot with 2 cups of potting mix per 6-inch container (or 6 cups total for the 12-inch planter). Press the soil down lightly so it’s firm but not packed. You want roots to spread easily, not struggle through air pockets. Tap the sides gently to settle everything evenly.
🌱 Step 2: Select and Plant Your Herbs
Pick four easy herbs: basil, parsley, chives, and thyme. These handle beginner mistakes like overwatering better than fussy varieties. For each pot, dig a hole twice as wide as the root ball and place your herb plant inside. Fill the hole with soil, pressing lightly to remove air gaps.
If using seeds (like basil or parsley), sprinkle them ¼ inch deep and cover lightly. Mist the soil until damp but not soaked—you’ll see tiny droplets on the surface, not puddles. Label each pot so you don’t mix them up (trust me, parsley and basil look very different when mature).
☀️ Step 3: Place in the Right Spot
Herbs need at least 6 hours of sunlight daily, but they’ll tolerate 4 hours of morning sun if that’s all you’ve got. A south-facing windowsill or balcony is ideal. If your space is shady, stick to parsley and chives—they’re the most forgiving.
Rotate the pots a quarter turn every few days so plants grow straight, not lopsided. You’ll notice leaves leaning toward the light? That’s your cue to move the pot. Basil and thyme will tell you first—they grow fast and get bossy about their space.
💧 Step 4: Water Like a Pro (No Guessing!)
Water when the top inch of soil feels dry—stick your finger in to check. Most herbs hate soggy roots, so water deeply but infrequently. For 6-inch pots, ½ cup per plant is enough; for the 12-inch container, 1 cup total splits between all four. Let excess water drain completely.
Here’s the trick: water at the base, not overhead. This keeps leaves dry and prevents fungal diseases. If you see yellowing leaves, you’re either overwatering or underwatering—check the soil first. Herbs like thyme and rosemary (if you swap in) are drought-tolerant, so err on the side of less water.
✂️ Step 5: Harvest and Maintain for Long-Term Growth
Start harvesting basil and parsley when they reach 3-4 inches tall—pinch off the outer leaves to encourage bushier growth. Chives and thyme can wait until they’re 4-6 inches. Never take more than ⅓ of the plant at once, or you’ll stunt its growth.
Fertilize once a month with a balanced liquid fertilizer (like 10-10-10) mixed to half-strength. Overdoing it burns roots, so dilute it well. Watch for pests like aphids—spray with neem oil if you spot them (it’s herb-safe and works fast). With this routine, your herbs will stay lush for months, not weeks.
Tips & tricks for perfect beginner herb garden
Here's what I learned after helping friends turn their first herb garden into a thriving kitchen staple.
Container Selection: Terra cotta pots are ideal because they wick away moisture, but if you choose plastic, make sure to water less frequently. The drainage holes in Step 1 are non-negotiable—herbs will rot if water pools at the bottom. I've seen people skip this and lose entire plants within days.
Soil Preparation: Don't just grab any potting mix. Look for one labeled "organic" with perlite or vermiculite to improve drainage. When you fill your containers with 2 cups (for 6-inch pots) or 6 cups (for 12-inch planters), press the soil down gently but firmly—this prevents air pockets that can stunt root growth. Think of it like giving your herbs a cozy, well-drained nest to settle into.
Light Management: The 6 hours of sunlight mentioned in Step 3 is your minimum—any less and your herbs will grow leggy and weak. If your space only gets 4 hours of morning sun, rotate your pots to catch light from different angles throughout the day. Basil and thyme will show you when they're unhappy by leaning toward the light—this is their way of begging for more sun!
Watering Wisdom: The finger-check method in Step 4 is foolproof, but here's the secret: water in the morning so excess moisture evaporates during the day. For the ½ cup per 6-inch pot, use a watering can with a narrow spout to direct water right at the base. Overhead watering creates damp leaves that attract fungal diseases—trust me, I've seen parsley turn yellow from this exact mistake.
Pro Tips for Beginner Herb Garden
- Here's what I learned after helping friends turn their first herb garden into a thriving kitchen staple.
- Container Selection: Terra cotta pots are ideal because they wick away moisture, but if you choose plastic, make sure to water less frequently.
- Soil Preparation: Don't just grab any potting mix.
Frequently asked questions
What’s the easiest herb to grow for a complete beginner?
Start with basil, mint, or parsley—they’re hardy, fast-growing, and forgiving. Basil thrives in warmth, mint spreads aggressively (great for containers), and parsley handles cooler temps. Avoid finicky herbs like dill or cilantro until you gain confidence!
How long does it take to see harvestable herbs?
Most herbs sprout in 1–3 weeks, but harvest-ready growth varies:
- Basil/Cilantro: 4–6 weeks
- Parsley/Mint: 6–8 weeks
- Rosemary/Thyme: 8–12 weeks (slow but worth it!)
Can I grow herbs indoors without sunlight?
Yes! Use a south-facing window or a grow light (12–16 hours/day). Herbs like basil and chives need 6+ hours of light daily. Group pots together to maximize efficiency, and rotate them weekly for even growth.
What do I do if my herbs get pests or diseases?
Start with prevention: space plants for airflow, water at the base (not leaves), and use organic neem oil for pests. Common issues:
- Aphids: Spray with soapy water.
- Fungal spots: Remove affected leaves and improve drainage.
- Yellowing leaves: Check for overwatering or nutrient deficiency (use balanced fertilizer).
What’s a low-maintenance herb alternative if I travel often?
Try oregano or thyme—they’re drought-tolerant, slow-growing, and survive 1–2 weeks without water if potted. For longer trips, use self-watering pots or ask a neighbor to check on them! Mint is another great option since it spreads fast and recovers quickly.
Wrapping up and next steps
Starting a beginner herb garden doesn’t have to be intimidating—just follow these simple steps, and you’ll be harvesting fresh flavors in no time! 🌱 Whether you’re working with pots, containers, or a small plot, the key is consistency, patience, and a little love.
Your kitchen (and taste buds) will thank you!
Ready to dive in? Start small—pick 3-5 easy herbs like basil, mint, or parsley—and expand as you gain confidence. Next, grab your seeds or seedlings, set up your space, and watch your green thumb grow! Happy gardening! 🌿