
Tools
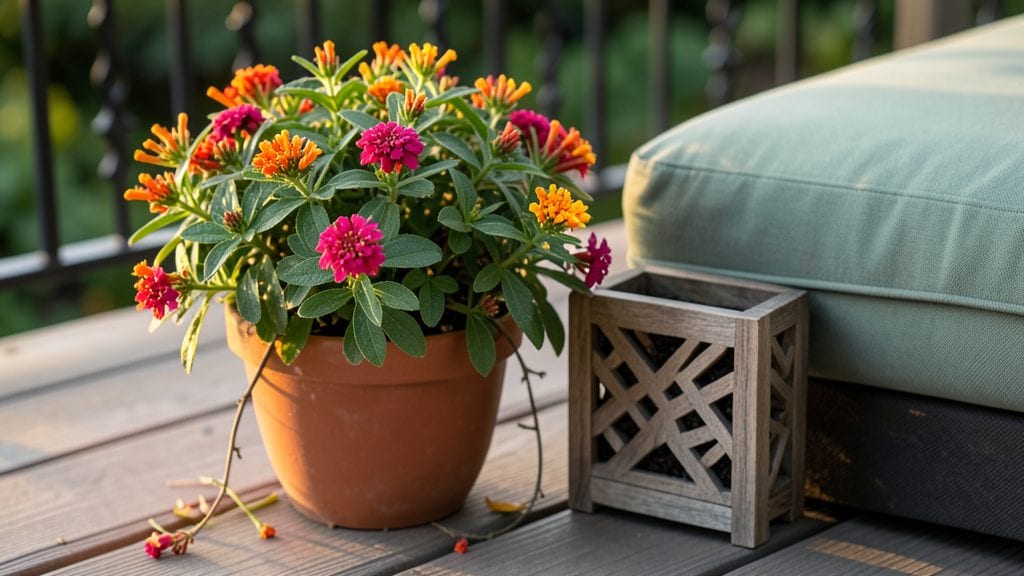
A garden on deck transforms unused space into a lush, productive oasis—without needing a yard. 🌿 I’ve turned my narrow patio into a thriving mini-garden using lightweight planters and sun-loving plants that thrive in containers.
The key is choosing the right setup: shallow roots, wind-resistant varieties, and materials that won’t crack under summer sun.
Start with 5-gallon fabric planters for herbs and lettuce—they’re lightweight, self-watering, and fit snugly on railings. For tomatoes and peppers, opt for 10-gallon ceramic pots with casters so you can move them when needed.
Drought-tolerant plants like lavender, rosemary, and succulents need minimal care, while trailing plants like nasturtiums add vertical interest without overcrowding.
By mid-summer, you’ll have a deck that’s not just functional but a showstopper—think vibrant blooms, fragrant herbs, and fresh veggies within arm’s reach. The best part? No weeding, no soil prep, and no backbreaking work. Just pure, portable gardening joy that adapts to your space and lifestyle.
Works for balconies, rooftops, or even a single deck chair—no green thumb required. Let’s make your deck the envy of the neighborhood without sacrificing style or ease.
📚 In This Guide
- What you need
- Instructions
- Tips and common mistakes
- Wrapping up and next steps
What you need
- ● Deck-Ready Planters: 2–4 weather-resistant containers (plastic, resin, or fiberglass) – sizes based on your deck space (e.g., 12"–24" diameter for small decks, 30"+ for larger areas).
- ● Drainage holes (if DIY-ing planters) – drill ½" holes in the bottom for aeration.
- ● Growing Medium: 1–2 bags of well-draining potting mix (avoid garden soil—it compacts!).
- ● Perlite or vermiculite (1 cup per planter) for extra airflow.
- ● Plants: 3–5 deck-friendly plants (e.g., herbs like basil/thyme, succulents, or compact veggies like cherry tomatoes).
- ● Check plant tags for sunlight needs (match your deck’s exposure!).
- ● Tools: Trowel or small shovel for planting.
- ● Gloves (to keep hands clean!).
- ● Watering can or hose with a gentle spray nozzle.
- ● Decor: Solar-powered lights, pebbles, or mosaic tiles for a polished look.
- ● Fertilizer: Slow-release granules or liquid feed for nutrient boosts.
- ● Portable Trellis: For climbing plants like jasmine or cucumbers.
- ● Deck Mat: Protects surfaces from water stains (if using heavy planters).
Step-by-step guide to creating a thriving deck garden
Transform your deck into a lush extension of your garden with these proven techniques.
🪴 Step 1: Select Containers and Assess Deck Conditions
Start by choosing containers with at least 12-inch depth for most plants, as shallow pots dry out too quickly. I prefer lightweight materials like resin or fiberglass for easy repositioning—no one wants to wrestle heavy planters on a windy day. Check your deck’s exposure: south-facing areas get 6+ hours of sun, while north sides may need shade-tolerant varieties.
Place containers on a waterproof tray or saucer to catch overflow and prevent deck staining. If your deck has gaps between boards, add landscape fabric underneath to protect from wind and debris. This is the moment that matters: proper placement now means fewer adjustments later as plants grow.
🌱 Step 2: Prepare Soil and Plant for Optimal Growth
Use a high-quality container-specific potting mix—never garden soil, which compacts and suffocates roots. Mix in slow-release fertilizer (follow package rates) and a handful of perlite for drainage. Fill containers to 1 inch below the rim, leaving room for watering without spillage.
Plant according to mature size: small herbs like thyme or parsley can share a 6-inch pot, while tomatoes or peppers need 12+ inches of depth. Space plants 3-6 inches apart based on their growth habits. I always water thoroughly after planting to settle the soil and eliminate air pockets around roots.
☀️ Step 3: Position for Sunlight and Wind Protection
Most deck plants thrive in full sun (6+ hours daily), but adjust based on your climate. In hot regions, afternoon shade prevents wilting. Group plants with similar light needs together—this keeps your deck garden cohesive and reduces stress on individual plants.
Wind is the silent enemy of deck gardens. If your space is exposed, add a windbreak like a lattice screen or tall grasses on the prevailing wind side. You’ll notice leaves fluttering or plants leaning? That’s your cue to relocate or add protection immediately.
💧 Step 4: Establish a Watering Routine
Water deeply 2-3 times per week, until water runs freely from drainage holes. Stick your finger 1 inch into the soil—if it’s dry, it’s time to water. Morning is best to reduce evaporation and fungal risks. I use a self-watering system or drip irrigation for larger containers to maintain consistent moisture.
Mulch with 1-2 inches of organic mulch to retain moisture and regulate soil temperature. Avoid inorganic mulches like rocks, which don’t improve soil health. Watch for wilting leaves or crispy edges—these are early signs of underwatering or overwatering.
✂️ Step 5: Maintain and Harvest for Long-Term Success
Fertilize every 4-6 weeks with a balanced liquid fertilizer to replenish nutrients lost through harvesting. Prune regularly to encourage bushier growth: pinch back leggy stems and remove spent flowers. This keeps plants compact and productive.
Harvest herbs in the morning when oils are most concentrated, and pick vegetables when fully ripe. You’ll see new growth within days of pruning—that’s your reward for consistent care. Rotate containers occasionally to ensure even sunlight exposure all around.
Tips & tricks for perfect deck-ready planters
Small details make all the difference when creating a thriving deck garden—here's what I've learned after years of trial and error.
Container Selection Wisdom: While 12-inch depth works for most plants, opt for containers with built-in saucers or feet to prevent water pooling on your deck surface. I've found that glazed ceramic pots with drainage holes actually retain moisture better than they appear to—just be sure to empty the saucer after watering to prevent root rot. For windy decks, choose wider, shorter containers rather than tall, narrow ones—they're more stable and less likely to tip over.
The Soil Mix Secret: Never skip the perlite! That handful you mix into your container-specific potting blend is the difference between plants that thrive and ones that struggle. I've seen roots suffocate in dense mixes without it. For extra insurance against compaction, consider adding a layer of coconut coir beneath your potting mix—it improves aeration without altering drainage. And remember: fill containers to just 1 inch below the rim, not the top, to prevent spillage during watering.
Sunlight Strategy: The 6+ hours of sun recommendation is a baseline, but don't assume all plants need full sun. Leafy greens like lettuce and kale actually prefer partial shade in hot climates. I've had great success with shade-tolerant varieties like Swiss chard in north-facing containers that only get 3-4 hours of direct sun. Always check plant tags for specific light requirements before committing to a location.
Watering Hack: That 1-inch soil moisture check is your best friend, but I've found an even better method: use a moisture meter. It takes the guesswork out of watering and prevents both underwatering and overwatering. For containers without drainage holes (like some decorative planters), I make small holes with a drill and cover them with landscape fabric to maintain drainage while preventing soil loss. Morning watering is non-negotiable—it gives plants all day to absorb moisture before evening heat causes evaporation.
Pro Tips for Garden On Deck
- Small details make all the difference when creating a thriving deck garden—here's what I've learned after years of trial and error.
- Container Selection Wisdom: While 12-inch depth works for most plants, opt for containers with built-in saucers or feet to prevent water pooling on your deck surface.
- The Soil Mix Secret: Never skip the perlite!
Frequently asked questions
Got questions about transforming your deck into a lush garden oasis? Here are some of the most common ones—and their answers—to help you get started with confidence!
What’s the best way to prep my deck for planters?
Start by cleaning the surface thoroughly to remove dirt, debris, or old sealant. Check for structural integrity—ensure the deck isn’t warped or damaged. If needed, add a waterproof barrier (like a plastic sheet) under lightweight planters to protect the wood. For heavy containers, reinforce the deck with additional supports like joist hangers.
Can I use any plants in deck planters?
Not all plants thrive in containers! Opt for compact, drought-tolerant varieties like succulents, herbs (basil, thyme), or trailing plants (petunias, ferns). Avoid root-heavy plants like large shrubs unless your planters are extra deep (12+ inches). Always check sunlight requirements—match plants to your deck’s exposure (sunny, partial shade, or full shade).
How often should I water deck planters?
Watering depends on your climate and plant type, but a general rule is to check soil moisture daily in hot weather—top off when the top inch feels dry. Self-watering planters or drip irrigation systems can help maintain consistency. In cooler months, reduce watering to every 2–3 days. Pro tip: Use mulch to retain moisture and reduce evaporation!
Are there budget-friendly alternatives to expensive deck planters?
Upcycle materials like old buckets, wooden crates, or even mason jars for small herbs. DIY with cedar planks or pallet wood for a rustic look. Thrift stores often have lightweight ceramic or metal containers at a fraction of retail prices. Just ensure they have drainage holes to prevent root rot.
How do I keep pests away from my deck garden?
Prevent pests with a mix of strategies: Use neem oil or insecticidal soap for early signs of bugs. Plant pest-repellent companions like marigolds or lavender near your garden. Elevate planters slightly off the deck to deter ants and rodents. Avoid overwatering, which attracts slugs and mosquitoes. If pests persist, consider organic traps or consult a local nursery for region-specific solutions.
Wrapping up and next steps
Creating a garden on deck is more than just a space-saving hack—it’s a chance to bring nature’s beauty right to your backyard oasis! Whether you’re growing herbs, veggies, or flowers, these deck-ready planters make it easy to turn unused space into a thriving green escape. 🌱
Start small, experiment with what works best for your climate, and don’t forget to enjoy the process. Your next step? Grab those planters, get planting, and watch your deck transform into a lush, inviting retreat. Happy gardening!