
Tools
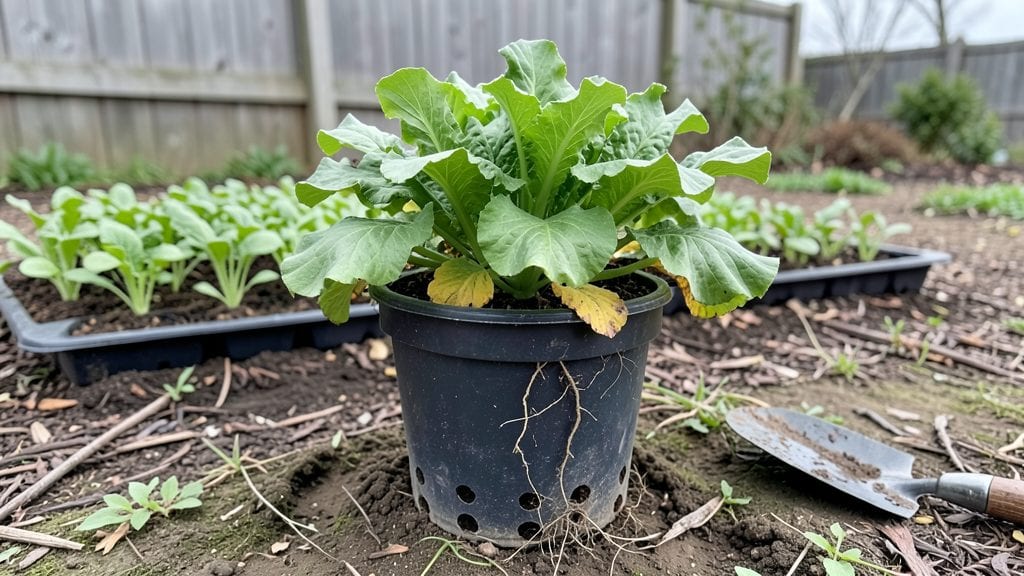
Mastering bucket gardening 101 means turning trash into treasure—literally—with containers that fit on patios, balconies, or even kitchen counters.
Transforming small spaces into thriving gardens doesn’t require dirt or deep soil—just the right containers. Bucket gardening turns everyday household items into high-yield plant homes, but not all buckets are created equal when it comes to maximizing root growth and drainage.
Whether you’re growing herbs in a five-gallon bucket or tomatoes in a repurposed paint container, the key is choosing the right material, drilling drainage holes, and selecting plants that thrive in confined spaces.
In this guide, I’ll walk you through the best bucket materials, how to modify them for optimal plant health, and the top 5 mistakes that kill bucket gardens before they even get started.
Best bucket materials for root growth and drainage in container gardening
Not all buckets are equal when it comes to growing plants. The material you choose directly impacts root space, drainage efficiency, and even plant health.
Whether you're growing herbs, tomatoes, or peppers, selecting the right bucket material can mean the difference between thriving plants and struggling seedlings. Let’s break down the pros and cons of the most common bucket materials to help you make an informed decision.
When evaluating buckets, focus on four key factors: weight, durability, drainage capability, and root aeration. Heavy buckets like ceramic stay stable but may crack, while lightweight plastic buckets are portable but can degrade under intense sunlight.
Each material has unique advantages depending on your plant type and garden setup. Let’s dive into the details.
Comparison Table for Bucket Materials in Container Gardening:
Plastic buckets are a beginner-friendly choice because they’re affordable, lightweight, and easy to modify. You can drill drainage holes anywhere and even stack them vertically to save space.
They’re ideal for herbs like basil and parsley, which don’t need deep root space. However, plastic can degrade under prolonged sunlight, so opt for UV-resistant versions if possible.
Fabric grow bags, like those made from burlap or geotextile, offer the best root aeration because their breathable walls allow roots to spread freely. This makes them perfect for tomatoes and peppers, which thrive when their roots aren’t restricted.
Fabric buckets also dry out faster, reducing the risk of root rot. Just be aware they’ll need replacing every 2-3 years.
Metal buckets, often galvanized or coated, are durable and excellent for ornamental plants or succulents that don’t need frequent watering. They hold up well in harsh conditions but can overheat in direct sunlight, which may stress heat-sensitive plants.
Always drill drainage holes and consider lining them with plastic to prevent rust from leaching into the soil.
Ceramic buckets add a rustic charm to your garden but come with trade-offs. They’re heavy, which limits mobility, and can crack if dropped or exposed to freezing temperatures. Unglazed ceramic offers better drainage, while glazed versions retain moisture longer.
Use them for small plants like herbs or shallow-rooted flowers, but avoid heavy feeders like cucumbers or squash.
For optimal drainage, always add a layer of gravel or perlite at the bottom of your bucket, regardless of material. This prevents soil from clogging the drainage holes and ensures excess water escapes quickly.
If your bucket lacks pre-drilled holes, use a power drill with a 1/4-inch bit to create multiple openings around the base.
Pro tip: If you’re growing deep-rooted plants like carrots or beets, stack two buckets together or use a taller container. This gives roots the vertical space they need to thrive without crowding. Always match your bucket size to your plant’s mature root depth for the best results.
Experiment with different materials to see what works best for your climate and plant varieties. Over time, you’ll develop a system that maximizes root growth while keeping maintenance simple. Happy bucket gardening! 🌱
How to modify buckets for maximum root space and plant success
Not all buckets are ready for gardening straight out of the closet. Root space and drainage are the two biggest hurdles, but with a few simple modifications, you can turn any bucket into a thriving plant home.
I’ve transformed everything from 5-gallon paint buckets to plastic storage bins into high-performing gardens—here’s how.
Start with the basics: drainage holes are non-negotiable. Without them, your plants will drown in soggy soil. For root-bound plants like tomatoes or peppers, you’ll also need to expand the growing area. The key is balancing aeration, nutrient retention, and water control—and I’ll show you exactly how.
Bucket Gardening 101: Step-by-Step Modifications
-
Step 1: Drill Drainage Holes
Use a 1/4-inch drill bit to create 4-6 holes near the bottom of the bucket. For fabric grow bags, skip this step—they’re already breathable. Space holes evenly to prevent soil from clogging them.
-
Step 2: Cut Side Slits for Root Expansion
For tomatoes, peppers, or cucumbers, cut vertical slits (2-3 inches tall) on the sides of the bucket. This lets roots spread outward while keeping the plant upright. Use a hacksaw or utility knife for clean cuts.
-
Step 3: Line the Bottom for Nutrient Retention
Place a landscape fabric square over the drainage holes to prevent soil from washing out. For herbs like basil or parsley, add a 1-inch layer of gravel on top of the fabric for extra aeration.
-
Step 4: Add a Wicking Layer (Optional)
For drought-prone plants, insert a cotton rope or wicking fabric through the drainage holes. Soak the rope in water to create a self-watering system—perfect for indoor herb gardens.
-
Step 5: Layer Soil for Optimal Drainage
Fill the bucket with 3 inches of perlite or pumice at the bottom, then add a mix of 60% potting soil and 40% compost. Top with 1 inch of coco coir to retain moisture for leafy greens.
-
Step 6: Secure the Plant with Support
For vining plants like beans or cucumbers, attach a trellis or bamboo stake to the bucket’s side. Use soft plant ties to secure stems without damaging them.
Pro tip: Stack buckets for vertical gardening! Place smaller buckets inside larger ones to create a two-tier system. I’ve grown cherry tomatoes in the top tier and basil in the bottom—no wasted space. Just ensure the top bucket has extra drainage holes to prevent overflow.
Remember, herbs and leafy greens thrive in smaller buckets (1-3 gallons), while tomatoes and peppers need at least 5 gallons of modified space. Test your setup by filling the bucket with water—if it drains in under 10 minutes, you’re good to go!
With these modifications, your buckets will grow plants faster, retain nutrients longer, and keep roots happy—no matter how small your space. Happy gardening! 🌱