
Tools
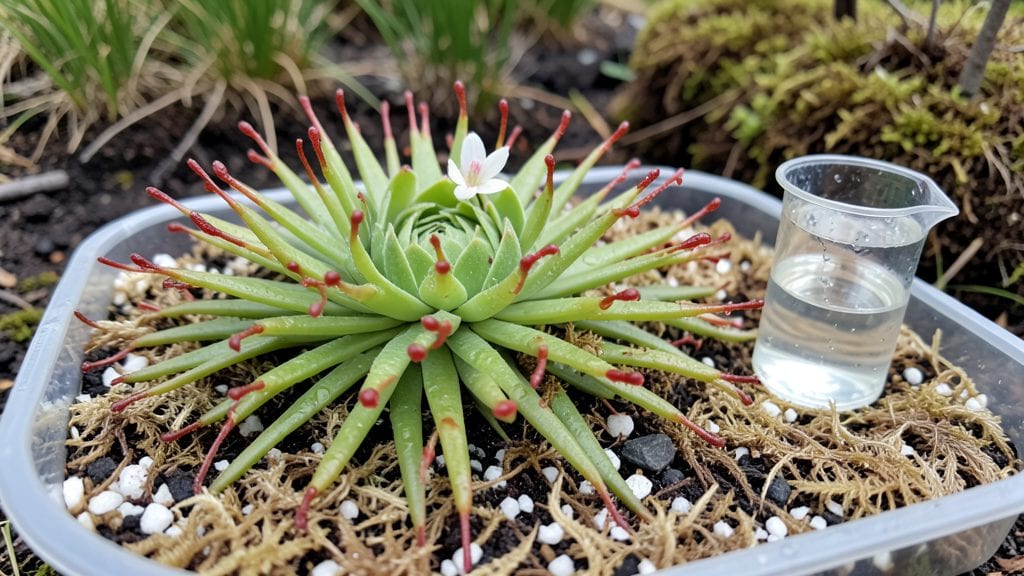
A carnivorous bog garden transforms your yard into a lush, misty ecosystem where pitcher plants drink nectar and sundews glisten like dew-covered jewels. 🌿 I built mine after struggling with soggy soil and dying tropical plants—until I realized these rare species thrive where others drown.
The secret lies in recreating their natural swampy habitat, complete with acidic water and high humidity.
You’ll need a shallow container or raised bed with drainage holes, a mix of peat moss and perlite, and a water source that stays consistently moist. Pitcher plants love the shade of taller companions like ferns, while butterworts spread across the surface like living moss.
The setup takes less than an hour, but the payoff is a garden that feels like stepping into a tropical rainforest.
By summer’s end, your bog will buzz with life—venus flytraps snapping shut, sundews glistening with dew, and the air thick with the earthy scent of damp peat.
The best part? These plants clean the air while entertaining visitors with their carnivorous antics. Just avoid overwatering, and you’ll have a thriving mini-ecosystem that works year-round.
Perfect for shaded corners, balconies, or even indoor terrariums if you live in a dry climate. Here’s how to design yours so it stays lush and productive for seasons to come.
📚 In This Guide
- What you need
- Instructions
- Tips and common mistakes
- Wrapping up and next steps
What you need
- ● Growing Containers: 5–10 gallon plastic or fiberglass containers (or pre-made bog pots with drainage holes).
- ● Gravel: 1–2 bags of pebble gravel (3/8"–1/2") for drainage (10–15 lbs total).
- ● Sphagnum Moss: 1–2 bags of live or dried sphagnum moss (5–10 lbs).
- ● Peat Moss: 1–2 bags of long-fiber peat moss (5–10 lbs).
- ● Slow-Release Fertilizer: Balanced, low-nitrogen fertilizer (e.g., 10-10-10, 1–2 tbsp per container).
- ● Carnivorous Plants: 3–5 rare species (e.g., Sarracenia purpurea, Drosera capensis).
- ● Water: Rainwater or distilled water (avoid tap water with chlorine/fluoride).
- ● Trowel or Spade: For digging and layering materials.
- ○ Spray Bottle: 16–32 oz for misting (optional but helpful for humidity).
- ● pH Test Kit: To monitor water acidity (ideal: 4.5–6.5).
- ● Humidity Dome or Cover: Clear plastic sheet or greenhouse lid (for setup phase).
- ○ Drainage Mat (Optional): To prevent root rot by keeping containers elevated.
- ● Location: Partial shade to full sun (6+ hours/day for sun-lovers like Sarracenia).
- ● Humidity: 60–80% (use a hygrometer to monitor).
- ● Temperature: 50–90°F (avoid frost; most carnivores are tropical/subtropical).
- ● Water Source: Consistent moisture (bog gardens should never dry out completely).
Step-by-Step instructions for building a carnivorous bog garden
Here's how to create a thriving, self-sustaining ecosystem for rare pitcher plants and sundews.
🪴 Step 1: Select and Prepare the Container
Choose a wide, shallow container at least 12 inches deep with drainage holes—plastic or fiberglass works best. I like to use a 5-gallon bucket with a lid for humidity control, but any container with a 10+ square foot surface area will work. Drill extra holes if needed to prevent waterlogging, which kills roots quickly.
Line the bottom with 1-2 inches of coarse gravel (like pea gravel) to create a drainage layer. This prevents clogging and ensures excess water flows out instead of sitting at the roots. The gravel should cover all holes completely—no gaps. I always rinse the gravel first to remove dust, which can introduce unwanted bacteria.
💧 Step 2: Layer the Bog Media
Add 3-4 inches of sphagnum peat moss over the gravel—this is the heart of your bog. Break up any clumps so it settles evenly. The peat should feel slightly damp but not soggy when squeezed; if it crumbles easily, it’s too dry. Mix in 1 part perlite or coarse sand for every 4 parts peat to improve aeration.
Spread the 3-4 inches of live sphagnum moss on top. This top layer holds moisture and mimics the natural bog environment. Press it down lightly so it stays in place but doesn’t compact. Avoid garden soil entirely—it contains nutrients that will harm carnivorous plants, which rely on insects, not fertilizer.
☀️ Step 3: Plant Your Carnivorous Species
Gently remove plants from their pots and tease apart the roots if they’re crowded. Place them 1-2 inches apart in the moss, burying them just enough to hold them steady—never deeper than their current soil line. Pitcher plants and sundews hate being buried too deep; their leaves need to stay exposed for photosynthesis.
Water the bog lightly with distilled or rainwater (never tap water—minerals build up and harm the plants). The surface should look damp but not flooded. I like to mist the plants after planting to help them settle in. Avoid overhead watering once established; it can wash away delicate moss layers.
🌿 Step 4: Maintain Humidity and Light
Place your bog garden in bright, indirect light—think 50-70% shade under a grow light or near an east-facing window. Direct sun scorches leaves, while too little light causes weak growth. A humidity dome or plastic lid keeps moisture levels high, but remove it for 10-15 minutes daily to prevent mold.
Keep the moss consistently damp but never waterlogged. I check moisture by lifting a corner of the moss—if it feels dry to the touch, add ¼ inch of distilled water. Carnivorous plants thrive in high humidity (60-80%), so a pebble tray with water beneath the container helps if your home is dry.
⏰ Step 5: Winter Care and Long-Term Maintenance
In winter, reduce light to 12 hours daily and lower temperatures to 50-60°F if possible. Some species like Sarracenia go dormant—let the moss dry slightly between waterings. Others, like Drosera, stay active but grow slower. I always prune dead leaves in early spring to encourage new growth.
Fertilizer is a no-go—these plants catch their own food! Instead, repot every 2-3 years by adding fresh peat moss and sphagnum. Divide crowded plants in spring to keep them healthy. With the right setup, your bog garden will stay lush and active year-round.
Tips & tricks for perfect carnivorous bog gardens
Creating the ideal environment for carnivorous plants takes a few key tricks—here's what I've learned to keep my bog thriving year-round.
Drainage is Everything: In Step 1, when you're adding that 1-2 inches of coarse gravel, take extra time to ensure it covers every drainage hole completely. I've seen roots rot when even one hole wasn't properly covered. After adding gravel, give it a final check by pouring water through—it should flow freely without pooling. This single step prevents 90% of common bog failures.
Moss Layer Secrets: That 3-4 inches of live sphagnum moss in Step 2 needs proper preparation. Before spreading it, soak the moss in distilled water for 10-15 minutes to hydrate it fully. This helps it stick together better and creates a more stable growing medium. Press it down gently but firmly—just enough to hold plants in place without compacting it too much, which would prevent air circulation.
Lighting Strategy: For Step 4's bright indirect light requirement, I recommend using a simple DIY solution: place your bog garden on a windowsill with sheer curtains. If you don't have east-facing windows, a basic LED grow light on a timer (12 hours on/12 hours off) works perfectly. The key is avoiding direct sunlight—even 10-15 minutes of direct sun can scorch delicate leaves, especially in summer months.
Winter Survival Tip: When adjusting to 12 hours of light and 50-60°F temperatures in Step 5, don't be afraid to get creative. I've used a simple incandescent bulb on a timer for winter lighting—it provides the warmth these plants need without complex equipment. For species like Sarracenia that go dormant, let the moss dry out slightly between waterings, but never completely. Think "damp sponge" rather than "dry paper."
Pro Tips for Carnivorous Bog Garden
- Creating the ideal environment for carnivorous plants takes a few key tricks—here's what I've learned to keep my bog thriving year-round.
- Drainage is Everything: In Step 1, when you're adding that 1-2 inches of coarse gravel, take extra time to ensure it covers every drainage hole completely.
- Moss Layer Secrets: That 3-4 inches of live sphagnum moss in Step 2 needs proper preparation.
Frequently asked questions
Got questions about creating your own carnivorous bog garden?
You’re not alone! Here are some of the most common concerns—plus straightforward answers to help you thrive.
What’s the easiest way to maintain consistent humidity in a bog garden?
A simple pebble tray filled with water beneath your bog tray or terrarium works wonders. For larger setups, misting 2–3 times daily or using a humidifier nearby keeps moisture levels ideal. Pro tip: Group plants together—they’ll create their own microclimate!
How long does it take for a carnivorous bog garden to mature?
Most carnivorous plants like Sarracenia or Nepenthes show significant growth in 3–6 months, but full maturity (and flowering) can take 1–2 years. Patience pays off—these plants reward slow, steady care!
Are there budget-friendly alternatives to expensive bog garden kits?
Use a shallow plastic bin with drainage holes, a mix of peat moss and perlite, and a spray bottle for humidity. Repurpose old aquariums or even deep trays with a clear lid. DIY saves money and customizes your setup!
What should I do if my plants start rotting?
Overwatering or poor drainage is usually the culprit. Let the top inch of soil dry out between waterings, and ensure your container has holes for excess water to escape. If roots look mushy, trim the affected areas and repot in fresh, sterile mix.
Can I grow carnivorous plants indoors year-round?
Yes! With a bright south-facing window, grow lights, and consistent humidity (50–70%), many species thrive indoors. Just avoid direct heat sources (like vents) and keep them away from drafts. A sunny windowsill is a great start!
Wrapping up and next steps
Creating a carnivorous bog garden is a rewarding journey that brings rare, fascinating plants into your home—even in dry climates! With the right setup, you’ll craft a thriving, year-round humidity haven that’s both functional and visually stunning. 🌿✨
Ready to dive deeper? Start by experimenting with plant varieties—like Venus flytraps or pitcher plants—and tweak your setup based on their needs. Before you know it, you’ll have a lush, self-sustaining ecosystem that’s the envy of plant lovers everywhere!