
Tools
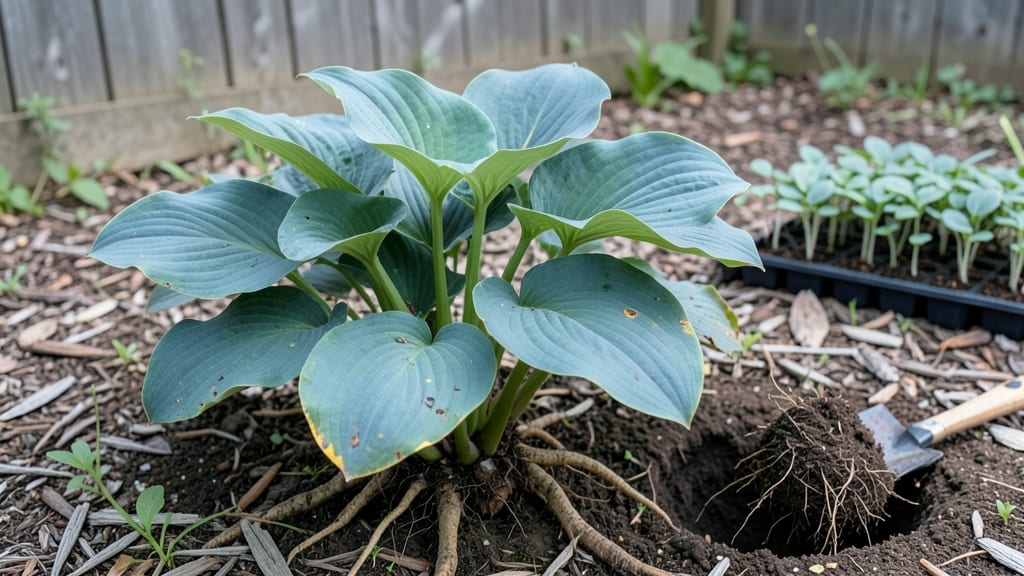
The circle garden bed transformed my awkward corner into a showstopping centerpiece—no wasted space, just layered beauty that draws the eye. I’d spent years struggling with straight-edged beds that left odd patches of lawn, until I discovered how a simple circular shape could make every inch count.
The raised border adds height and definition, while the curved edges create natural flow that feels organic yet intentional.
You don’t need fancy materials—just sturdy wood, stone, or even repurposed bricks to create the border. Inside, I planted tall perennials at the center (like coneflowers) with mid-height herbs spiraling outward, then trailing thyme at the edges.
The result? A low-maintenance space that thrives on its own while looking like a designer’s dream. Plus, the circular shape makes weeding and harvesting a breeze—no more reaching awkwardly into corners.
What you’ll love most is how versatile these beds are. Use them for pollinator gardens, herb spirals, or even a raised veggie patch—the shape works for everything.
My neighbors kept asking where I got the design, and now I’m sharing the secrets so you can create your own. Start with a simple sketch, mark your center point, and let the magic unfold as you build outward.
The best part? You can adapt the size to fit a tiny balcony planter or a sprawling backyard feature. Whether you’re working with 6-foot diameter or just a 2-foot herb circle, the principles stay the same.
Ready to turn that empty corner into a garden that steals the show? Let’s get shaping!
📚 In This Guide
- What you need
- Instructions
- Tips and common mistakes
- Wrapping up and next steps
What you need
- ● Circular border frame: Pre-made metal, wood, or composite hoops (diameter: 3–8 ft) or bendable rebar/wire (½"–¾" thick, cut to 4–6 ft lengths).
- ● Edging material: Wood (cedar or redwood, 2x4s or 1x6s, 4–6 ft long) or
- ● Bricks, pavers, or stones (6–12" tall, enough to encircle your design).
- ● Soil: High-quality garden soil mix (2–3 cubic feet per square foot of bed) or a blend of topsoil, compost, and perlite (50/30/20 ratio).
- ● Landscape fabric: 3–4 ft wide roll (to suppress weeds).
- ● Tools: Measuring tape
- ● Staple gun (for fabric)
- ● Shovel or spade
- ● Level (to ensure even edges)
- ● Hammer or mallet (for securing edges)
- ● Wire cutters (if using rebar/wire)
- ● Drainage: Gravel or landscape fabric at the base (if raised).
- ● Mulch: Wood chips or straw (to retain moisture).
- ● Drip irrigation: Soaker hose or micro-sprinkler kit.
- ● Decorative touches: Paint (for wood), pebbles, or mosaic tiles.
- ● Knee pad: For comfort during assembly!
Step-by-Step instructions for building a circle garden bed
Here's how to create a striking circular raised border that transforms any outdoor space.
Measure and Mark the Circle Layout
Determine your circle's diameter—4 feet works beautifully for a single-person garden while allowing easy access. Use a 6-foot length of rope or string as your radius: tie one end to a central stake and stretch the other end taut while marking the perimeter with spray paint or a garden hose. For precision, I use a winding technique: start at the stake, wrap the rope around it, then mark where the rope's end naturally falls when extended.
Double-check your circle's symmetry by measuring across multiple diameters. An off-center circle will look unbalanced and make planting uneven. If you're unsure, use a garden hose to outline the shape first—it's flexible enough to adjust until perfect. Once satisfied, remove the hose or rope and transfer the outline to the ground with a shovel or edging tool to create a shallow trench along the marked line.
Excavate and Prepare the Base
Dig out the marked circle to a depth of 6-8 inches, removing grass, weeds, and any rocks larger than 2 inches in diameter. I use a border spade for clean edges and a hand trowel for precision in tight spots. The goal is a flat, level base—any unevenness will show through your raised border and create drainage issues. For extra stability, especially in clay soil, I add a 2-inch layer of coarse sand to the bottom of the trench before proceeding.
Test the soil's drainage by filling a small section of the trench with water and timing how long it takes to drain. If water pools after 30 minutes, amend the base with 1 inch of perlite or composted bark to improve aeration. This step prevents root rot later, which is critical for perennial plants. Once satisfied, smooth the base with the back of your shovel and remove any loose debris.
Build the Raised Border Structure
For a 4-foot diameter circle, you'll need approximately 12 linear feet of border material—I recommend cedar or redwood boards cut to 12 inches tall and 6 inches wide for durability. Start by cutting the boards to length: use a circular saw to create 12 equal-length pieces, each about 1 foot long. The boards should fit snugly together with minimal gaps—a ¼-inch space is ideal to prevent shifting while allowing flexibility for seasonal soil movement.
Assemble the circle by laying the first board flat on the ground, then standing it upright in the trench. Use a level to ensure it's perfectly vertical before securing it with galvanized screws driven into the ground at a 45-degree angle for stability. Continue placing boards around the circle, staggering the screws so they don't align—this distributes weight evenly. For extra reinforcement, I add a horizontal brace midway up the border using L-brackets to prevent leaning, especially in windy conditions.
Fill and Plant the Circle Garden Bed
Fill the circle with a 3-inch layer of coarse gravel for drainage, followed by 6 inches of high-quality garden soil mixed with 2 cups of compost per square foot. I like to blend in slow-release organic fertilizer at this stage to give plants a nutrient boost from the start. Tamp the soil lightly with your hands or a board to eliminate air pockets, then create a slightly concave center to encourage water retention during dry spells.
Plant your chosen perennials or annuals in the center, spacing them according to their mature size. For a 4-foot circle, I typically use 3-5 plants arranged in a natural, asymmetrical pattern—this creates visual interest without overcrowding. Water deeply after planting to settle the soil and encourage root contact. If you're using mulch, apply a 2-inch layer around plants, keeping it 2 inches away from stems to prevent moisture-related diseases.
Maintain and Enhance the Circle Over Time
Check the border's stability after the first heavy rain—soil can shift and cause boards to lean. If gaps appear between boards, fill them with landscape fabric strips to prevent soil from spilling out. I also recommend re-tightening screws annually in early spring, as seasonal expansion and contraction can loosen them over time. For long-term durability, apply a natural wood sealant every 2-3 years to protect against rot and insects.
To keep the circle looking its best, rotate plants every 2-3 years—this prevents soil depletion and reduces the risk of pests and diseases. I like to add seasonal interest by planting spring bulbs (like daffodils) in early fall, then summer annuals (like coneflowers) once the bulbs have finished blooming. This layered approach ensures your circle garden stays vibrant year-round while maximizing space efficiency.
Tips & tricks for perfect circle garden beds
A few key strategies will help you create a circle garden bed that's both stunning and functional for years to come.
Precision in Step 1: When marking your circle's diameter, I've found that using a garden hose for the initial outline saves time and frustration. The hose's flexibility lets you adjust the shape until it's perfectly centered before transferring the outline to the ground. For that final transfer, I recommend using a shovel or edging tool to create a shallow trench—this gives you a clear guide for where to place your boards later. The trench also helps prevent soil from spilling out over time, which is especially important if you're using heavier garden soil in your bed.
Drainage is Critical: The 30-minute drainage test in Step 2 is non-negotiable for long-term success. If your soil drains too slowly, that 1-inch layer of perlite or composted bark makes all the difference in preventing root rot. I've seen gardens fail spectacularly when this step was skipped—plants that looked healthy withered within weeks. For clay-heavy soils, consider adding a second layer of coarse sand at the bottom before the gravel. This extra step creates a proper drainage gradient that keeps roots happy even during heavy rains.
Board Assembly Secrets: When cutting your 12 boards to length in Step 3, I recommend using a circular saw with a fine-tooth blade to create clean, precise cuts. The ¼-inch gap between boards might seem small, but it's essential for allowing seasonal soil expansion. For extra stability, I've started pre-drilling screw holes before assembling the circle—this prevents wood splitting when you drive in the galvanized screws. The horizontal brace at mid-height is particularly important if you live in a windy area; I've seen unbraced borders lean dramatically after just one storm.
Planting Strategy: The slightly concave center you create in Step 4 serves two purposes: it helps water pool in the middle where plants need it most, and it creates a natural focal point. When arranging your 3-5 plants, I suggest placing the tallest variety toward the back (away from the center) to prevent shading smaller plants. For that 2-inch layer of mulch, I recommend using shredded bark or straw—both allow water to penetrate while suppressing weeds. The key is keeping mulch away from stems to prevent moisture-related diseases that can plague circular beds.
Pro Tips for Circle Garden Bed
- A few key strategies will help you create a circle garden bed that's both stunning and functional for years to come.
- Precision in Step 1: When marking your circle's diameter, I've found that using a garden hose for the initial outline saves time and frustration.
- Drainage is Critical: The 30-minute drainage test in Step 2 is non-negotiable for long-term success.
Frequently asked questions
Got questions about circle garden beds?
You’re not alone! Here are answers to the most common queries—from setup to upkeep—so you can dive in with confidence.
What’s the best time of year to install a circle garden bed?
Spring or early fall are ideal! Plant in spring after the last frost for warm-season veggies (like tomatoes or peppers), or in fall for cool crops (spinach, kale). Avoid winter in cold climates—frost can damage roots or warp wood. Pro tip: Start with fast-growing cover crops (like clover) in early spring to prep the soil!
How do I keep weeds from overtaking my circle bed?
Weeds thrive in gaps! Use landscape fabric under mulch or opt for living mulches (like creeping thyme or strawberries). Edge your bed with hardware cloth buried 6–12 inches deep to block roots. Water deeply but infrequently—thirsty plants outcompete weeds!
Are circle beds more expensive than traditional raised beds?
Costs vary, but circle beds can be pricier due to curved lumber or pre-cut kits. DIY with cedar or redwood (rot-resistant) and repurpose materials (e.g., old pallets). Skip fancy edging—focus on function: a simple 4x8-foot circle uses ~10% less wood than a square!
Can I grow vegetables in a circle bed year-round?
Yes, but plan for seasonal swaps! Use cold-hardy greens (kale, arugula) in winter, then transition to heat-lovers (peppers, basil) in summer. Add a cloche or row cover to extend spring/fall growing. Just avoid heavy root crops (like carrots) in shallow beds—opt for bush varieties!
What’s the quickest fix for a sagging or uneven circle bed?
Check for rotted wood or loose screws—replace damaged sections immediately. For minor sags, drive stakes into the ground inside the bed and screw them to the frame. Prevent future issues by watering evenly and avoiding overloading with heavy mulch.
Are circle beds better for small spaces than square or rectangular beds?
Circles maximize corner space and reduce wasted edges (no "dead zones" like in squares). Plus, they’re easier to reach into—perfect for knee issues or kids helping out. Just ensure the diameter fits your path (aim for 4–6 feet for solo gardeners).
Wrapping up and next steps
A circle garden bed isn’t just a clever space-saver—it’s a stunning, functional centerpiece that transforms any yard into a thriving oasis. Whether you’re a seasoned gardener or a beginner, this design maximizes beauty, efficiency, and even accessibility, proving that great things come in small (and round!) packages.
Ready to roll up your sleeves? Grab your tools, sketch your design, and start building! Your future garden’s star feature is just a few steps away—let’s make it happen. 🌱✨