
Tools
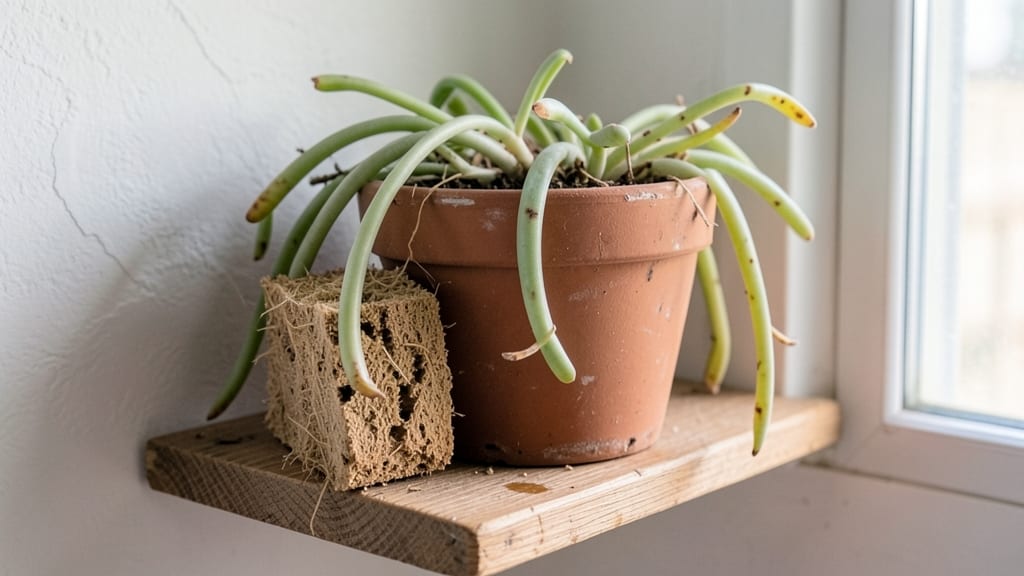
A coco coir garden starts with the right mix of moisture and air roots crave. I switched from peat moss after my seedlings kept drying out—until I discovered coco coir’s ability to hold water without drowning roots.
The texture is like a sponge that remembers hydration, making it perfect for fussy seeds like peppers or lettuce that need consistent dampness.
Prepping coco coir is simpler than it sounds: just soak the bricks in water for 15-20 minutes until they’re like a wrung-out washcloth. Mix it 50/50 with potting soil for seed starting, or use it straight in hydroponics.
The key is avoiding compaction—fluff it gently after wetting to keep those tiny roots breathing. My basil seedlings went from wilted to thriving in just 10 days.
You’ll notice plants growing faster because coco coir feeds microbes that break down nutrients gradually. No more guesswork about overwatering—just check the top inch of the mix. For herbs and veggies, it’s a game-changer, and even ferns stay lush in it.
The only trick is adjusting pH if your tap water’s hard, but that’s easy with a few drops of vinegar.
Works for everything from windowsill herbs to full sun vegetables—just match the mix to your plants’ needs. Let’s get those seeds sprouting with confidence!
📚 In This Guide
- What you need
- Instructions
- Tips and common mistakes
- Wrapping up and next steps
What you need
- ● Coco coir bricks or blocks: 1–2 bricks (depending on garden size; ~5–10 lbs each). Choose 100% coco coir (no peat or additives) for the best results.
- ● Seedling trays or pots: 1–2 trays (1020-cell or 72-cell) or 4–6 4" pots. Ensure they have drainage holes!
- ● Watering can or spray bottle: A fine-mist spray bottle works best for gentle hydration.
- ○ pH test kit (optional but recommended): Coco coir is slightly acidic (pH 5.2–6.8); test before planting.
- ● Perlite or vermiculite: 1 cup (for aeration; mix 1 part perlite to 4 parts coco coir).
- ● Seeds or seedlings: Your chosen plants (herbs, veggies, or flowers—coco coir works for all!).
- ● Hydroponic nutrients: A diluted liquid fertilizer (like fish emulsion or seaweed extract) to boost growth.
- ● Heat mat (for indoor gardens): Keeps soil warm for faster germination.
- ● Grow lights: If natural light is limited, LED grow lights (12–16 hrs/day) work wonders.
- ● Moisture meter: Ensures your coco coir stays in the 40–60% moisture range—no guesswork!
- ● Compost or worm castings: ½ cup (for extra nutrients; mix into coco coir before planting).
Step-by-Step guide to creating a moisture-retentive coco coir garden
Here’s how to build a seedling-friendly coco coir mix that holds moisture perfectly while preventing soggy roots.
Prepare Your Coco Coir Base
Start by hydrating the coco coir bricks with warm water—this expands them into a fluffy, sponge-like medium. Place the bricks in a clean container and pour enough water to fully submerge them. Let them soak for 15-20 minutes, stirring occasionally to ensure even saturation. You’ll know it’s ready when the bricks triple in size and feel like damp, crumbly soil.
Drain any excess water through a colander or fine mesh screen. Squeeze out extra moisture with your hands, but avoid compacting the fibers. The goal is a texture that holds water like a damp sponge—not dripping wet. This step is critical: over-soaking leads to anaerobic conditions that stunt roots.
Mix in Essential Amendments
In a large bin, combine the hydrated coco coir with perlite and worm castings (if using). The perlite improves aeration, while worm castings add gentle nutrients. For 4 cubic feet of coco coir, mix in 1 quart of perlite and 1 pound of worm castings. Use a garden fork or gloved hands to blend thoroughly—you want an even distribution without clumps.
This blend mimics the moisture retention of peat moss but with better drainage. Test the consistency by squeezing a handful: it should hold together when pressed but not crumble into dust. If it feels too dense, add a little more perlite; if it’s too loose, mix in a bit of extra coco coir.
Fill Containers and Prep for Planting
Fill your seedling trays or pots with the coco coir mix, leaving about ½ inch of space at the top for watering. Tap the containers gently on the table to settle the mix, then use your fingers to create small planting holes—just deep enough to nestle seeds or seedlings without burying them too deeply.
Water the mix lightly with a spray bottle until the surface looks evenly moist. Avoid oversaturating at this stage; you’re prepping the medium, not watering the plants yet. The coco coir should feel damp like a wrung-out sponge, not wet like a swamp. This ensures seeds get consistent moisture without drowning.
Plant and Maintain Moisture Levels
Place seeds or seedlings into the prepared holes, then cover lightly with additional coco coir mix. Press down very gently to secure them. Water again with a fine mist until the surface is damp but not glistening. Coco coir’s moisture-retentive nature means you’ll water less frequently—about every 2-3 days—but always check the top inch of soil before adding more.
To keep humidity high during germination, cover the tray with a clear plastic dome or plastic wrap. Remove it once seedlings emerge to prevent fungal issues. Watch for yellowing leaves or mold—signs of overwatering. Adjust your watering schedule based on the mix’s dryness: it should feel slightly damp 1 inch below the surface at all times.
Monitor and Adjust for Long-Term Success
After the first true leaves appear, transition to watering from the bottom by placing trays in a shallow tray of water for 10-15 minutes. This encourages deep root growth. Coco coir’s ability to hold moisture means you’ll rarely need to water daily, but always check for dryness at the base of pots—this is where roots draw their moisture.
Every 2-3 weeks, top-dress with a balanced liquid fertilizer diluted to half-strength. Coco coir leaches nutrients quickly, so regular feeding keeps seedlings thriving. If the mix starts to compact or dry out too fast, fluff it gently with a fork and add a little more perlite to restore aeration.
Tips & tricks for perfect coco coir garden mix
Creating the ideal coco coir mix takes a few key steps—here's how to avoid common pitfalls and get that perfect moisture balance every time.
Soaking Time Matters: During Step 1, those 15-20 minutes of soaking are crucial. If your coco coir bricks don't triple in size, they're either not fully submerged or the water isn't warm enough. I like to use water that's about 100°F—just warm enough to feel comfortable in a glass. This ensures even hydration throughout the bricks without over-saturating them. Remember, the goal is a damp sponge texture, not a dripping mess.
Mixing Consistency Check: In Step 2, when blending your coco coir with perlite and worm castings, always do the squeeze test. The mix should hold together when pressed gently but not crumble like dry sand. If it feels too dense, add a little more perlite (about ¼ cup at a time) to improve aeration. If it's too loose, mix in a bit of extra coco coir—just enough to bring it back to that perfect damp sponge consistency.
Watering Wisdom: The instructions mention watering every 2-3 days, but this can vary based on your environment. In warmer climates or with direct sunlight, you might need to water more frequently. Always check the top inch of the mix—it should feel slightly damp, not bone dry or soggy. I've found that using a spray bottle for initial watering in Step 3 prevents over-saturating the surface while still keeping the mix moist enough for seeds to germinate properly.
Long-Term Maintenance: For Step 5, when transitioning to bottom watering, I recommend doing this gradually. Start with 5-10 minutes in the shallow tray of water, then increase to the full 10-15 minutes as you monitor how quickly the mix absorbs moisture. This gradual approach helps prevent root shock while still encouraging deep root growth. Also, keep that perlite on hand—adding a little every few weeks helps maintain the perfect balance between moisture retention and aeration.
Pro Tips for Coco Coir Garden
- Creating the ideal coco coir mix takes a few key steps—here's how to avoid common pitfalls and get that perfect moisture balance every time.
- Soaking Time Matters: During Step 1, those 15-20 minutes of soaking are crucial.
- Mixing Consistency Check: In Step 2, when blending your coco coir with perlite and worm castings, always do the squeeze test.
Frequently asked questions
Got questions about using coco coir in your garden?
You’re not alone! Here are answers to the most common queries to help you get the most out of this eco-friendly growing medium.
What’s the best way to hydrate coco coir before planting?
Soak coco coir in water for at least 4-6 hours (or overnight) until it expands to 3-4x its original size. Drain excess water to avoid soggy roots. For faster results, use a 50/50 mix of coco coir and water in a bucket and stir well. Pro tip: Add a pinch of calcium nitrate or perlite to improve aeration!
How long does coco coir stay moist compared to peat moss?
Coco coir retains moisture longer than peat moss—typically 2-3x as long—thanks to its fibrous structure. While peat dries out quickly (often within days), coco coir can stay damp for 1-2 weeks with proper drainage. For extended hydration, mix coco coir with hydrogel crystals or vermiculite.
Can I reuse coco coir from one growing season to the next?
Yes, but with a sterilization step! After harvest, rinse coco coir to remove salts, then bake it at 200°F (93°C) for 30 minutes to kill pathogens. Avoid reusing if it’s moldy or smells foul. For heavy metals or pests, compost it instead and start fresh.
Is coco coir more expensive than traditional potting soil?
Upfront, coco coir can cost 20-30% more than peat-based mixes, but it’s a long-term investment. Benefits like sustainability, better drainage, and reusable properties offset costs over time. Buy in bulk or check local hydroponic stores for discounts! Split costs with fellow gardeners for larger projects.
Why does my coco coir smell bad after wetting it?
A sour or rotten odor usually means bacterial buildup from old coco coir or poor drainage. Fix it by:
- Rinsing thoroughly with hydrogen peroxide (3%) to sanitize.
- Adding compost or worm castings to balance pH.
- Ensuring pots have drainage holes to prevent waterlogging.
What’s a good alternative if coco coir isn’t available?
Try these eco-friendly swaps:
Alternative
Pros
Cons
Peat moss
Cheap, widely available
Non-renewable, poor drainage
Coconut fiber pellets
Similar benefits, lightweight
Requires rehydration
Compost + perlite
Nutrient-rich, DIY-friendly
Less moisture retention
Wrapping up and next steps
Transforming your garden with coco coir isn’t just a smart choice—it’s a game-changer for seedling success! 🌱 This sustainable, moisture-retentive medium keeps roots happy, reduces waste, and makes gardening easier than ever.
Whether you're a seasoned green thumb or just starting, coco coir opens doors to healthier plants and a thriving garden.
Ready to dive in? Start small—try a single seedling tray or a section of your garden—and watch your plants flourish. Your next step? Grab some coco coir, roll up your sleeves, and let nature do the rest!