
Tools
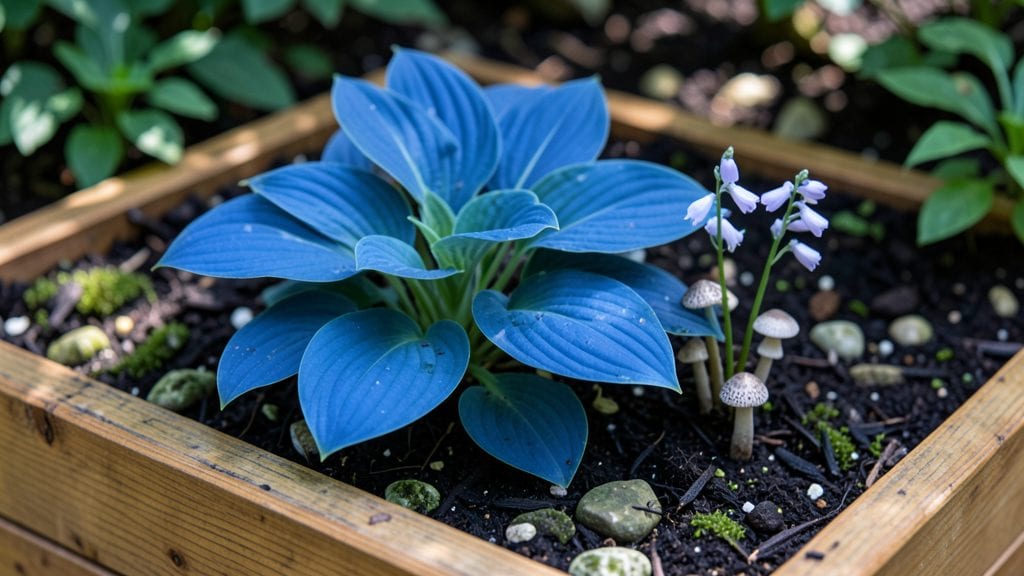
A dinosaur fairy garden turns your backyard into a hidden prehistoric wonderland where tiny dinosaurs and fairies coexist. 🦖✨ I started mine in a shallow raised bed after my kids begged for a "real-life Jurassic Park meets fairy tale" scene—now it’s the most magical corner of our yard, complete with mossy dinosaur footprints and glowing mushroom lights.
The secret to pulling this off lies in low-maintenance plants that thrive in partial shade—think ferns, hostas, and creeping thyme for texture, plus tiny succulents to mimic prehistoric shrubs.
Add miniature statues (dinosaur eggs, fairy doors, and tiny dinosaurs) and a winding path of pebbles or moss to guide visitors through the scene. The best part? You can theme it around a specific era—Jurassic, Triassic, or even a fantasy world where dinosaurs and fairies share the land.
By summer, your garden will feel like a secret escape, with hidden details like dinosaur "tracks" pressed into the soil or fairy lanterns glowing at dusk. The plants stay lush with minimal care, and the whimsical layout makes it a hit with kids (and nostalgic adults).
The magic doesn’t stop there—add a few weather-resistant decorations and seasonal touches, like painted rocks or tiny dinosaur skeletons, to keep the theme alive all year.
Perfect for small spaces, containers, or even a corner of your existing garden. Whether you’re a parent looking for a creative project or a gardener craving something playful, this design blends nature and imagination in a way that’s as rewarding to create as it is to explore.
📚 In This Guide
- What you need
- Instructions
- Tips and common mistakes
- Wrapping up and next steps
What you need
- ● Container: A shallow wooden tray (12" x 18"), ceramic dish, or repurposed baking sheet (ensure drainage holes if using soil).
- ● Base Layer: Pebbles or small gravel (2–3 lbs, ¼"–½" size)
- ● Activated charcoal (1 small bag, for odor control)
- ● Soil: Cactus/succulent mix (5 lbs) or well-draining potting soil.
- ● Miniature Plants: Succulents (e.g., 3–5 small Haworthia or Sedum)
- ● Moss (1 small sheet, for texture)
- ● Miniature ferns (2–3 plants, 2" tall)
- ● Dinosaur & Fairy Elements: Miniature dinosaur figurines (3–5, 1"–3" tall)
- ● Fairy garden accessories (e.g., tiny mushrooms, toadstools, or resin fairies)
- ○ Pebble path kit (optional, for walkways)
- ● Tools: Small hand trowel or spoon
- ● Spray bottle (for misting plants)
- ● Paintbrush (for details, like moss glue or tiny water features)
- ○ Optional Enhancements: Fairy lights (battery-operated, for ambiance)
- ● Miniature water feature (e.g., tiny pond liner or pebble "stream")
- ● Acrylic paint + sealant (for customizing rocks or dinosaurs)
- ● Glitter or biodegradable confetti (for magical sparkle)
- ● A sunny windowsill or grow light (6+ hours/day for succulents).
- ● Patience! Layering and details take time—plan for 2–3 hours of assembly.
- ● Creative vision—sketch your layout first to avoid overcrowding.
Step-by-Step instructions for building a dinosaur fairy garden
Here's the method I use to create a magical miniature world where tiny dinosaurs and fairies coexist.
🪴 Step 1: Choose and Prepare Your Base Container
Select a shallow, wide container like a 12-inch ceramic tray or wooden planter box—something that gives you at least 18 square inches of surface area for each of your 4 fairy garden zones. I like to use a rectangular wooden box because it gives me clean edges and makes it easy to divide the space into sections.
Line the bottom with landscape fabric to prevent soil from falling out while still allowing drainage. Cut it to fit snugly, leaving a little extra on the sides. This keeps your fairy garden neat and makes cleanup easier later. If your container has drainage holes, cover them with small pebbles first to prevent soil from washing out.
🌱 Step 2: Layer the Base for Texture and Drainage
Start with a 1-inch layer of small pebbles—I use smooth river stones—to create drainage and add natural texture. Spread them evenly across the bottom of your container. Next, add a ½-inch layer of activated charcoal (if you have it) to keep things fresh and prevent mold, or skip it if you don’t. This layer is optional but helps with moisture control.
Top this with a 2-inch layer of coarse sand to create a stable base for your fairy garden. Press it down lightly with your fingers so it’s firm but not packed. This layer prevents your fairy structures from sinking into the soil later. I like to rake it smooth with a small hand rake for a polished look.
🌿 Step 3: Create Miniature Landscapes for Each Zone
Divide your container into 4 sections, each about 6 inches by 6 inches, to create distinct habitats. For one zone, mound up ½ cup of potting soil to form a small hill—this will be the dinosaur’s "mountain home." For another, create a tiny pond by pressing a small ceramic dish (like a 3-inch saucer) into the soil and filling it with water.
Use small twigs, moss, and pebbles to build tiny paths, bridges, or fences between zones. I like to arrange 3-4 twigs in an "X" shape to create a fairy bridge over the pond. Add small rocks around the edges to define paths. Here’s the thing—fairies love details, so even a tiny "mushroom" made from a small acorn cap adds charm.
✂️ Step 4: Plant Miniature Flora for Scale and Magic
Choose small succulents, moss, or tiny ferns to plant in each zone. I use hen and chicks (they stay small) and sheet moss for ground cover. Plant them in small clusters—about 3-5 plants per zone—so they look like a natural fairy garden rather than a sparse one. Water them lightly after planting so the soil settles around the roots.
Add tiny flowers like miniature impatiens or baby’s tears to bring color. Place them near the edges of paths or around the base of your dinosaur figures. The key is to keep everything under 2 inches tall so it stays proportional. If a plant gets too big, trim it back with small scissors—fairies prefer neat, tidy gardens!
🪴 Step 5: Add Dinosaur and Fairy Elements for Whimsy
Place your 4 dinosaur figures in their zones—maybe a T-Rex near the mountain and a Stegosaurus by the pond. I like to bury them halfway up their legs in the soil so they look like they’re rooted in place. For fairy elements, add tiny mushroom houses (made from small clay pots or acorn caps), pebble pathways, and miniature furniture like tiny stools or benches (use small bark slices or toothpicks to prop them up).
Scatter tiny accessories like glow-in-the-dark pebbles (for fairy lights) or small seashells to add texture. Here’s where it gets fun—hide tiny details like a miniature treasure chest (a small matchbox) or a fairy door (cut from bark) to encourage exploration. The more hidden surprises, the more magical it feels!
Tips & tricks for perfect dinosaur fairy gardens
Creating a magical miniature world takes a few clever tricks to make it look like fairies and dinosaurs actually coexist. Here's how to bring your vision to life with professional flair.
Proportions Are Everything: In Step 3, when dividing your container into 4 zones, use a ruler to measure each 6-inch square precisely. This ensures your dinosaur figures and fairy elements fit perfectly without looking cramped. I learned this the hard way—my first attempt had a T-Rex that looked like it was about to topple over!
Texture Layers Matter: For Step 2, don't skip the coarse sand layer—it creates a stable foundation that prevents your fairy structures from sinking. Press it down firmly but don't pack it too tightly, or your twig bridges might not stay upright. Think of it like building a tiny foundation for a house!
Hidden Details Elevate Magic: In Step 5, when adding those tiny accessories, place them at slightly different heights. A treasure chest half-buried in soil or a fairy door tucked behind a pebble creates depth and invites exploration. The more hidden surprises you include, the more magical your garden becomes.
Plant Care for Miniature Gardens: After planting in Step 4, water lightly but thoroughly—these tiny plants need consistent moisture. I use a spray bottle for precision, avoiding oversaturation that could wash away your delicate fairy structures. Place your garden in bright, indirect light to keep plants happy without scorching them.
Pro Tips for Dinosaur Fairy Garden
- Creating a magical miniature world takes a few clever tricks to make it look like fairies and dinosaurs actually coexist.
- Proportions Are Everything: In Step 3, when dividing your container into 4 zones, use a ruler to measure each 6-inch square precisely.
- Texture Layers Matter: For Step 2, don't skip the coarse sand layer—it creates a stable foundation that prevents your fairy structures from sinking.
Frequently asked questions
Got questions about creating your own dinosaur fairy garden? You’re not alone! Here are some of the most common queries—plus quick, helpful answers to spark your creativity.
What’s the best way to blend dinosaurs and fairies in one garden?
Mix scale and theme! Use tiny dinosaur figurines (like baby raptors or stegosaurus) as "garden guardians" or "fairy pets." Add mossy logs as "dino nests" or "fairy portals," and tiny mushrooms as both food for fairies and dinosaur plants. The key? Play with proportions—fairies on mushrooms, dinosaurs in the "jungle" background!
How long does it take to build a dinosaur fairy garden?
That depends on your vision! A simple setup (mini dinos + a few plants) takes 1–2 hours. A detailed world with terrain, hidden paths, and custom backdrops can take a weekend or more. Pro tip: Start small! Build in layers—add dinosaurs first, then fairy elements, and finally the "magic" details like glowing pebbles or tiny bridges.
Can I use real plants, or should I stick to fake ones?
Both work! Real plants (like succulents or ferns) add life and texture but need care. Fake plants (silk or plastic) are low-maintenance and let you get wild with colors (think neon ferns or glowing vines). For a hybrid look, combine real moss with artificial dinosaur eggs or fairy doors. If using real plants, place your garden in partial shade to slow wilting.
What’s the trickiest part of setting this up?
The terrain! Creating natural-looking hills, caves, or water features (like tiny ponds with pebbles) can be fiddly. Use a mix of:
- Sanding for smooth slopes
- Hot glue to secure rocks or bark
- Spray paint (matte finish) for weathered effects
How can I add hidden details to make it magical?
Think tiny surprises! Hide:
- Glow-in-the-dark paint on "fairy fireflies" or dinosaur scales
- Miniature "footprints" leading to a "secret" (like a buried treasure chest)
- Peekaboo elements—dinosaurs peeking from behind rocks or fairies on the "other side" of a bridge
- A "story" clue, like a cracked egg with a fairy wand inside
What if my garden looks too cluttered?
Step back and edit ruthlessly! Remove anything that doesn’t serve a purpose—like extra dinos blocking a path or fairy houses too close together. Try the "rule of thirds":
- Leave empty space for "breathing room"
- Group similar elements (e.g., all mushrooms in one area)
- Use height variation—tall ferns behind short dinos
Wrapping up and next steps
Creating a dinosaur fairy garden is more than just a craft—it’s a magical way to blend prehistoric charm with enchanting whimsy! 🦖✨ Whether you’re a parent, hobbyist, or creative soul, this project sparks imagination and offers endless possibilities for customization.
The key takeaway? With a little patience and creativity, you can craft a tiny world that delights both kids and adults alike.
Ready to bring your vision to life? Grab your supplies, sketch your design, and start building! Share your progress or final masterpiece—we’d love to see your dinosaur fairy kingdom come to life. 🌿🎨