
Tools
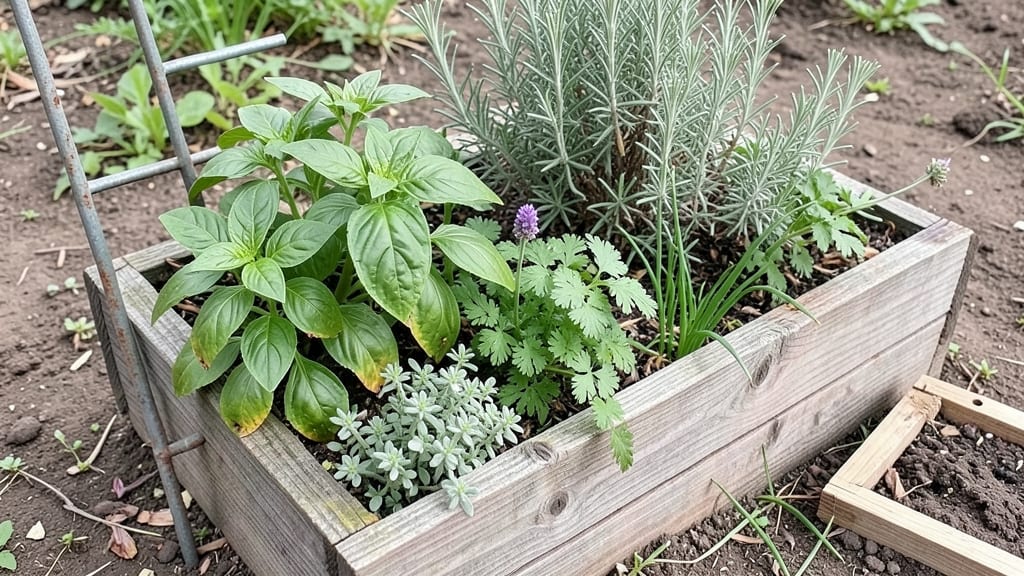
An elevated herb garden turns wasted wall space into a fragrant, functional kitchen feature. 🌿 I built mine in a 12-inch-wide cedar planter mounted near my stove, and now I harvest fresh basil and thyme whenever I cook.
The best part? No more bending over or crowded pots—everything fits neatly above counter level.
You’ll need a sturdy frame (wood, metal, or composite), drainage holes, lightweight potting mix, and herbs that thrive in containers. Cedar resists rot, while metal stays cool in summer.
Just match your herbs to their sunlight needs—rosemary loves full sun, while parsley tolerates shade. A simple 2x4 frame with lattice sides works perfectly for beginners.
By week three, you’ll see lush green growth reaching for your kitchen window. The aroma alone makes it worth the setup—imagine snipping fresh cilantro for tacos or rosemary for roasted potatoes. Plus, elevated gardens stay cleaner, drain better, and look intentional in any kitchen decor.
Works for apartments, tiny homes, or just busy cooks who hate clutter. Start with one planter, then expand as your herb collection grows. The key is keeping soil moist but not soggy—herbs hate wet feet. Here’s how to set yours up without overcomplicating it.
📚 In This Guide
- What you need
- Instructions
- Tips and common mistakes
- Wrapping up and next steps
What you need
- ● Elevated planter: 1-2 wooden crates, pallet shelves, or a pre-made vertical garden kit (height: 24–36 inches, depth: 6–12 inches).
- ● Drill & screws: 1 drill, 12–20 wood screws (1.5–2 inches long).
- ● Sandpaper: Medium-grit (80–120) to smooth edges.
- ● Non-toxic wood sealant: 1 can (e.g., beeswax or polyurethane) for durability.
- ● Potting soil: 1–2 bags of lightweight, well-draining potting mix (avoid garden soil!).
- ● Herb seedlings or cuttings: 6–12 plants (basil, thyme, parsley, mint, etc.—pick your favorites!).
- ● Drainage holes: Drill bit (if modifying a planter without pre-made holes).
- ● Watering can or spray bottle: 1 small container (avoid overwatering!).
- ● Grow lights: LED strips (for low-light kitchens).
- ● Self-watering system: Wick or reservoir kit to reduce maintenance.
- ● Decorative paint/stain: Non-toxic, food-safe option for a polished look.
- ● Herb labels: Chalkboard tags or plant markers for organization.
- ● Casters or brackets: For mobility or wall-mounting.
Step-by-Step instructions for building an elevated herb garden
Here's how to create a functional, space-saving herb garden that brings fresh flavors right to your kitchen counter.
🪴 Step 1: Choose and Assemble Your Elevated Planter
Start with a sturdy elevated planter that's at least 12 inches deep to accommodate root growth. I like to use cedar or redwood because they resist rot and look great in any kitchen decor. If your planter doesn't have built-in drainage holes, drill ¼-inch holes along the bottom using a hole saw—this prevents waterlogging that can drown roots.
Position your planter where it gets 4-6 hours of sunlight daily. South-facing windows or under grow lights work best. Place a drip tray underneath to catch excess water and keep your countertop clean. This tray also helps you monitor watering needs—when it's empty, it's time to water.
🌱 Step 2: Prepare the Growing Medium
Fill your planter with 3 gallons of high-quality potting mix—never use garden soil, as it compacts in containers and suffocates roots. I blend mine with 1 cup of perlite to improve drainage and prevent soggy soil. Mix these thoroughly until you get a light, airy texture that holds together when squeezed but crumbles easily.
Leave about 1 inch of space at the top of the planter for watering. Press the soil down lightly with your hands to eliminate air pockets, then water it thoroughly until water runs freely from the drainage holes. This pre-moistening helps establish an even watering pattern for your herbs.
☀️ Step 3: Plant Your Herb Selections
For this 4-plant setup, choose herbs with similar water needs—like basil, parsley, chives, and thyme. Dig 2-inch deep holes spaced 6 inches apart to give each plant room to grow without competing for nutrients. Gently remove each herb from its nursery pot and place it in the hole, ensuring the top of the root ball sits ½ inch below the soil line. This prevents stem rot from sitting water.
Fill the holes with soil and press lightly around the base of each plant to eliminate air gaps. Water immediately after planting to help settle the soil and encourage root contact. You'll see the first signs of establishment when new leaves appear within 1-2 weeks—that's your cue everything is rooted properly.
💧 Step 4: Establish a Watering Routine
Water your elevated garden when the top inch of soil feels dry to the touch. I like to use a watering can with a narrow spout to direct moisture to the base without disturbing the plants. Water until you see excess moisture drain from the bottom holes—this ensures thorough hydration without waterlogging.
Herbs in elevated planters dry out faster than in-ground gardens, so check daily during hot weather. A self-watering tray underneath can help maintain consistent moisture, but never let the plants sit in standing water. You'll know your watering is perfect when the soil stays evenly moist but not soggy between waterings.
✂️ Step 5: Maintain and Harvest Regularly
Pinch back the tips of new growth when plants reach 4-6 inches tall to encourage bushier, more productive plants. This simple pruning trick keeps herbs compact and prevents them from becoming leggy. Harvest leaves regularly by snipping just above a leaf node—this stimulates continued growth and keeps your plants productive.
Fertilize every 4-6 weeks with a balanced liquid fertilizer diluted to half-strength. I mix 1 tablespoon of 10-10-10 fertilizer per gallon of water and apply it during your regular watering routine. You'll notice healthier, more vibrant foliage within a few applications, and your herbs will taste fresher than anything from the store.
Tips & tricks for perfect elevated herb garden
These simple strategies will help you create a thriving herb garden that stays healthy and productive for months.
Planter Placement: The 4-6 hours of sunlight mentioned in Step 1 is crucial, but don't overlook the importance of airflow. Position your elevated planter near a window with gentle breezes—this helps prevent fungal diseases. If your kitchen has limited natural light, supplement with a full-spectrum grow light placed 6-12 inches above the plants for 12 hours daily. I've found that herbs grow just as well under lights as they do in sunny windows.
Soil Preparation: When mixing your 3 gallons of potting soil with 1 cup of perlite in Step 2, take a moment to check the moisture level after adding water. The soil should feel like a damp sponge—not dripping wet. Overly wet soil can suffocate roots, while too-dry soil prevents proper nutrient absorption. I like to do the "squeeze test"—if water drips out when you squeeze a handful, it's too wet; if it crumbles completely, add more water.
Planting Depth: The ½-inch depth for root balls in Step 3 is perfect for keeping stems healthy, but here's the secret: gently score the sides of the root ball with a knife before planting. This encourages new roots to grow outward into the surrounding soil, creating a stronger plant. Just make 4-5 shallow cuts around the root ball before placing it in the hole—it takes 30 seconds but makes a huge difference in establishment.
Watering Wisdom: In Step 4, the top inch soil test is spot-on, but I've learned the hard way that morning watering works best. Watering in the morning gives plants all day to absorb moisture before evening evaporation. If you must water in the evening, do it at least 2 hours before sunset to prevent fungal growth. I've seen herbs develop powdery mildew when water sits on leaves overnight—trust me, it's not worth the risk.
Pro Tips for Elevated Herb Garden
- These simple strategies will help you create a thriving herb garden that stays healthy and productive for months.
- Planter Placement: The 4-6 hours of sunlight mentioned in Step 1 is crucial, but don't overlook the importance of airflow.
- Soil Preparation: When mixing your 3 gallons of potting soil with 1 cup of perlite in Step 2, take a moment to check the moisture level after adding water.
Frequently asked questions
Got questions about elevated herb gardens?
Here are some of the most common ones—plus quick, practical answers to help you get started (or troubleshoot) with ease.
What’s the best height for an elevated herb garden?
Ideal height is 24–36 inches off the ground—low enough for easy access (no bending!) but high enough to deter pests like slugs and rabbits. If you’re wheelchair-accessible or have mobility concerns, 30–36 inches works best. Pro tip: Add a small shelf or stool nearby for harvesting!
When is the best time to plant herbs in an elevated garden?
For most herbs, spring (after the last frost) or early fall are prime times. Basil, cilantro, and parsley thrive in warm soil (60°F+), while rosemary and thyme tolerate cooler temps. Seedlings can go in year-round in mild climates—just avoid extreme heat or cold snaps!
Can I use an elevated herb garden on a balcony or patio?
Just ensure your setup gets 6+ hours of sunlight daily (south-facing is ideal in the Northern Hemisphere). For balconies, opt for lightweight materials like galvanized steel or recycled plastic. Add wheels or a portable stand if you need to move it for shade or weather protection.
How do I keep pests away from my elevated herb garden?
Elevation alone deters some pests, but for extra defense:
- Neem oil spray (natural repellent for aphids/mites).
- Copper tape around the base to block slugs/snails.
- Companion planting (e.g., marigolds near basil).
- Row covers for young plants in early spring.
Bonus: Harvest regularly—healthy, thriving herbs resist pests better!
What if my herbs wilt or turn yellow?
Common causes (and fixes):
Symptom
Likely Cause
Solution
Wilting
Underwatering or overwatering
Check soil moisture (top inch should be dry). Use well-draining soil + drainage holes.
Yellow leaves
Overwatering or nutrient deficiency
Let soil dry slightly between waterings. Fertilize lightly with fish emulsion or compost tea.
Leggy growth
Not enough light
Move to a sunnier spot or supplement with a grow light (12–14 hrs/day).
Pro tip: Most herbs prefer drought-tolerant conditions—err on the side of less water!
Wrapping up and next steps
Creating an elevated herb garden is a game-changer for small kitchens—it’s practical, stylish, and packed with fresh flavors at your fingertips! 🌿 With the right materials and a little creativity, you can transform unused vertical space into a thriving green oasis.
Whether you’re a seasoned gardener or just starting out, this setup makes growing herbs effortless and rewarding.
Now that you’re inspired, take the next step: sketch your design, gather your supplies, and start building! Your future meals—and your kitchen—will thank you.