Landscaping
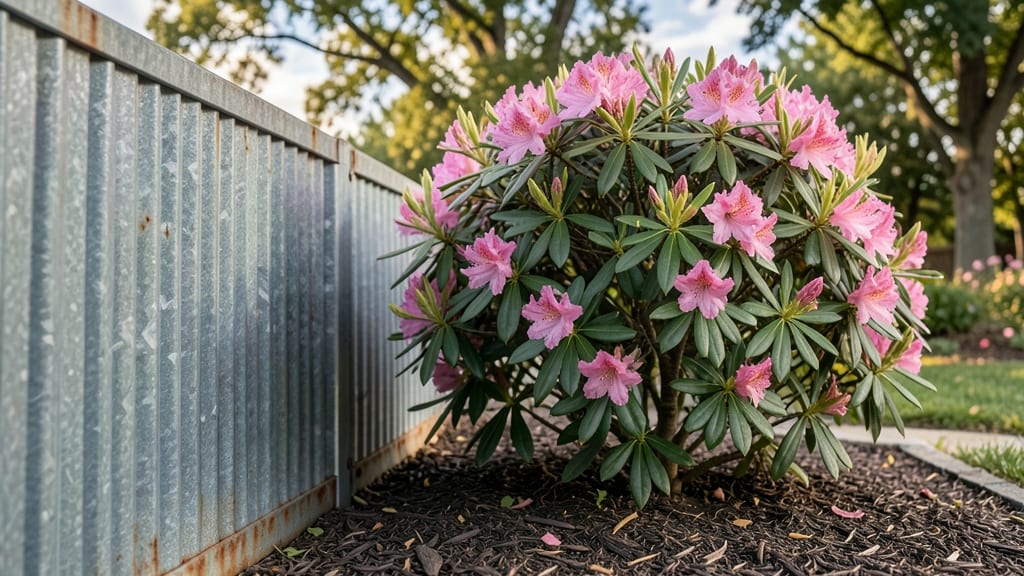
A galvanized garden fence brings that perfect mix of rustic charm and sturdy protection to your outdoor space. I remember the first time I installed one—it transformed a messy, exposed yard into a defined, welcoming area that actually felt like mine.
The zinc coating means no rust, no peeling paint, and years of looking fresh with almost no upkeep.
You don’t need to be a contractor to make it work—basic tools and a weekend are all it takes.
The panels come in standard heights from 3 to 6 feet, so you can match your fence to your garden’s needs, whether that’s privacy for a cozy seating area or just keeping pets and critters out.
Plus, the classic look pairs beautifully with everything from cottage gardens to modern landscapes.
What you’ll love most is how easy it is to maintain. A quick wipe-down with soapy water keeps it looking sharp, and the galvanized coating lasts 10-15 years without fading or flaking.
Imagine a fence that stays strong and stylish for decades—no sanding, no repainting, just pure function and good looks.
Here’s the best part: you can customize it further with climbing plants, lattice panels, or even built-in trellises. Whether you’re outlining a vegetable patch, creating a play area for kids, or simply defining your property line, this fence does it all without the hassle.
Let’s get yours looking as good as it’ll feel!
📚 In This Guide
- What you need
- Instructions
- Tips and common mistakes
- Wrapping up and next steps
What you need
- ● Galvanized steel fence panels: Measure your property and calculate the total length needed (e.g., 50 ft for a small yard). Standard widths are 4–6 ft; height options typically range from 6–8 ft.
- ● Galvanized steel fence posts: 4x4 or 6x6 inches, cut to 6–8 ft tall (depending on ground conditions). Plan for one post every 6–8 ft along the fence line.
- ● Concrete mix: 60–80 lb bags (pre-mixed) for setting posts. You’ll need about 1 bag per post, depending on soil stability.
- ○ Galvanized fence caps (optional): For a polished look, add these to post tops to prevent water damage.
- ● Landscape fabric: 3–4 ft wide roll to prevent weeds and stabilize the base.
- ● Measuring tape (25+ ft for accuracy).
- ● Post hole digger or auger (manual or powered).
- ● Level (4 ft) to ensure posts are plumb.
- ● Shovel and wheelbarrow for moving dirt and concrete.
- ● Circular saw or hacksaw for cutting posts/panels.
- ● Wrenches (adjustable and socket set) for hardware.
- ● Safety gear: Gloves, goggles, and ear protection.
- ○ String line & stakes (optional): For marking fence layout before digging.
- ● Check local codes: Verify setback requirements and fence height limits before starting!
- ● Call 811: Have underground utilities marked to avoid costly mistakes. 🚧
- ● Dry run: Lay out panels and posts on the ground first to adjust for gates or uneven terrain.
Step-by-Step instructions for installing a galvanised garden fence
Here’s how to build a sturdy, rustic fence that lasts for years with minimal upkeep.
Measure and Mark Your Fence Line
Start by measuring the area where your fence will go. Use wooden stakes and a string line to mark the exact placement—this ensures straight, professional-looking panels. I like to check the line at both ends and midway to confirm it’s perfectly level before moving forward. Mark the exact spots for posts every 6 to 8 feet along the line, as this spacing provides stability for the panels.
Double-check your measurements against the total length of fencing material you’ve purchased. If you’re working with 4 sections of 8-foot panels, for example, you’ll need 5 posts (one at each corner and three in between). Adjust your spacing slightly if needed to ensure the panels fit neatly between posts without gaps.
Dig Post Holes and Set the Foundation
Use a post hole digger or auger to create holes 2 to 3 feet deep—this depth ensures the posts are stable, especially in windy conditions. The hole should be about 3 inches wider than the post diameter to allow for backfilling with gravel. I always tap the post into the hole with a rubber mallet to check for level before finalizing placement.
Place a 2-inch layer of gravel at the bottom of each hole to improve drainage and prevent soil from compacting around the post. This step is critical for long-term stability, as it keeps moisture from pooling and causing rust over time. Once the post is perfectly vertical, backfill the hole with soil, tamping it down firmly every 6 inches to eliminate air pockets.
Attach the Panels to the Posts
Begin by positioning the first panel between two posts, ensuring it’s flush with the top edges. Use galvanised screws or bolts (included with most fence kits) to secure the panel to the posts. I like to pre-drill holes in the panel to prevent splitting, especially if the wood is dense. Start at the bottom and work your way up, tightening screws evenly to avoid warping.
For a seamless look, stagger the joints between panels—this hides the seams and adds to the rustic charm. Leave a small gap (about ¼ inch) between panels to allow for natural expansion and contraction from temperature changes. If your fence includes diagonal braces, attach them now to reinforce corners and high-traffic areas.
Add Finishing Touches for Durability
Once all panels are secured, inspect the fence for any loose screws or uneven sections. Tighten any connections and reinforce weak spots with additional screws if needed. This is also the time to install any gates—ensure hinges are properly aligned and the latch mechanism works smoothly. A well-fitted gate prevents sagging over time.
Finally, apply a clear sealant or rust-resistant paint to the galvanised metal components if they’re exposed. While galvanisation provides excellent corrosion resistance, an extra layer of protection extends the fence’s lifespan, especially in humid or coastal climates. Step back and admire your work—your fence is now both functional and stylish!
Tips & tricks for perfect galvanised garden fence installation
Building a galvanised garden fence that lasts requires attention to detail—here are the key tricks to ensure your project turns out sturdy and stylish.
Leveling is Everything: Before setting any posts, use a level to check your string line at multiple points, not just the ends. I’ve learned the hard way that even a slight slope in the initial line can cause panels to lean over time. For extra precision, use a laser level if available—it’s worth the investment for large fences. The 6 to 8 feet spacing between posts mentioned in Step 1 works perfectly when your line is perfectly level from start to finish.
Post Hole Preparation Matters: When digging holes 2 to 3 feet deep, don’t rush the process. The 3-inch wider diameter allows for proper backfilling with gravel, which is crucial for drainage. I’ve seen fences sag when posts weren’t set deep enough—especially in windy areas. After placing the 2-inch gravel layer, use a rubber mallet to tap the post into place before backfilling. This helps you catch any leveling issues before the hole is full.
Preventing Panel Warping: In Step 3, when attaching panels, pre-drilling holes is non-negotiable for dense wood types. I’ve seen panels crack when screws were driven directly into untreated wood. Start with the bottom screws first and work your way up—this prevents the panel from bowing outward as you tighten. The ¼-inch gap between panels is just as important as the screws; it allows for natural wood movement without causing stress points that could lead to future gaps.
Gate Alignment Secret: For gates, take an extra 10 minutes to ensure the hinges are perfectly aligned before attaching them to the post. I’ve fixed more sagging gates than I’d like to admit—always check that the gate sits flush with the fence line when fully open and closed. A well-aligned gate won’t just look better; it’ll last longer and operate smoothly for years to come.
Pro Tips for Galvanised Garden Fence
- Building a galvanised garden fence that lasts requires attention to detail—here are the key tricks to ensure your project turns out sturdy and stylish.
- Leveling is Everything: Before setting any posts, use a level to check your string line at multiple points, not just the ends.
- Post Hole Preparation Matters: When digging holes 2 to 3 feet deep, don’t rush the process.
Frequently asked questions
Got questions about galvanized garden fences? You’re not alone! Here are some of the most common queries—plus clear, no-nonsense answers to help you make the best choice for your outdoor space.
What makes a galvanized fence different from regular steel or wood?
A galvanized fence is made from steel coated with a layer of zinc to prevent rust and corrosion. Unlike untreated steel, which rusts quickly, or wood, which rots over time, galvanized fences offer long-lasting durability with minimal upkeep. They’re also stronger, more resistant to pests, and won’t warp like wood—making them ideal for high-traffic or wet areas.
How long does a galvanized fence last, and when should I replace it?
With proper care, a galvanized fence can last 20–50 years or more! Signs it’s time for a replacement include thick rust spots, weakened panels, or excessive sagging. If the zinc coating is still intact but the fence looks tired, a fresh coat of paint or powder coating can extend its life for years.
Is a galvanized fence more expensive than wood or vinyl?
Upfront, galvanized fences cost more than wood (typically $10–$30 per linear foot) but less than premium vinyl ($20–$50 per foot). However, their low maintenance and longevity often make them the most cost-effective option over time—no staining, sealing, or frequent replacements!
Can I install a galvanized fence myself, or do I need a pro?
DIY installation is totally doable for basic designs, but pros recommend hiring help for uneven terrain, tall fences, or heavy gates. Key tools: post hole digger, concrete mix, fence staples, and a level. If you’re unsure, start with a short section to test your skills before committing to the whole yard!
Can I paint or customize a galvanized fence for a different look?
While the galvanized coating protects the steel, you can paint or powder-coat it in any color to match your home’s aesthetic. Just clean the surface thoroughly first to ensure paint adheres well. Popular choices: black, white, or earthy tones for a modern look, or rustic red/green for a classic vibe.
Will a galvanized fence rust over time, even with the coating?
Minor rust spots can appear if the zinc coating is scratched or damaged, but it won’t spread quickly like untreated steel. To prevent issues:
- Inspect annually for chips or dents.
- Avoid sharp tools that could scratch the coating.
- Repaint small areas if rust forms.
Wrapping up and next steps
A galvanised garden fence isn’t just a boundary—it’s a durable, low-maintenance statement that blends rustic charm with practical strength. Whether you’re protecting your property, boosting curb appeal, or creating privacy, its weather-resistant coating and sturdy design make it a smart, long-term investment.
Plus, with minimal upkeep, you’ll enjoy its beauty for years without the hassle!
Ready to transform your outdoor space? Start by measuring your yard and gathering the tools you’ll need—then dive into your project with confidence! 🌿✨