
Tools
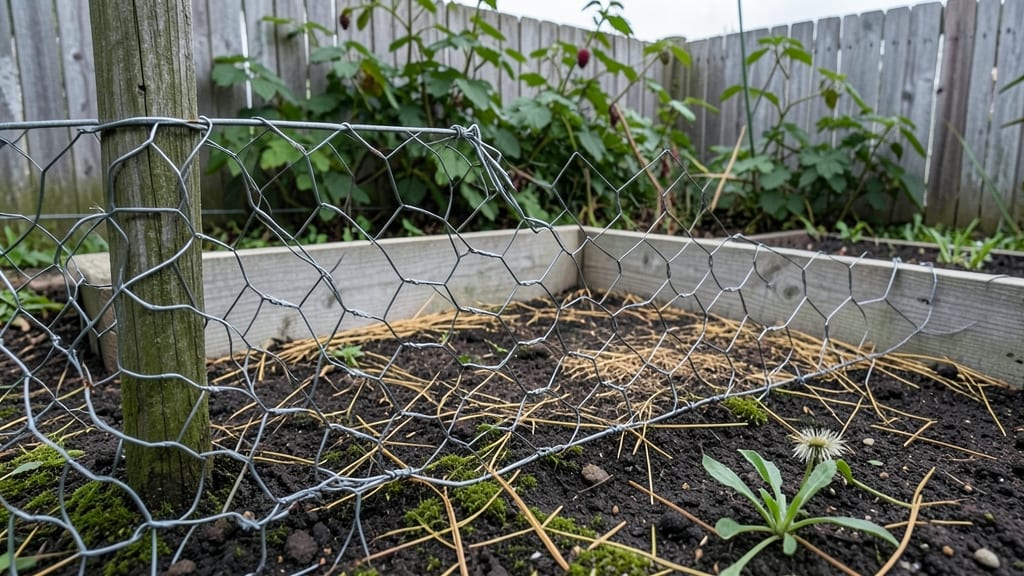
Transforming your garden into a private oasis just got easier with garden bed enclosures that blend function and style. 🌿 I’ve seen how these modular screens can turn a windswept backyard corner into a lush, protected growing space—while keeping neighbors’ eyes (and critters) at bay.
The best part? You’re not sacrificing aesthetics for practicality.
These enclosures come in wood, metal, or even fabric, each offering different benefits. Wooden frames add rustic charm and can be built to match your garden’s style, while metal borders bring a sleek, modern edge that lasts years.
Fabric barriers are lightweight and perfect for temporary setups or small spaces. The key is choosing materials that suit your climate and design goals—whether you want a cottage garden feel or a clean, contemporary look.
Imagine a raised planter lined with a lattice screen, where climbing roses or ivy soften the edges while keeping soil in place. You’ll love how these enclosures reduce wind damage, deter pests, and even create microclimates for delicate plants.
The result? A garden that’s both productive and polished, with minimal effort once installed.
From vegetable gardens to flower beds, these versatile structures adapt to any layout. Whether you’re starting fresh or retrofitting an existing space, the possibilities are endless. Let’s dive into the best ways to make them work for you!
📚 In This Guide
- What you need
- Instructions
- Tips and common mistakes
- Wrapping up and next steps
What you need
- ● Wood: Cedar, redwood, or pressure-treated pine (4x4 posts for corners, 2x6 or 2x8 boards for sides—calculate based on your enclosure dimensions).
- ● Screws: Deck screws (2.5”–3” galvanized, ~100–150 screws depending on size).
- ● Concrete mix: Quick-setting (~5 lbs per post for stability).
- ● Landscape fabric: 3’ wide roll (cut to fit enclosure base to block weeds).
- ● Drill/driver: Cordless for efficiency.
- ● Level: 24” or 48” bubble level (critical for even posts!).
- ● Measuring tape: 25’ tape measure.
- ● Post hole digger: Manual or auger (6” diameter, 12” deep holes).
- ● Staple gun: Heavy-duty for securing landscape fabric.
- ● Sandpaper: 80-grit for smoothing edges.
- ● Vinyl or metal edging: For a polished look (e.g., galvanized steel trim).
- ● Lattice panels: Pre-cut cedar lattice for added texture and climbing plants.
- ● Stain/sealant: Outdoor wood stain or waterproof sealant (apply after assembly).
- ● Drainage holes: Drill ½” holes in the bottom of boards if using as planters.
- ● Hinged or removable panels: For easy access to plants or modular rearranging.
- ● 🔥 Pre-cut wood: Measure twice, cut once! Use a miter saw for clean edges.
- ● 🌡️ Weatherproofing: Cedar resists rot, but sealant adds longevity—especially in rainy climates.
- ● ✨ Modular flexibility: Build sections in 4’ increments for easy transport or rearrangement.
Step-by-Step instructions for building modular privacy screens that double as raised planters
Transform your garden into a lush, private retreat with these easy-to-assemble enclosures that grow flowers and screen your space.
🪴 Step 1: Measure and Mark Your Garden Bed Layout
Start by measuring the length and width of your garden bed—this determines how many modular panels you’ll need. For a 4-foot-wide bed, I recommend 4-foot-tall panels (standard height for privacy). Mark the perimeter with wooden stakes and string to visualize the enclosure before cutting anything. This prevents costly mistakes later.
Here's the thing—measure twice, cut once. Double-check your dimensions against the width of your lumber (typically 2x4s or cedar planks). If your bed is irregular, break it into sections and build separate panels for each. For example, a 6-foot-long bed might need two 3-foot panels instead of one awkward 6-footer.
🌱 Step 2: Build the Modular Planter Frames
Construct each panel using 2x4s for the frame and cedar planks for the front face (the side where plants will grow). Assemble a rectangular frame with 4-foot height and width matching your bed (e.g., 4 feet wide x 4 feet tall). Screw the corners together with deck screws for durability. I reinforce the bottom with an extra horizontal board to support the weight of soil and plants.
For the planter section, attach the cedar planks to the front of the frame, leaving the back and sides open for airflow. This design lets roots breathe while keeping soil contained. Pre-drill screw holes to prevent wood splitting—this is where most DIY projects fail. Use galvanized screws to resist rust over time.
☀️ Step 3: Assemble the Privacy Screen Panels
For the privacy screen portion, attach bamboo or lattice panels to the back of each frame. These materials are lightweight, weather-resistant, and let light filter through while blocking views. Secure them with staple guns or screws—just enough to keep them firm but flexible enough to lean slightly if needed. I like to stagger the seams between panels so the screen looks seamless.
Leave 1-2 inches of space between the top of the planter and the screen section. This gap prevents water from pooling on the lattice when it rains. Test-fit the panels in your garden bed before final assembly. If they feel wobbly, add corner braces for extra stability—especially important if kids or pets might lean on them.
💧 Step 4: Install and Fill the Planters
Place the assembled panels around your garden bed, screwing them into ground anchors or burying the bottom 4 inches deep for stability. For a 4-foot-wide bed, you’ll need two panels on the long sides and one on each end. Fill the planter sections with 12-18 inches of high-quality potting mix (never garden soil—it compacts too much). Pack it lightly but firmly to eliminate air pockets.
Here’s where it gets fun—plant spiller plants (like petunias or lobelia) along the edges and tall varieties (like sunflowers or hollyhocks) toward the back. The privacy screen will shield your plants from harsh winds while letting you enjoy their colors from inside your space. Water deeply after planting to settle the soil and encourage root growth.
✂️ Step 5: Maintain and Customize Over Time
Check the drainage holes occasionally to ensure they’re not clogged with roots or debris. If your plants outgrow their space, trim them back in early spring to encourage bushier growth. I like to rotate plants seasonally—swapping out summer annuals for winter-hardy greens keeps the enclosure looking fresh year-round.
Real talk: If your panels start leaning after heavy rain, it’s not a failure—it’s just a sign they need stakes or guy wires for support. Bury 4-foot wooden stakes at a 45-degree angle into the ground behind the panels and secure them with zip ties or bungee cords. This keeps everything upright without ruining the aesthetic.
Tips & tricks for perfect garden bed enclosures
These game-changing insights will help you build sturdy, beautiful enclosures that last for years—no more wobbly panels or soggy planters!
Precision in Step 1: When measuring your garden bed, use a laser level or string pulled taut between stakes to ensure perfectly straight lines. I learned this the hard way after building panels that leaned inward—always double-check diagonals to confirm your rectangle is square. For irregular beds, sketch a rough layout first to visualize how many 4-foot panels you'll need before cutting lumber. This saves material and prevents awkward gaps.
Frame Reinforcement: In Step 2, don't skimp on the extra horizontal board at the bottom—this is what prevents your planters from bowing under soil weight. I reinforce mine with 3/4-inch plywood instead of just a 2x4 for extra stability, especially if you're planting heavy perennials. Pre-drilling screw holes is non-negotiable—skipping this step causes wood splitting that ruins the look. Use a 1/8-inch drill bit for clean pilot holes before driving your deck screws.
Screen Assembly Secret: The 1-2 inch gap between planter and screen in Step 3 is crucial for drainage, but don't make it too wide or water will splash onto your lattice. I like to use spacers made from scrap wood strips to maintain consistent gaps while assembling. For extra durability, attach the bamboo lattice with outdoor-rated staples along the edges and center—this prevents sagging over time. Staggering seams creates a seamless look, but if you're new to this, just align them carefully for a clean finish.
Planting Strategy: When filling your planters in Step 4, layer the 12-18 inches of potting mix with a 2-inch layer of gravel or perlite at the bottom for superior drainage. Pack the soil lightly but firmly to eliminate air pockets—this prevents compaction over time. For the first planting, choose drought-tolerant varieties like lavender or sedum—they thrive in the slightly drier conditions created by the privacy screen's airflow restriction.
Pro Tips for Garden Bed Enclosures
- These game-changing insights will help you build sturdy, beautiful enclosures that last for years—no more wobbly panels or soggy planters!
- Precision in Step 1: When measuring your garden bed, use a laser level or string pulled taut between stakes to ensure perfectly straight lines.
- Frame Reinforcement: In Step 2, don't skimp on the extra horizontal board at the bottom—this is what prevents your planters from bowing under soil weight.
Frequently asked questions
Got questions about garden bed enclosures?
You’re not alone! Here are answers to the most common concerns—from setup to troubleshooting—to help you get the most out of your modular privacy planters.
What’s the best time of year to install garden bed enclosures?
Install them in early spring or late fall for ideal conditions. Spring lets plants establish roots before summer heat, while fall avoids extreme temperatures. If installing in summer, water thoroughly and shade new plants until they acclimate. Avoid winter—frost can damage materials or delay planting.
Can I use garden bed enclosures for vegetables, or are they just for flowers?
These enclosures work great for veggies—herbs, tomatoes, peppers, and greens thrive in the raised beds. The modular design even lets you rotate crops seasonally. Just ensure your enclosure has drainage holes and use lightweight, nutrient-rich soil for root health.
Are there budget-friendly alternatives to pre-made enclosures?
Yes! DIY options include:
- Cinder blocks or bricks: Stack and fill with soil (add hardware cloth to deter pests).
- Pallet wood: Sand edges, treat with non-toxic sealant, and line with landscape fabric.
- Recycled materials: Old fencing, plastic lumber, or even stacked tires (drill drainage holes!).
How do I keep pests out of my enclosed garden bed?
Start with a hardware cloth barrier (bury 12 inches deep around the base). Add companion plants like marigolds or basil to repel bugs naturally. For slugs/snails, use copper tape on edges. Avoid overwatering—moist soil attracts pests. Bonus: Install a small fan on a timer to deter flying insects!
Will garden bed enclosures protect plants from harsh weather?
They offer partial protection—enclosures shield plants from wind and heavy rain but won’t insulate against frost. For cold climates:
- Use burlap or frost cloth as a removable cover.
- Choose darker-colored materials to absorb sunlight and retain heat.
- Add a thick mulch layer (straw or shredded leaves) to insulate roots.
Wrapping up and next steps
Creating a garden bed enclosure that blends privacy with functionality is a game-changer for any outdoor space! These modular screens not only protect your plants from pests and weather but also elevate your garden’s aesthetic—all while doubling as stylish raised planters.
Whether you’re a seasoned gardener or just starting out, the key is to start small, customize your design, and enjoy the process. 🌱✨
Ready to transform your garden? Grab your materials, sketch a simple plan, and begin building your first panel today! Your future self—and your plants—will thank you.