
Tools
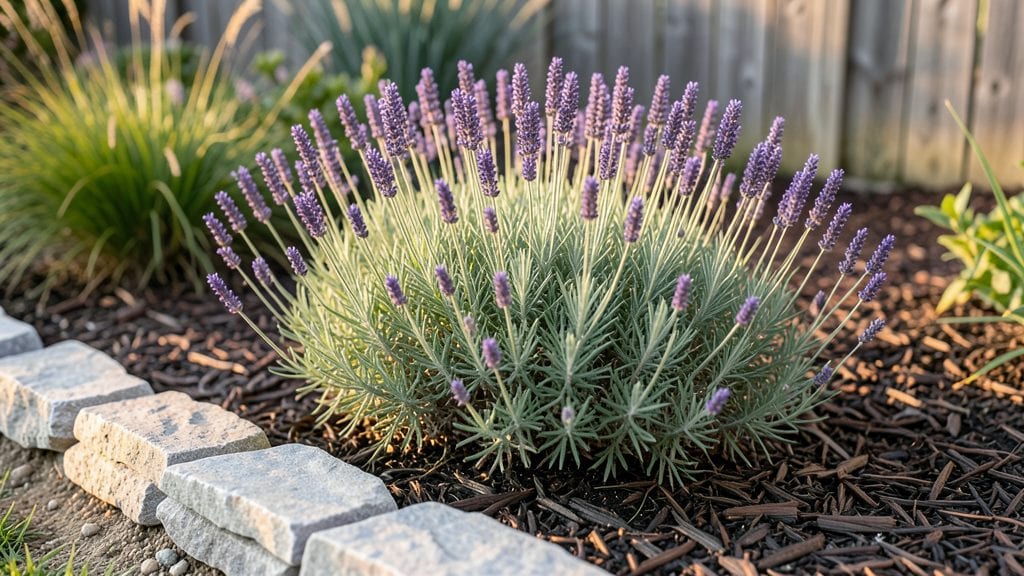
A garden border design transforms a simple yard edge into a showstopping frame for your entire landscape—softening harsh lines while adding texture, color, and year-round interest. I learned this the hard way after installing straight, monotonous borders that made my garden feel like a park, not a home.
The secret lies in organic curves, layered heights, and plants that bloom at different times, creating movement that draws the eye deeper into your space.
You don’t need fancy materials or a degree in horticulture—just a few key elements: low-growing perennials for structure, mid-height shrubs for volume, and climbers or tall grasses to soften edges. Stones, wood, or even repurposed bricks can anchor the design without overwhelming it.
My favorite setup combines lavender for scent, heuchera for fall color, and clematis to spill over a curved wooden border—simple but impossible to ignore.
What you’ll end up with is a border that feels intentional, not imposed—one that changes with the seasons while always feeling like part of the garden, not just its boundary.
The right design reduces maintenance (no more weeding straight lines) and boosts curb appeal, making your outdoor space feel like a curated retreat. Here’s how to make it happen without overcomplicating things.
Works for any yard size, from cozy urban patios to sprawling country gardens. Whether you’re softening a fence line or defining a flower bed, these principles keep your design timeless. Let’s get those edges looking like they belong in a magazine spread.
📚 In This Guide
- What you need
- Instructions
- Tips and common mistakes
- Wrapping up and next steps
What you need
- ● Measuring tape (25–50 ft) – For precise border layouts.
- ● String line or garden twine – To mark curves and edges.
- ● Stakes or pins (wooden or metal, 6–12 inches long) – To anchor your twine.
- ● Shovel or spade – For digging trenches or planting.
- ● Garden shears or pruners – For trimming plants to shape.
- ● Gravel, sand, or edging material (e.g., bricks, stones, or metal edging) – To define the border’s base.
- ● Plants for borders (e.g., boxwood, lavender, or ornamental grasses) – Choose based on your climate and design style.
- ○ Mulch (optional but recommended) – To retain moisture and suppress weeds.
- ● Decorative edging (e.g., wrought iron, bamboo, or colored plastic) – For a polished look.
- ● Lighting (solar-powered stake lights or low-voltage LED strips) – To highlight borders at night.
- ● Water features (small fountains or bubblers) – For a serene touch.
- ● Paint or stain (for wooden borders) – To match your landscape’s aesthetic.
Instructions for crafting a garden border with timeless curves
Here's how to create a border that softens your garden's edges while adding structure and flow.
Define Your Border Layout with Natural Curves
Begin by sketching your border on graph paper using a 6-inch grid for precision. I like to start with two focal points—perhaps where the border meets a path or flowerbed—and draw gentle, sweeping arcs between them. Avoid sharp corners; instead, use 30-45 degree curves to create movement. Walk the space while holding a 12-foot flexible tape measure to visualize how the curves will flow across the terrain.
For a cohesive look, maintain a consistent radius—typically 8-12 feet—for the curves. If your space has slopes or uneven ground, adjust the radius slightly to follow the natural contours. This ensures the border feels organic rather than forced. Mark the curve path with wooden stakes every 3 feet to guide planting later.
Prepare the Soil Along the Border Path
Dig a 4-inch deep trench along your staked curve line using a spading fork to loosen the soil without disturbing the surrounding area. This depth allows roots to establish while keeping the border compact. Remove any grass, weeds, or debris from the trench—this prevents competition for nutrients and keeps the border tidy. I like to add 1 inch of compost to the trench to enrich the soil before planting.
If your border will include low-growing perennials or ground covers, mix 20% perlite into the trench soil to improve drainage. For borders with taller shrubs or ornamental grasses, focus on amending the top 6 inches of soil with organic matter like leaf mold or well-rotted manure. This ensures the plants have the nutrients they need to thrive without overwhelming the border's delicate lines.
Plant Layered Materials for Depth and Texture
Start with evergreen shrubs or boxwood as the backbone of your border, spacing them 12-18 inches apart along the trench. These plants provide year-round structure and define the curve’s shape. Next, add mid-height perennials like lavender or Russian sage, placing them 6-8 inches in front of the shrubs to create a gradual transition. Finally, fill the front with low-growing ground covers such as creeping thyme or ajuga to soften the edge.
For a natural, undulating effect, stagger the heights of your plants slightly—taller specimens toward the back, shorter ones toward the front. This creates visual interest while maintaining the border’s fluidity. Water deeply after planting to settle the soil and encourage root growth. Mulch the area with 2 inches of shredded bark to retain moisture and suppress weeds, but keep the mulch 2 inches away from plant stems to prevent rot.
Refine with Edging and Maintenance Planning
Install flexible metal or plastic edging along the trench to maintain the curve’s shape over time. Drive the edging 2 inches deep into the soil, following the stakes you placed earlier. This prevents grass and weeds from encroaching while keeping the border neat. For a more natural look, use stone or brick edging laid in a staggered pattern to follow the curve’s rhythm.
Plan your maintenance routine to preserve the border’s elegance. Trim back overgrown plants in early spring before new growth appears, and shape the border twice annually—once in late spring and again in early fall. This keeps the curves crisp and the layers distinct. I also recommend adding 1-2 inches of mulch annually in late winter to refresh the border’s appearance and protect the soil.
Tips & tricks for crafting a garden border with timeless curves
Creating a garden border that flows naturally takes more than just planting—it’s about understanding subtle design principles that make all the difference. Here’s how to elevate your border from basic to breathtaking.
Precision in Layout: When sketching your curves on graph paper, I recommend using a 6-inch grid to maintain consistency, especially if your border spans multiple sections. For larger gardens, consider using a 12-foot flexible tape measure to verify curves in situ—walking the space while holding it helps you visualize how the arcs will interact with pathways or flowerbeds. The key is to avoid symmetry; instead, let the curves follow the land’s natural contours. If you’re working with slopes, adjust the 8-12 foot radius slightly to prevent the border from looking forced.
Soil Preparation Strategy: The 4-inch deep trench is your foundation, but don’t overlook soil composition. For borders with ground covers, mix 20% perlite into the trench to prevent waterlogging, which can suffocate roots. If you’re planting taller shrubs, focus on amending the top 6 inches of soil with organic matter—this ensures nutrients reach the root zones without overwhelming the delicate layers. I’ve found that adding 1 inch of compost to the trench before planting gives plants a strong start, especially in clay-heavy soils.
Layering for Visual Impact: The spacing between plants in Step 3 is where depth comes to life. Place evergreen shrubs or boxwood 12-18 inches apart to create a solid backbone, but don’t be afraid to stagger their heights slightly. For mid-height perennials like lavender, position them 6-8 inches in front of the shrubs to build a gradual transition. The front layer of ground covers—like creeping thyme—should spill just enough to soften the edge without competing with the taller plants. This layering trick makes a border look intentionally designed rather than haphazard.
Edging and Maintenance Insight: Flexible metal or plastic edging is a game-changer for preserving your curves, but installation depth matters. Drive the edging 2 inches deep to keep it sturdy, but avoid over-driving it—this can damage roots. For a more organic feel, I’ve used stone or brick edging laid in a staggered pattern, which follows the curve’s rhythm while adding texture. When planning maintenance, remember that twice-annual trimming—once in late spring and again in early fall—keeps the curves crisp. Adding 1-2 inches of mulch annually in late winter also refreshes the border’s appearance and suppresses weeds without smothering plant stems.
Pro Tips for Garden Border Design
- Creating a garden border that flows naturally takes more than just planting—it’s about understanding subtle design principles that make all the difference.
- Precision in Layout: When sketching your curves on graph paper, I recommend using a 6-inch grid to maintain consistency, especially if your border spans multiple sections.
- Soil Preparation Strategy: The 4-inch deep trench is your foundation, but don’t overlook soil composition.
Frequently asked questions
Got questions about creating the perfect garden border? You’re not alone! Here are some of the most common concerns—plus straightforward answers to help you design with confidence.
What’s the best time of year to install a garden border?
The ideal time depends on your climate and materials. For permanent borders (like stone or brick), spring or fall—when soil is workable but not frozen—is best. For plant-based borders, plant perennials in early spring or late fall to establish roots before extreme weather. Annuals thrive when planted after the last frost.
How much does a garden border cost, and where can I save money?
Costs vary widely: stone borders range from $5–$25 per square foot, while gravel or mulch borders are $1–$10 per square foot. Save by:
- Choosing affordable materials like recycled bricks or local rocks.
- DIY installation (rent tools like a plate compactor for $60/day).
- Skipping professional landscaping for simple designs.
What plants work best for low-maintenance garden borders?
Opt for hardy, drought-tolerant plants that suppress weeds and thrive with minimal care. Top picks:
- Ornamental grasses (e.g., fountain grass or sedge) for texture.
- Perennials like lavender, Russian sage, or salvia for color.
- Ground covers such as creeping thyme or ajuga to fill gaps.
Do I need a border if I’m using mulch or gravel?
Not always! Mulch or gravel can act as a border if contained by:
- A physical edge (like landscape fabric or edging stones).
- Natural barriers (e.g., a raised bed or dense shrubs).
- Regular raking to keep materials from spreading.
My border looks uneven—how can I fix it?
Uneven borders often stem from poor soil prep or inconsistent materials. Try these fixes:
- For stone/brick: Dig a trench, level the base with sand/gravel, and adjust stones as you lay them.
- For plants: Prune overgrown edges or add fillers (like moss or low shrubs) to disguise gaps.
- For DIY errors: Use a rubber mallet to tap stones into place or add soil under sunken sections.
Wrapping up and next steps
Designing a garden border isn’t just about marking an edge—it’s about crafting a statement piece that ties your landscape together with elegance and purpose.
Whether you lean into soft curves, structured hedges, or natural stone, the right border elevates your outdoor space into a cohesive, inviting retreat. 🌿✨
Ready to transform your garden? Start small—sketch a few ideas, gather your materials, and take that first step. Your landscape’s edge deserves to shine!