Fertilization
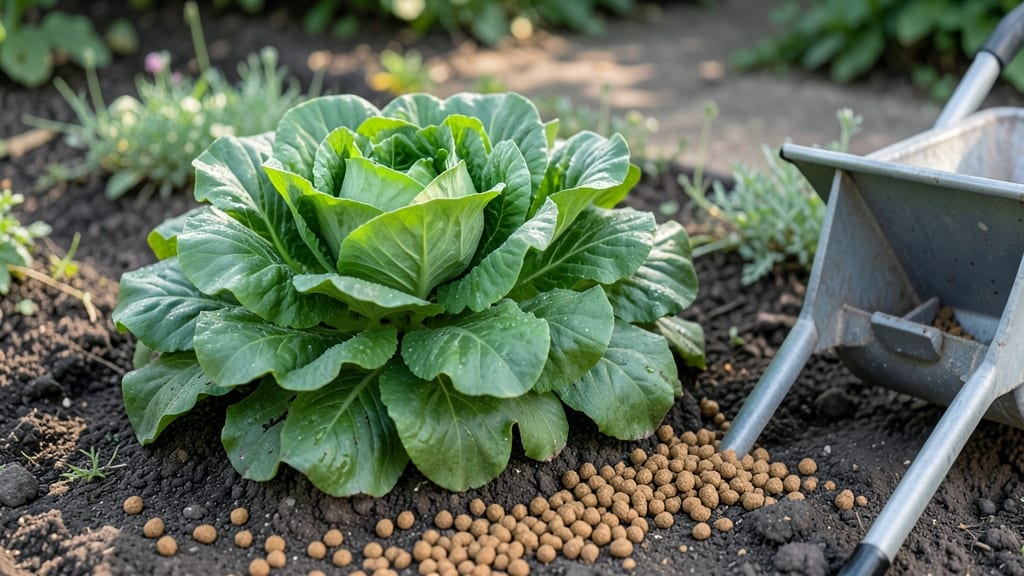
My garden fertilizing tips start with one simple truth: healthy soil grows healthy plants, and the secret isn’t just throwing down fertilizer—it’s feeding the soil ecosystem first.
Last summer, my tomatoes exploded with fruit after I stopped drenching them with synthetic mixes and focused on compost, worm castings, and balanced organic blends instead. The difference was night and day—deep green leaves, fewer pests, and a harvest that lasted until frost.
You don’t need a degree in chemistry to get this right. Start with a basic soil test (kits cost under $20) to know what’s missing—usually nitrogen, phosphorus, or potassium. Then match your fertilizer to the season: fast-acting greens in spring, bloom boosters in summer, and root builders in fall.
For most gardens, a 3-4-2 ratio (higher nitrogen first) works wonders, but veggies like tomatoes and peppers need more phosphorus for fruit production.
Here’s the game-changer: feed the soil, not just the plants. Top-dress with compost every 4-6 weeks, mulch heavily to retain moisture and nutrients, and avoid over-fertilizing—yellow leaves or leaf burn mean you’ve gone too far.
My zucchini patch went from struggling to producing 20 pounds of squash in a single season after I cut back on the synthetic stuff and let the microbes do the work.
This approach works for flowers, lawns, and veggies alike—just adjust the timing. Spring is for building soil, summer is for maintenance, and fall is for replenishing. By next year, your garden will be so productive, your neighbors will ask for your soil secrets. Let’s get those roots thriving!
📚 In This Guide
- What you need
- Instructions
- Tips and common mistakes
- Wrapping up and next steps
What you need
- ● Fertilizer: Choose one of these based on your plants’ needs: Granular fertilizer (e.g., 10-10-10 NPK ratio) – 5 lbs per 100 sq ft
- ● Slow-release organic fertilizer (e.g., composted manure or bone meal) – 2–3 lbs per 100 sq ft
- ● Liquid fertilizer (e.g., fish emulsion or seaweed extract) – 1–2 gallons per 100 sq ft
- ○ Soil test kit – To check pH and nutrient levels (optional but highly recommended)
- ● Garden tools: Trowel or hand fork
- ● Garden gloves (1 pair)
- ● Watering can or hose with spray nozzle
- ● Measuring cup or scale – For precise fertilizer application
- ● Water – At least 1 gallon per 10 sq ft for post-fertilizing hydration
- ● Mulch (e.g., straw or shredded leaves) – 2–3 inches to retain moisture
- ● pH adjusters (lime for acid-loving plants, sulfur for alkaline soils)
- ● Compost or worm castings – 1–2 inches mixed into soil for organic boost
- ● Fertilizer spreader (for large gardens)
- ● Plant-specific amendments (e.g., Epsom salt for magnesium-loving plants)
Instructions for season-long soil fertilizing
Here’s how to feed your garden throughout the growing season for vibrant, healthy plants.
Test Your Soil First
Before adding any fertilizer, grab a small soil sample from your garden bed—about 1 inch deep—and send it to your local cooperative extension office for testing. This tells you exactly what nutrients your soil lacks, whether it’s too acidic, or if you’ve got an imbalance of nitrogen, phosphorus, or potassium. I’ve seen gardens with perfect-looking plants that were secretly starving because the soil test revealed a hidden magnesium deficiency. Results usually take 1-2 weeks, so plan ahead.
If you’re in a hurry, use a home soil test kit for a quick read on pH and basic nutrients. Aim for a pH between 6.0 and 7.0—most vegetables and flowers thrive in that neutral to slightly acidic range. Adjust with lime to raise pH or sulfur to lower it before fertilizing, or you’ll waste money on nutrients your plants can’t access.
Apply a Slow-Release Base Fertilizer at Planting
Start with a balanced, slow-release fertilizer—like a 10-10-10 or 5-5-5 blend—when you plant your garden. Spread ½ cup per 10 square feet evenly over the soil surface, then lightly scratch it into the top 1-2 inches of soil. This gives your plants a steady supply of nutrients over 8-12 weeks, reducing the need for frequent top-dressing. I like to mix it in just before planting so the roots can access it immediately without burning tender new growth.
For organic options, use composted manure or worm castings at the same rate. These add nutrients and improve soil structure, which helps roots spread and absorb water more efficiently. Water the area deeply after applying to help the fertilizer settle into the soil and prevent it from washing away.
Feed Mid-Season with a Liquid Boost
Around 6-8 weeks after planting, when your plants are actively growing but showing signs of slowing down—like smaller leaves or pale stems—it’s time for a liquid fertilizer. Use a fish emulsion or seaweed extract diluted to half-strength (check the label for exact ratios). Apply every 2-3 weeks until harvest, following the package instructions for coverage rates.
I like to fertilize in the early morning so the leaves have time to dry before evening. Wet foliage at night can invite fungal diseases, and you don’t want your hard work turning into a plant hospital. If you notice yellowing leaves between the veins, that’s often a sign of nitrogen deficiency—time to bump up the liquid feed to a 20-20-20 blend for a quick fix.
Top-Dress and Mulch for Long-Term Health
After your mid-season feeding, switch to a low-nitrogen, high-phosphorus fertilizer—like bone meal or a 5-10-10 blend—to encourage root growth and flowering. Sprinkle ¼ cup per 10 square feet around the base of your plants, then water it in. This is especially important for fruiting plants like tomatoes, peppers, and berries, which need strong roots to support heavy harvests.
Follow up by adding 2-3 inches of organic mulch—like straw or shredded leaves—around your plants. Mulch locks in moisture, keeps roots cool, and slowly breaks down to feed the soil. It also prevents weeds from competing with your plants for nutrients. Replenish the mulch layer every 4-6 weeks to maintain its effectiveness.
Adjust for the Final Push Before Harvest
When your plants start flowering or setting fruit, switch to a potassium-rich fertilizer, like greensand or a 0-0-50 blend. Potassium helps plants resist disease, improve fruit quality, and store nutrients for winter. Apply ¼ cup per 10 square feet about 4-6 weeks before harvest—this gives your plants time to absorb it without overloading the soil.
Stop fertilizing 2-3 weeks before picking to avoid bitter flavors or excess nitrates in edible crops. Instead, focus on watering deeply and keeping weeds at bay. You’ll notice the difference in flavor and texture—plants fed just right at the right time taste like they were grown with love (and a little science).
Tips & tricks for season-long soil fertilizing
These practical tips will help you get the most out of your garden's growing season without overcomplicating the process.
Soil Testing Timing: If you're sending samples to your local cooperative extension, submit them at least 2 weeks before planting—this gives you time to adjust pH and amend soil before your first seeds go in. I've learned the hard way that waiting until the last minute leaves no time to correct issues like high acidity or nutrient deficiencies. For home test kits, follow the package instructions carefully, as some require 24 hours for accurate results.
Fertilizer Application Technique: When applying that ½ cup per 10 square feet of slow-release fertilizer in Step 2, use a spreader for even distribution. Work the fertilizer into the top 1-2 inches of soil with a rake or trowel—this prevents it from washing away during watering. I've found that mixing it in just before planting gives roots immediate access to nutrients without burning tender new growth, which is especially important for seedlings.
Liquid Fertilizer Application: For your mid-season liquid boost in Step 3, focus on applying fertilizer to the soil—not the leaves. This prevents leaf burn while ensuring roots get the nutrients they need. I like to use a watering can with a fine rose attachment to create a gentle spray that penetrates the soil without disturbing plant roots. The 2-3 weeks interval between applications gives plants time to absorb nutrients without overloading the soil.
Mulch Maintenance: That 2-3 inch mulch layer you add in Step 4 needs regular attention. Check mulch depth every 4-6 weeks and replenish as needed, especially after heavy rains or watering. I've noticed that mulch breaks down faster in hot, dry climates, so I keep extra straw on hand. Avoid piling mulch directly against plant stems to prevent rot and disease—leave a 1-2 inch gap around the base of plants.
Pro Tips for Garden Fertilizing Tips
- These practical tips will help you get the most out of your garden's growing season without overcomplicating the process.
- Soil Testing Timing: If you're sending samples to your local cooperative extension, submit them at least 2 weeks before planting—this gives you time to adjust pH and amend soil before your first seeds go in.
- Fertilizer Application Technique: When applying that ½ cup per 10 square feet of slow-release fertilizer in Step 2, use a spreader for even distribution.
Frequently asked questions
Got questions about keeping your garden thriving with the right fertilizing know-how? Here are some of the most common concerns—plus quick, actionable answers to keep your green space looking its best!
How often should I fertilize my garden?
Most gardens benefit from fertilizing every 4-6 weeks during the growing season (spring to fall). Slow-release fertilizers may last longer, while liquid feeds require more frequent applications. Always check the product label for specific instructions—overdoing it can harm plants!
Is it okay to fertilize right before rain?
Nope! Rain can wash away nutrients before plants absorb them. Fertilize 1-2 days before light rain or water deeply after applying to help nutrients soak into the soil. For heavy downpours, wait until the forecast clears to avoid runoff.
Can I use coffee grounds or eggshells as fertilizer?
Coffee grounds add nitrogen (great for acid-loving plants like blueberries), while crushed eggshells provide calcium. Mix them into compost or topsoil for a nutrient boost. Just avoid overdoing it—too much coffee grounds can make soil too acidic.
Why are my plants turning yellow after fertilizing?
Yellowing leaves often signal over-fertilization (too much salt) or nutrient burn. Flush the soil with water to dilute excess salts, and reduce fertilizer strength next time. If roots look brown or mushy, you may have overdone it—let the soil recover before reapplying.
What’s the best fertilizer for a new garden bed?
Start with a balanced, slow-release fertilizer (like 10-10-10) to give roots a strong foundation. For organic options, try compost or worm castings. Avoid high-nitrogen fertilizers early on—they encourage leafy growth but weaken root development.
Wrapping up and next steps
Transforming your garden into a thriving oasis is all about consistent care and smart fertilizing! 🌱 From choosing the right nutrients to timing applications just right, these season-long tips ensure your plants grow strong and vibrant.
Start small—whether it’s a single herb pot or a sprawling flower bed—and watch your efforts bloom into stunning results.
Ready to take the next step? Pick one plant or area this week and apply what you’ve learned. Track your progress, adjust as needed, and soon, your garden will be the talk of the neighborhood. Happy gardening! 🌿✨