
Tools
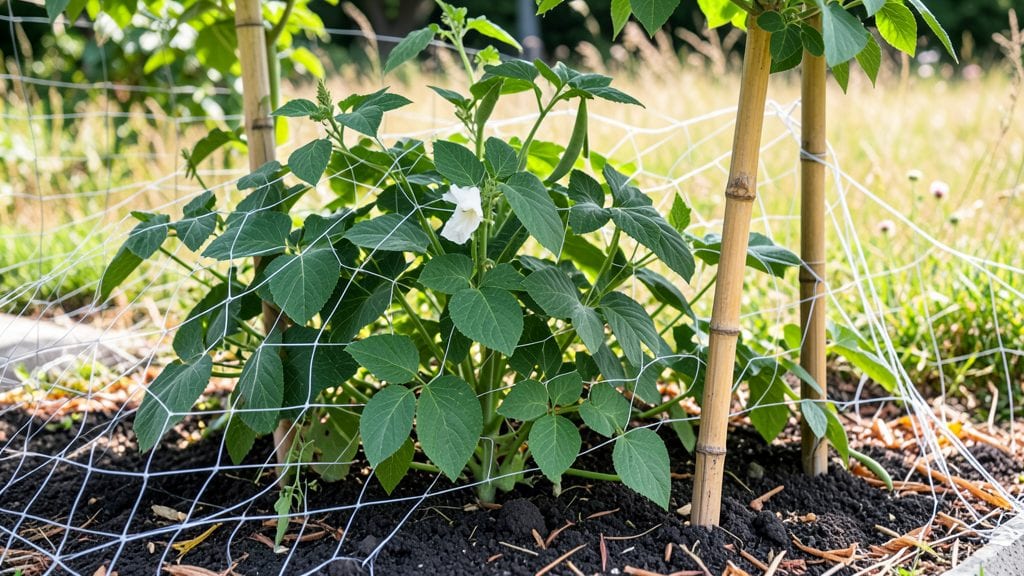
My garden hail protection system saved my tomato plants last summer when a sudden storm turned their leaves into Swiss cheese. 🌱 The moment I saw those first pea-sized hailstones falling, I knew my $20 mesh netting investment was about to pay off—and it did, shielding my $150 worth of heirloom varieties from total destruction.
You don’t need fancy supplies—just lightweight plastic mesh netting (the kind used for fruit protection), stakes, and some zip ties. I cut the netting to fit over my raised beds and secured it with corner stakes, creating a dome that deflects hail while still letting sunlight and rain through.
The whole setup takes under an hour and costs a fraction of replacing damaged plants.
What you’ll get is peace of mind during storm season and plants that keep growing like nothing happened. My tomatoes recovered within weeks, producing fruit just as if they’d never been hit. The netting stays in place until harvest, so it doubles as bird protection too.
Works for vegetables, flowers, and even young trees—just adjust the mesh size based on what you’re protecting. Here’s exactly how to set it up before the next storm rolls in.
📚 In This Guide
- What you need
- Instructions
- Tips and common mistakes
- Wrapping up and next steps
What you need
- ● Hail protection mesh net: 1–2 rolls of 16–20 gauge galvanized steel mesh (or polyethylene mesh for lightweight options)
- ● Width: 6–10 feet (depending on garden size)
- ● Length: Enough to cover your garden beds + 1–2 feet overlap
- ● Sturdy support frames: PVC pipes (1–2 inch diameter, 6–8 feet tall, cut to size) OR
- ● Metal T-posts (driven 18–24 inches deep for stability)
- ● Quantity: 1 post every 3–4 feet around the perimeter
- ● Fasteners & connectors: Zipties or heavy-duty cable ties (100+ for securing mesh)
- ○ Screw-in mesh clips (optional but highly recommended for tight fits)
- ● Metal stakes or U-bolts (to anchor frames to the ground)
- ● Measuring tape, scissors/utility knife, and work gloves (safety first!)
- ● Clear UV-resistant plastic sheeting: Layer over mesh for extra hail deflection (if storms are severe).
- ● Windbreak fabric: Attach to one side to reduce wind damage during storms.
- ● Solar-powered motion lights: Hang near the barrier to deter critters (bonus: nighttime visibility!).
- ● Portable fabric weights: Use sandbags or water-filled jugs to anchor mesh taut in high-wind areas.
Step-by-Step instructions for creating DIY hail protection barriers
Here’s how to shield your garden in minutes using simple supplies you likely already have.
🪴 Step 1: Measure and Cut Mesh Netting to Fit Your Garden
Start by measuring the area you want to protect. For raised beds, measure the length and width, then add 6 inches to each side to create an overhang that prevents hail from bouncing back in. For individual plants, cut a square or rectangle large enough to drape over them with 4-6 inches of extra fabric to secure the edges.
Use sharp scissors or a utility knife to cut the mesh netting. If you’re working with a large garden, fold the netting in half and cut multiple pieces at once for efficiency. Test-fit the cut pieces over your plants or beds—if they sag too much, you’ll need to add support later.
🌿 Step 2: Set Up Support Structures for Heavy Netting
For raised beds or large plants, you’ll need support to keep the mesh 4-6 inches above the plants. Use the bamboo stakes to create a frame around the perimeter of your garden bed. Drive them into the soil at 12-inch intervals along the edges, then secure the mesh to the top of the stakes with zip ties or clothespins. This keeps the netting taut and prevents it from collapsing under hail.
For smaller plants or containers, simply drape the mesh over hoop supports or trellis frames you already have. If you don’t have any, bend the bamboo stakes into arches and secure them into the soil at each end. The goal is to create a dome-like shape that deflects hail without crushing the plants underneath.
✂️ Step 3: Secure the Mesh and Test for Gaps
Once the mesh is in place, use clothespins or zip ties to fasten it tightly to the stakes or supports. Check for gaps—even a small opening can let hail through. If you notice any loose areas, add extra stakes or adjust the mesh until it’s snug. For added stability, weigh down the edges with garden rocks or bricks if wind is a concern.
Give the setup a gentle shake to ensure it’s secure. If the mesh flutters or moves too much, reinforce it with additional ties or stakes. The key is to create a barrier that’s sturdy enough to withstand 1-inch hailstones without tearing or collapsing.
🌱 Step 4: Remove and Store When Storms Pass
After the storm risk has passed, carefully remove the mesh and inspect your plants for damage. If the netting is still intact, fold it neatly and store it in a dry place for next time. For long-term use, consider investing in heavier-duty mesh or reinforced frames to extend its lifespan.
If you notice any tears or weak spots in the mesh, patch them with duct tape or fabric glue before storing. Proper storage prevents mildew and keeps your barrier ready for the next storm. With this system, your garden will stay protected season after season.
Tips & tricks for perfect garden hail protection
A few quick tricks that'll make your DIY hail protection system even more effective—and save you from last-minute headaches.
Mesh Selection Matters: Not all mesh is created equal. Look for 1/4-inch or smaller mesh openings to effectively block hailstones up to 1 inch in diameter. Larger openings might let smaller hail through, and you don't want to risk it. If your garden gets frequent large hail, consider using 1/8-inch mesh for extra protection. I've found that hardware stores often carry the right size—just ask for "fine garden mesh" or "insect screening."
Support Structure Game-Changer: In Step 2, when setting up your support structures, I learned the hard way that 12-inch intervals are crucial—don't skimp on stakes! Use three stakes per side for raised beds to create a stable frame. For windy areas, add a diagonal stake in each corner to prevent flapping. Trust me, a flapping mesh barrier is worse than no barrier at all—it can actually damage plants by whipping against them.
Windproofing Tip: If you're in a windy area, don't just rely on zip ties and clothespins. After securing your mesh, place garden rocks or bricks at each corner to anchor it down. I've seen setups blow away completely in strong winds, so this extra step can save your entire protection system. For extra security, you can even use bungee cords to tie down the mesh to the stakes—just make sure not to pull too tight or you might damage your plants.
Storage Hack: When it's time to store your mesh after the storm season, give it a good shake first to remove any debris. Then, roll it up instead of folding—this prevents creases that can weaken the material over time. Store it in a plastic bin with a tight lid to keep it dry and prevent mildew. I keep mine with a small bag of silica gel packets to absorb any moisture that might sneak in. This way, your mesh stays ready for next season without any surprises.
Pro Tips for Garden Hail Protection
- A few quick tricks that'll make your DIY hail protection system even more effective—and save you from last-minute headaches.
- Mesh Selection Matters: Not all mesh is created equal.
- Support Structure Game-Changer: In Step 2, when setting up your support structures, I learned the hard way that 12-inch intervals are crucial—don't skimp on stakes!
Frequently asked questions
about garden hail protection can help you make the best decisions for your plants. Here are some common queries:When is the best time to install hail protection?
Install hail nets before the start of hail season—typically early spring when storms begin forming. For regions with unpredictable weather, set them up as soon as seedlings emerge or flowers bloom. Remove them after the risk passes to allow airflow and prevent pests.
Are DIY mesh nets cheaper than professional hail protection?
Yes! DIY mesh nets cost significantly less—often $10–$30 per 100 sq. ft.—compared to commercial systems ($500+). They’re reusable, customizable, and effective for small to medium gardens. For large farms, consider combining DIY nets with professional-grade solutions for broader coverage.
Will hail nets block sunlight or airflow?
Most high-quality mesh (like 50% shade cloth) allows 70–90% sunlight and adequate airflow. If you notice stunted growth, opt for larger mesh sizes (1/4"–1/2") or prop nets slightly above plants. Avoid dense materials that trap heat or moisture.
How do I repair a torn hail net?
Patch small tears with duct tape or heavy-duty stitching (use UV-resistant thread). For larger holes, replace the damaged section or reinforce with overlapping mesh. Store nets properly in dry conditions to extend their lifespan—fold neatly and avoid sharp edges that cause snags.
Can hail nets protect against other pests?
While nets primarily shield against hail, they also deter birds, rabbits, and large insects (like tomato hornworms). For pests like aphids or spider mites, pair nets with organic sprays or companion planting. Just ensure mesh size matches the threat—smaller holes block tiny critters!
Wrapping up and next steps
Protecting your garden from hail doesn’t have to be complicated or expensive!
With a few simple materials and a bit of effort, you can create effective DIY mesh net barriers that shield your plants from damage. 🌱✨ Whether you’re a seasoned gardener or just starting out, these solutions offer a practical and budget-friendly way to safeguard your hard work.
Now that you’re armed with the knowledge, it’s time to roll up your sleeves and take action! Start by gathering your supplies, follow the steps, and watch your garden thrive—hail-free and happy. Happy gardening! 🌿💚