
Tools
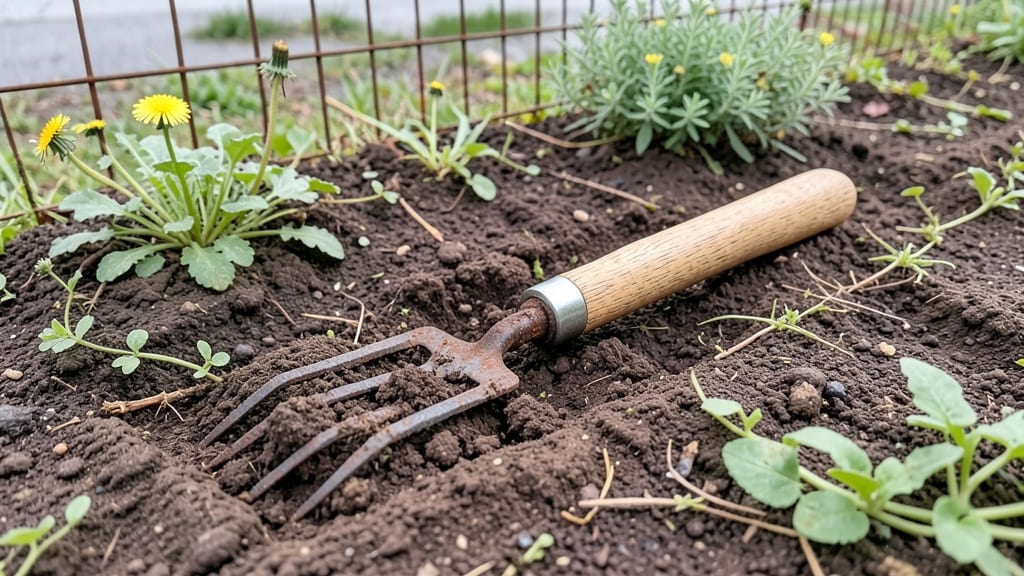
A garden hand weeder transforms weeding from a back-breaking chore into a quick, satisfying task—especially when you're tackling stubborn weeds between delicate plants. I remember the first time I used one; it felt like finally having the right tool for the job after years of digging with my fingernails.
The secret isn't just the tool itself but how you use it: a gentle twist here, a steady pull there, and weeds come out clean without disturbing nearby flowers or veggies.
You'll need one with a sturdy, ergonomic handle—something that fits comfortably in your palm so you don't end up with sore hands after 20 minutes. The best models have a narrow, pointed tip for precision and a wider fork at the base to grip weeds at the root.
Pair it with a small trowel for larger weeds or rocky soil, and you've got a weeding combo that handles almost anything. For small gardens or container plants, a compact weeder with a looped handle is a game-changer.
What you'll achieve is a garden bed that stays weed-free with minimal effort, and your back will thank you for it. No more bending over for hours or pulling weeds that snap off at the surface. Instead, you'll see clean soil, healthier plants, and a fraction of the time spent.
The key is working when the soil is slightly damp—weeds pull out easier, and you avoid the dust that dry soil creates. Plus, your garden will look neater faster, which is always a bonus.
This tool works year-round, but early spring and late fall are ideal times to tackle weeds before they seed or spread. For rocky or hard-packed soil, a hand weeder still works, but you might need to loosen the ground first with a fork or hoe.
And if you're wondering how to weed without one? A sturdy butter knife or even a plastic spoon can work in a pinch—but nothing beats the precision of a good hand weeder.
📚 In This Guide
- What you need
- Instructions
- Tips and common mistakes
- Wrapping up and next steps
What you need
- ● Hand Weeder Tool: 1 x Ergonomic garden hand weeder (with a sturdy, looped handle and a sharp, angled tip for precision—look for stainless steel or durable plastic models).
- ● Garden Gloves: 1 pair cut-resistant, breathable gloves (e.g., nitrile-coated or leather for grip and protection).
- ○ Knee Pads or Pad: 1 x Adjustable or gel-filled knee pad (optional but highly recommended for comfort during long sessions!).
- ● Pruners or Small Shears: 1 x Bypass pruners (for snipping stubborn weeds at the base).
- ● Bucket or Bag: 1 x 5-gallon bucket or mesh bag (for collecting weeds—line with a trash bag if you’re squeamish!).
- ● Water Spray Bottle: 1 x 16-oz spray bottle (for dampening soil before weeding or rinsing off tools).
- ● Weeding Trowel: For loosening soil around deep-rooted weeds.
- ● Sun Hat & Sunglasses: Because no one wants a sunburned scalp mid-weed-war!
- ● Portable Stool: A foldable seat for breaks (trust us, your back will thank you).
- ● Compost Bin: Turn those weeds into nutrient-rich soil—zero waste!
- ● Hand Sanitizer or Wet Wipes: For post-weeding hand hygiene (you will get dirty).
Instructions for using a garden hand weeder effectively
Here’s how to weed with precision while keeping your back happy and your garden tidy.
Choose the Right Tool for the Job
A garden hand weeder is your secret weapon against stubborn weeds, but not all are created equal. Look for one with a sturdy, ergonomic handle—this prevents hand fatigue during long sessions. The blade should be sharp and angled to slip between plants and soil effortlessly. I like tools with a forked or claw design; these grip weeds at the root while leaving your plants unharmed.
Test the weight before buying. A tool that’s too heavy will make weeding feel like a workout, while one that’s too light won’t penetrate tough soil. Aim for something that feels balanced in your hand, like a well-made trowel. If you’re working in rocky or compacted soil, a slightly heavier weeder will give you better leverage.
Work When the Soil Is Moist
Timing matters more than you’d think. The best time to weed is after a light rain or when the soil is damp but not soggy. Moisture loosens the earth, making it easier for the weeder’s blade to slide between roots and plants. You’ll know you’ve got the right conditions when the soil crumbles slightly at the edges of your weeding path.
Avoid weeding when the ground is bone-dry. The weeder will struggle to penetrate, and you’ll risk pulling plants out by their roots instead of just the weeds. If your garden is parched, water lightly the evening before weeding. The moisture will work its way down overnight, giving you perfect conditions the next morning.
Insert the Weeder at the Right Angle
Grip the handle firmly and insert the weeder at a 45-degree angle next to the weed you’re targeting. The blade should slide between the weed’s root and the soil, not force its way through. Think of it like a knife cutting through butter—smooth and controlled. Press gently but steadily until the blade reaches the weed’s root base.
If the weeder resists, you’re likely too close to a plant or hitting a rock. Step back, adjust your angle, and try again. For deep-rooted weeds like dandelions, you may need to wiggle the weeder slightly as you pull upward. Never yank—this can snap the weed off at the surface, leaving the root behind to regrow.
Pull with Confidence and Precision
Once the weeder is in place, grip the handle with both hands and pull upward in one smooth motion. The weed should come out cleanly, with the entire root intact. If it breaks off, dig deeper and try again. You’ll feel a satisfying resistance as the root releases, followed by a sense of accomplishment when the weed pops free.
Drop weeds into a bucket or directly onto a compost pile—never onto the soil, where they can regrow. For particularly stubborn weeds, like those with thick taproots, repeat the process until the entire root system is removed. Patience here saves you from dealing with the same weed next week.
Maintain Your Tool and Your Garden
After each use, clean your hand weeder with a damp cloth to remove dirt and debris. Store it in a dry place to prevent rust, especially if it’s made of metal. A quick wipe-down also helps you spot any signs of wear or damage early. If the blade starts to dull, sharpen it with a file or replace it—this makes weeding easier and more effective.
To keep weeds from returning, mulch your garden beds with 2-3 inches of organic mulch after weeding. This blocks sunlight from reaching weed seeds and retains moisture, giving your plants the upper hand. Water deeply but infrequently to encourage strong root growth in your desired plants, which outcompetes weeds naturally.
Tips & tricks for precision weeding with a hand weeder
Mastering the hand weeder takes practice, but these techniques will help you work smarter—not harder—while protecting your garden and your back.
Angle is Everything: The 45-degree angle in Step 3 isn't just a suggestion—it's the key to effortless weeding. Imagine slicing through warm butter rather than forcing the blade. If you're struggling, try this: press the weeder into the soil until you feel resistance, then pivot slightly to find the natural gap between the weed and your plant. This prevents accidental damage to your desired plants while making the pull much smoother. For weeds growing in tight spaces, a slight wiggle at the base helps loosen stubborn roots without breaking them.
Grip Like You Mean It: When you reach Step 4 and pull upward, your grip matters just as much as your angle. Wrap both hands around the handle about 6 inches apart to create leverage, but don't squeeze so tight your knuckles turn white. This balanced grip lets you control the upward motion while absorbing the resistance when the root releases. I've found that positioning your feet shoulder-width apart gives you better stability—especially important when dealing with thick taproots that might surprise you with their strength.
Tool Maintenance Pays Off: The final step about cleaning your weeder isn't just about longevity—it's about performance. A dirty blade slips instead of grips, making weeding more frustrating. After each session, give your weeder a quick wipe-down with a damp cloth, then dry it thoroughly. For metal tools, a light coating of food-safe mineral oil prevents rust and keeps the blade moving smoothly. I keep mine in a small tool caddy near my garden hose so it's always ready when I am. A sharp weeder requires less force, which means less strain on your hands and wrists over time.
Mulch as Your Secret Weapon: While Step 5 mentions mulching, here's the pro tip: apply your 2-3 inches of organic mulch immediately after weeding, not days later. This creates a barrier that blocks sunlight from reaching weed seeds before they germinate. For containers or small garden beds, you can even use last year's dried leaves as mulch—just make sure they're weed-free first. The mulch also helps retain moisture, so you'll need to water less frequently, giving your plants the competitive edge they need to outgrow any weeds that do sprout.
Pro Tips for Garden Hand Weeder
- Mastering the hand weeder takes practice, but these techniques will help you work smarter—not harder—while protecting your garden and your back.
- Angle is Everything: The 45-degree angle in Step 3 isn't just a suggestion—it's the key to effortless weeding.
- Grip Like You Mean It: When you reach Step 4 and pull upward, your grip matters just as much as your angle.
Frequently asked questions
What’s the best time of day to use a hand weeder for weeding?
The ideal time is early morning or late afternoon when the soil is moist but not soggy. This makes weeds easier to pull without breaking. Avoid midday heat—soil dries out fast, and weeds can snap off at the roots.
Can a hand weeder work in hard or rocky soil?
Hand weeders are best for loose, well-aerated soil. Rocky or compacted soil can blunt the blade or make it hard to grip weeds at the base. For tough spots, loosen the soil first with a fork or digger, or opt for a sturdy dandelion weeder with a wider blade.
Is a hand weeder worth it if I already have a hoe?
While hoes are great for bulk weeding, a hand weeder lets you target stubborn weeds (like dandelions or clover) without bending over. It’s a game-changer for small gardens, containers, or tight spaces where hoes can’t reach. Think of it as your precision tool!
Why does my hand weeder keep slipping out of weeds’ roots?
This usually means the soil is too dry or the weed isn’t deep enough. Try watering the area lightly before weeding, or use the weeder’s forked prongs to dig deeper. For shallow weeds, grip the base firmly and pull upward with a twisting motion to loosen roots.
How do I clean and store my hand weeder to make it last?
Rinse the blade and prongs with soapy water after use to remove sap and dirt. Dry thoroughly to prevent rust, then store in a dry place (like a tool shed or garage). For long-term storage, apply a light coat of oil to the metal parts. Pro tip: Hang it with a hook to avoid bending the shaft!
Wrapping up and next steps
Say goodbye to sore backs and hello to effortless weeding! A garden hand weeder is your ticket to a tidy, thriving garden—no heavy lifting required. Whether you're a seasoned gardener or just starting out, this tool makes weeding simple, precise, and even enjoyable. 🌱✨
Ready to transform your garden? Start small—tackle one patch at a time—and watch your plants flourish without the strain. Grab your hand weeder today and reclaim your weekends for relaxation (not backaches)!
Pro tip: Pair it with a pair of knee pads for extra comfort—your future self will thank you! 😉