Landscaping
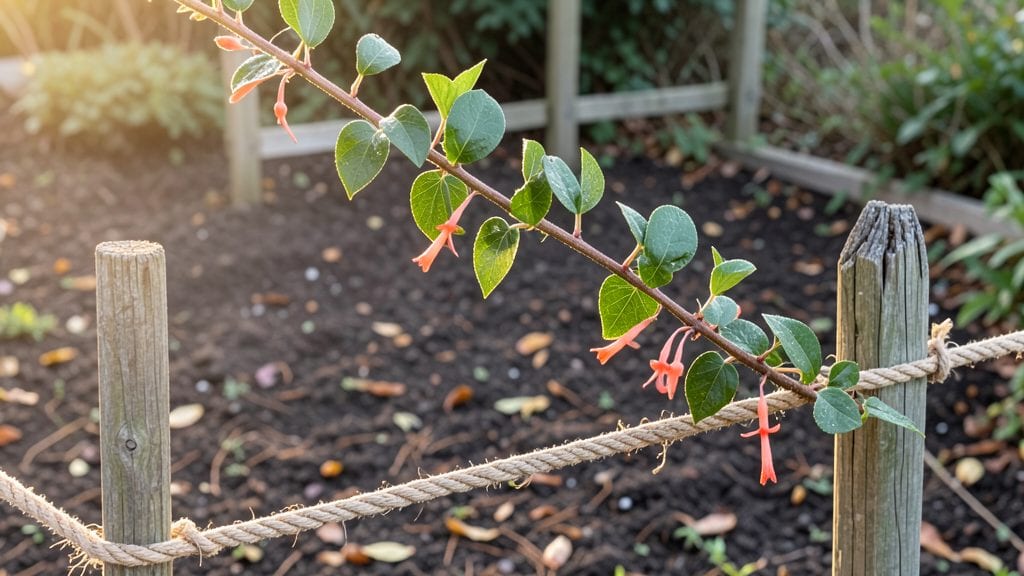
A garden rope fence transformed my cramped backyard into a private oasis without breaking the bank. 🌿 I was skeptical at first—would it hold up against curious neighbors' eyes or a strong breeze? Turns out, the right materials and installation make it a game-changer for small spaces.
This isn’t just a temporary fix—it’s a durable, flexible solution that bends with the wind instead of snapping. You’ll need sturdy posts, weather-resistant rope (polyester or UV-treated), and basic tools. The best part? It lets you customize the height, density, and even add climbing plants for extra privacy over time.
Imagine a cozy seating area hidden from view, a vegetable patch shielded from nosy squirrels, or a children’s play zone with soft boundaries. The rope creates a softer, more natural look than wood or metal while keeping costs low.
Plus, it’s easy to adjust or remove if you ever want to change your layout.
Works for urban balconies, suburban backyards, or even as a temporary screen during garden renovations. Here’s how to make it work for your space without the hassle of permanent fencing.
📚 In This Guide
- What you need
- Instructions
- Tips and common mistakes
- Wrapping up and next steps
What you need
- ● Garden rope fence kit (choose a polypropylene or UV-stabilized option for durability; 50–100 ft. rolls are ideal for most projects).
- ● Stakes or posts (galvanized metal or treated wood; 4–6 ft. tall, spaced 4–6 ft. apart depending on rope tension).
- ● Mallet or rubber hammer (for driving stakes without damaging them).
- ● Measuring tape (25+ ft. for accuracy).
- ● Scissors or utility knife (for trimming rope to size).
- ○ Optional: Decorative clips or hooks (to secure rope ends neatly).
- ○ Optional: Ground anchors (for windy areas or extra stability).
- ● Flat, level ground (clear debris and rocks to prevent uneven sagging).
- ● Gloves (to protect hands from rope fibers and splinters).
- ○ Level tool (optional, for ensuring stakes are straight).
- ○ Staple gun or zip ties (optional, for securing rope to stakes if clips aren’t included).
- ● Weather forecast check (avoid setting up on windy or rainy days!).
Step-by-Step instructions for installing a garden rope fence
Here’s how to create a sturdy, customizable privacy screen that adapts to any yard shape.
🪴 Step 1: Measure and Mark Your Fence Line
Use a tape measure to determine the length of your fence line, accounting for curves or corners. I mark the starting point with a small wooden stake and a bright-colored spray paint dot. For a 4-foot-wide section (standard for privacy), measure 4 feet outward from the stake at 1-foot intervals along the line. This creates a grid for evenly spaced posts.
Drive the stakes at each marked point—6 inches deep—to ensure stability. Double-check diagonals to confirm your layout is square. A level tool helps here; uneven posts will make your fence look wonky. I always step back and visualize the final structure before moving forward.
🌱 Step 2: Install Sturdy Corner and End Posts
Begin with the corner posts, cutting 4-foot-long pressure-treated lumber to your measured height. Dig holes 12 inches deep at each corner stake, then set the posts in concrete mix (follow the bag instructions for water ratios). Use a 2x4 brace temporarily to hold posts plumb while the concrete sets—24 hours for full cure.
For end posts, repeat the process but use 3-foot-long lumber. These anchor the rope at both ends, preventing sagging. I like to pre-drill holes in the top of each post for rope attachment later. Let the concrete harden completely before attaching anything—rushing here leads to wobbly posts.
💧 Step 3: Attach Intermediate Posts and Stretch the Rope
Install 3-foot intermediate posts every 4 feet along your marked line, using the same digging and concrete method. These posts should align 1 foot from the fence line to create a 3-foot-wide rope plane. Once all posts are set, tie a 1/4-inch nylon rope (or 3/8-inch for heavier privacy) to the top of one corner post using a bowline knot—this knot won’t slip under tension.
Stretch the rope taut to the opposite corner post, using a come-along tensioner for even pressure. Secure it temporarily with a zip tie while you adjust. For extra durability, I add a second rope 18 inches below the first, creating a double-layer screen. This blocks more light and wind while keeping the look clean.
✂️ Step 4: Secure Rope and Add Finishing Touches
Once tensioned, permanently tie off the rope at each post with square knots, spacing them 12 inches apart. Trim excess rope flush with the knots for a polished look. If using bamboo or lattice panels for added privacy, slide them onto the rope grid and secure with soft ties—never tighten too much, or you’ll warp the panels.
For a final touch, wrap the base of each post with landscape fabric to deter weeds. I also add post caps to protect the wood from moisture. Step back and admire your work—this fence looks professional but costs a fraction of traditional materials.
⏰ Step 5: Maintain for Long-Term Durability
Check rope tension every 6 months, adjusting as needed—rope stretches over time. I also inspect posts annually for rot or termite damage, especially near the ground. If using untreated wood, apply a waterproof sealant every 2 years to extend its life. With proper care, this fence lasts 10+ years while staying lightweight and adjustable.
Real talk: The first time I installed one, I forgot to level the posts. The rope sagged in the middle, and it looked amateur. Now I always use a level—it’s worth the extra 5 minutes.
Tips & tricks for perfect garden rope fence installation
Between us, these small adjustments will transform your DIY fence from "meh" to "wow" without breaking the bank.
Precision Matters in Step 1: The 6-inch depth for stakes might seem arbitrary, but it's critical for stability—especially in windy areas. I've seen fences topple when stakes weren't buried deep enough. Use a post hole digger for cleaner holes, and tap the stakes firmly with a mallet to eliminate any wobble. A quick check with a level at this stage saves hours of frustration later when the rope won't sit flat.
Concrete Cure Time is Non-Negotiable: That 24-hour cure time for corner posts isn't just a suggestion—it's the difference between a fence that stands for years and one that leans within months. I learned this the hard way when my first attempt used posts that weren't fully set before attaching rope. Mix concrete according to package instructions (usually 1 part water to 2.5 parts mix), and consider using a concrete vibrator if you're setting multiple posts to eliminate air pockets. The extra time spent here pays off in durability.
Rope Tension Technique: When stretching the rope in Step 3, don't just eyeball it—use your come-along tensioner to create even pressure. I aim for the rope to be tight enough that it doesn't sag more than 2 inches when pulled down in the middle. For longer sections (over 10 feet), consider adding a third rope at 12 inches below the first for maximum stability. And here's what nobody tells you: if your rope starts to stretch after a few years, simply retighten it—no need to replace the entire fence.
Post Capping Strategy: Those post caps in Step 4 aren't just decorative—they're essential for protecting the wood from moisture wicking up from the ground. I use galvanized steel caps that screw on tightly, and I always apply a bead of silicone caulk around the base where the cap meets the post. This simple step can double the lifespan of your untreated wood posts. For extra protection in rainy climates, consider using cedar posts—they're naturally rot-resistant and require less maintenance.
Pro Tips for Garden Rope Fence
- Between us, these small adjustments will transform your DIY fence from "meh" to "wow" without breaking the bank.
- Precision Matters in Step 1: The 6-inch depth for stakes might seem arbitrary, but it's critical for stability—especially in windy areas.
- Concrete Cure Time is Non-Negotiable: That 24-hour cure time for corner posts isn't just a suggestion—it's the difference between a fence that stands for years and one that leans within months.
Frequently asked questions
Got questions about garden rope fences?
You’re not alone! Here are answers to the most common concerns—from installation to long-term care—to help you make the best choice for your space.
What’s the best material for a garden rope fence?
A high-quality garden rope fence is typically made from polypropylene or polyethylene, which resists UV rays, mold, and mildew. Look for thick, braided ropes (3–6mm diameter) for durability. Avoid cheap vinyl—it yellows and weakens over time.
How long does a rope fence last?
With proper care, a garden rope fence lasts 3–5 years outdoors. To extend its life, rinse it every few months, avoid direct sunlight when possible, and store it indoors during harsh winters. Replace sections if fraying occurs.
Can I use a rope fence for permanent privacy?
While rope fences offer temporary, lightweight privacy, they’re not built for permanent use. For long-term solutions, pair them with trellises or lattice panels for structure, or consider bamboo screens or fabric wraps for added durability.
Do I need special tools to install it?
Nope! Most garden rope fences come with easy-clip connectors or hooks. You’ll need basic tools like scissors, a measuring tape, and a drill (for securing stakes). No power tools required—perfect for DIYers!
How do I keep pests away from my rope fence?
Pests like birds or squirrels may nest in rope fences. Tightly secure the ends and avoid leaving gaps. For extra protection, spray with vinegar-water mix (1:1 ratio) or hang predator deterrents nearby. Regularly inspect for nests!
Wrapping up and next steps
A garden rope fence is a game-changer for small spaces—offering stylish privacy, easy installation, and long-lasting durability without breaking the bank. Whether you’re keeping pets in, blocking nosy neighbors, or simply creating a cozy retreat, this low-maintenance solution delivers big results with minimal effort. 🌿
Ready to transform your outdoor space? Start by measuring your area, gathering supplies, and rolling up your sleeves! With the right tools and a little creativity, your dream garden oasis is just a few steps away. Happy building! 🛠️✨