
Tools
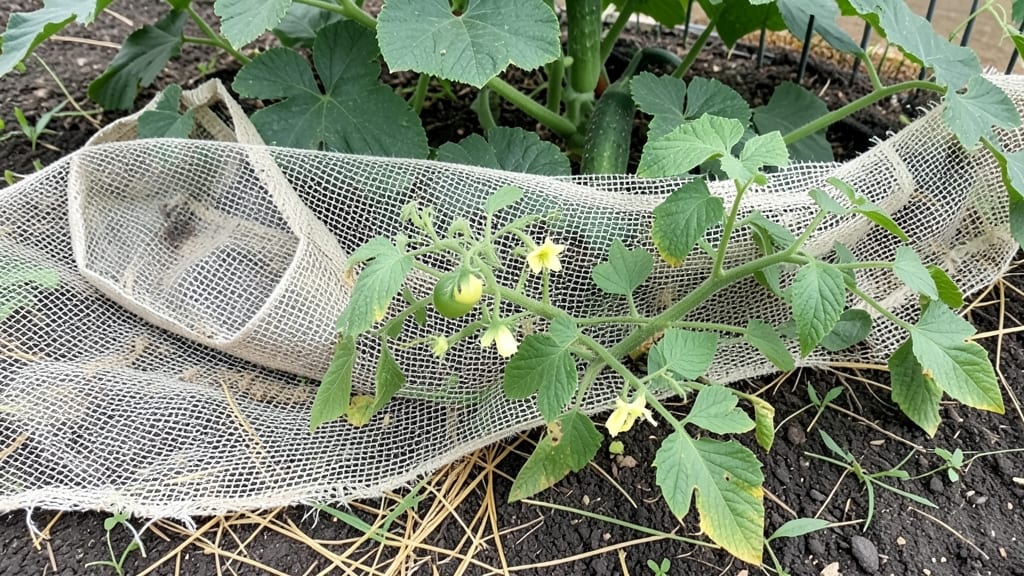
My garden vegetable netting saved my cherry tomatoes last summer—no more shredded leaves or fruit riddled with holes. It’s the unsung hero of small-space growing, keeping pests out while letting sunlight and rain through.
The right mesh size makes all the difference: too big, and cabbage moths laugh at you; too small, and your plants suffocate.
You’ll need lightweight but sturdy netting (1/4-inch mesh works for most veggies), some wooden stakes or hoops, and a few clips or twine to secure it. Set it up before pests arrive—early spring for cabbage worms, late spring for tomato hornworms—and remove it once harvest starts to avoid trapping moisture.
My favorite trick? Drape it loosely at first, then tighten as plants grow.
With netting in place, you’ll watch your broccoli, peppers, and greens mature without a single bite taken. The best part? No chemicals, no guesswork—just clean, protected plants ready to harvest. It’s especially game-changing in urban gardens or raised beds where space (and pests) are both limited.
Fair warning: Don’t leave it on too long after harvest—it can trap humidity and invite rot. And if you’re growing tall plants like corn, opt for larger mesh or skip netting entirely. Now go protect that hard work—your future salads will thank you.
📚 In This Guide
- What you need
- Instructions
- Tips and common mistakes
- Wrapping up and next steps
What you need
- ● Garden vegetable netting – Choose fine-mesh (1/4" to 1/2" openings) to block pests like cabbage moths, beetles, and birds. A 10' x 20' roll (or equivalent) covers most compact gardens. Opt for UV-stabilized, rot-resistant netting for longevity.
- ● Sturdy hoops or frames – Use 5-6 ft tall metal or PVC hoops (spaced 3-4 ft apart) or wooden dowels (at least 1" thick) for DIY setups.
- ● Ties or clips – Plastic zip ties, garden clips, or twist ties to secure netting to hoops or plant stems.
- ● Measuring tape – Ensures netting fits snugly without gaps.
- ● Scissors or utility knife – For cutting netting to size.
- ● Gloves – Protects hands from prickly plants or rough netting.
- ● Heavy-duty staples & staple gun – For securing netting to fences or trellises.
- ● Row covers or fleece fabric – Adds extra insulation for early-season planting or cold frames.
- ● Reflective tape – Deters birds by attaching strips to hoops or netting.
- ● Plant labels & markers – Keeps track of what’s growing under the netting!
Step-by-step guide to installing garden vegetable netting
Here’s how to set up protective netting that keeps pests out while letting your plants thrive in tight spaces.
Choose the Right Netting and Location
Select lightweight, breathable netting with ¼-inch to ½-inch mesh—this size blocks most insects while allowing airflow and sunlight. For compact spaces, I prefer 4-foot by 10-foot rolls, which cover most raised beds or small garden plots. Install the netting before planting or as soon as your vegetables begin to produce flowers or fruit, since that’s when pests become most active.
Position the netting over plants that are 6-12 inches tall—any shorter and they’ll get tangled, any taller and you’ll struggle to secure it properly. I like to use hoop supports made from ½-inch PVC pipes or wire hoops for rows, bending them into 2-foot arcs and spacing them 3 feet apart. This creates a dome that keeps pests out while allowing your plants to grow upward naturally.
Secure the Netting Properly
Drape the netting loosely over the hoops or supports, ensuring it hangs 2-3 inches below the soil level at the edges to prevent crawling insects from sneaking underneath. Use staple guns to attach the netting to the hoops, spacing staples every 6-8 inches for a snug fit. Avoid pulling too tight—you want the netting to sag slightly so it doesn’t tear when plants grow or when wind blows.
At the edges, bury the netting 1-2 inches deep around the perimeter or weigh it down with bricks, rocks, or soil-filled plastic bags. This stops pests from tunneling underneath. For larger plots, overlap sections by 6 inches and secure with additional staples or zip ties to prevent gaps where insects could slip through.
Maintain and Monitor for Effectiveness
Check the netting every 3-5 days for tears or holes, especially after rain or wind, which can stretch or damage the material. Patch small holes with duct tape or fabric glue—just avoid plastic tape, as it can trap moisture and degrade quickly. If pests like squash bugs or cabbage worms still appear, consider double-layering the netting or using a finer mesh for particularly troublesome crops.
Remove the netting after harvest or when plants are dormant to prevent mold buildup from trapped humidity. Store it in a dry place for next season—folding it neatly and keeping it away from direct sunlight preserves its integrity. I’ve reused the same netting for 3-4 seasons with minimal wear, making it a cost-effective long-term solution.
Adjust for Specific Crops and Pests
Tailor the setup to your plants’ needs. For tomatoes and peppers, use fine mesh (¼-inch) to block whiteflies and aphids, while broccoli and cabbage may only need ½-inch mesh for cabbage worms. If you’re growing cucumbers or squash, leave the netting loose enough to allow pollinators access—just secure it tightly at night when pests are most active.
For ground-dwelling pests like slugs or cutworms, extend the netting 6 inches below the soil surface around the base of plants. This creates a physical barrier that’s far more effective than chemical sprays. I’ve seen slugs completely avoided treated rows where netting was buried, even in damp climates where they’re usually a nightmare.
Tips & tricks for perfect garden vegetable netting installation
These practical tips will help you create an effective pest barrier that protects your plants without sacrificing growth or airflow.
Mesh Size Matters: When selecting netting with ¼-inch to ½-inch mesh, remember that finer mesh blocks smaller pests but may reduce airflow. For tomatoes and peppers, the ¼-inch mesh is worth the slightly tighter fit to keep out whiteflies. For larger pests like cabbage worms, the ½-inch mesh provides adequate protection while maintaining better airflow for your plants.
Hoop Spacing and Plant Growth: The 3-foot spacing between your 2-foot hoops is perfect for most garden vegetables, but adjust based on your plants' mature height. If you're growing tall varieties like pole beans or trellised cucumbers, consider adding extra hoops every 2 feet to prevent the netting from sagging too much as the plants grow. This ensures the protective dome maintains its shape and effectiveness throughout the growing season.
Edge Protection Strategy: Burying the netting 1-2 inches deep around the perimeter is crucial for preventing ground-dwelling pests, but don't forget to check for gaps where the netting meets the soil. I've found that using soil-filled plastic bags as weights works better than rocks in windy areas—they stay put and don't shift when the netting sags slightly. For extra security, consider adding a second layer of netting at the base where it meets the soil.
Maintenance Schedule: The 3-5 day check interval is ideal for catching small tears before they become big problems. I've learned to do my inspections right after watering—this helps me spot any water damage or stretched areas more easily. Keep a small roll of duct tape and some fabric glue on hand specifically for netting repairs. This makes quick fixes possible right in the garden without having to run back to the house.
Pro Tips for Garden Vegetable Netting
- These practical tips will help you create an effective pest barrier that protects your plants without sacrificing growth or airflow.
- Mesh Size Matters: When selecting netting with ¼-inch to ½-inch mesh, remember that finer mesh blocks smaller pests but may reduce airflow.
- Hoop Spacing and Plant Growth: The 3-foot spacing between your 2-foot hoops is perfect for most garden vegetables, but adjust based on your plants' mature height.
Frequently asked questions
What’s the best netting material for delicate veggies like tomatoes or peppers?
For delicate fruits, opt for fine-mesh netting (1/4"–1/2" holes)—it keeps pests out without damaging soft skins. Polypropylene is lightweight and breathable, while shade cloth (30–50%) adds UV protection. Avoid coarse netting; it can snag stems or deter pollinators like bees.
When should I install netting—before planting or after seedlings emerge?
Install netting before pests arrive! For early-season crops (e.g., cabbage), set it up at planting. For late bloomers (like tomatoes), add netting when flowers appear. Pro tip: Use hoop tunnels or cage frames to secure netting tightly—pests can slip through gaps!
Can I reuse vegetable netting year after year, or does it degrade?
Yes, but with care! Clean and store netting dry in a cool, dark place to prevent mold or UV damage. Polypropylene lasts 3–5 years; shade cloth may degrade faster. Inspect for tears before reuse—patch small holes with duct tape or replace sections if needed.
What if pests are already inside the netting? How do I remove them safely?
First, close off entry points (seal gaps with clips or weights). For small insects, spray neem oil or soapy water inside the netting. For larger pests (like squirrels), relocate them humanely with a trap. Never use chemicals inside netting—it can harm your veggies!
Are there alternatives to netting for small gardens?
Try these low-tech options:
- Row covers: Lightweight fabric stretched over hoops or stakes.
- Cage systems: Wire or plastic cages for individual plants (great for tomatoes/peppers).
- Floating row covers: Directly placed over crops with weights to keep pests out.
- Companion planting: Use pest-repelling plants like basil (for tomatoes) or marigolds (for squash).
Will netting block pollination for crops like cucumbers or squash?
Most fine-mesh netting (1/4"–1/2") allows bees to pass through, but heavy shade cloth might restrict them. For self-pollinating crops (tomatoes, peppers), netting is fine. For bee-dependent plants, hand-pollinate with a small brush or gently shake plants to release pollen.
Wrapping up and next steps
Garden vegetable netting is your secret weapon for thriving harvests in small spaces—keeping pests at bay while maximizing every inch of your garden! 🌱 Whether you're a beginner or a seasoned gardener, this simple tool makes protecting your veggies effortless.
Start small with a few plants, experiment with different setups, and watch your confidence (and yields!) grow.
Ready to take the next step? Pick your favorite veggies, grab some netting, and roll up your sleeves—your pest-free garden awaits! 🌟