Tools
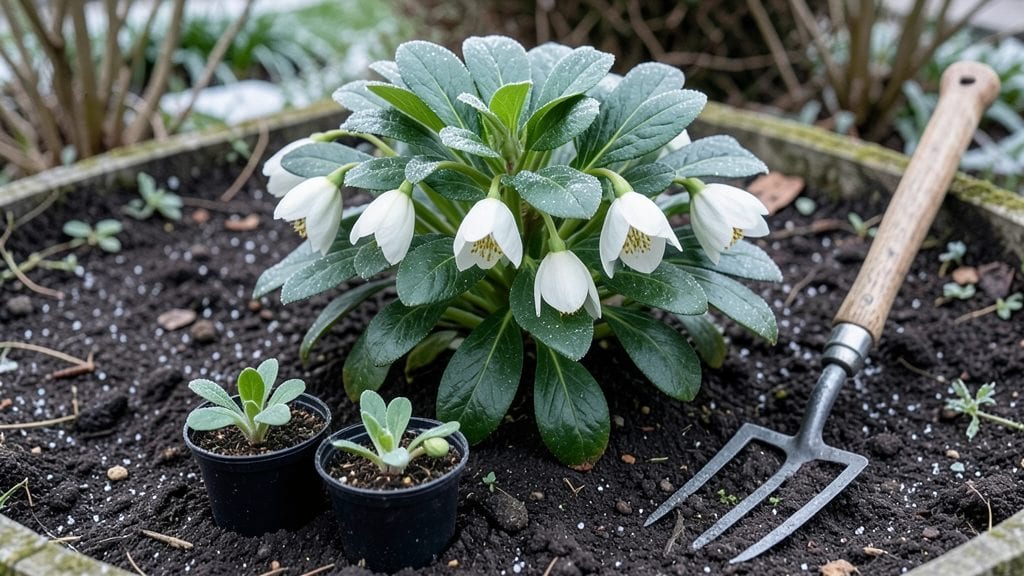
February gardening isn’t about waiting—it’s about planting cold-hardy crops that thrive when most gardens are still sleeping. ✨ I’ve learned that this month can be your secret weapon for an early harvest, especially with spinach, peas, and kale that love the crisp air.
The key is working with the weather, not against it.
Start by checking your frost dates and soil temperature—most cold-hardy crops need soil above 40°F but can handle light frosts. You’ll also want to prep beds by adding compost or aged manure, giving roots a nutrient boost before they really start growing.
Indoor seed starting is another game-changer: broccoli, lettuce, and onions sprout reliably on a sunny windowsill or under grow lights.
What you’ll end up with is a garden that’s already producing by spring—think tender baby greens, sweet peas climbing trellises, and kale that tastes sweeter after a frost. The best part? Fewer pests mean less work, and your early crops will shade out weeds before they even think about sprouting.
This is how you beat the rush and enjoy fresh food months before your neighbors’ gardens even wake up.
Works for gardeners in zones 3 through 8, though Southern Hemisphere friends can flip the schedule for their summer kickoff. The same principles apply—just swap crops for your climate’s early growing window. Let’s get those seeds in the ground (or under lights) before the month gets away!
📚 In This Guide
- What you need
- Instructions
- Tips and common mistakes
- Wrapping up and next steps
What you need
- ● Garden gloves – A pair of durable, waterproof gloves (e.g., nitrile-coated for grip and protection).
- ● Hand trowel – A stainless-steel or aluminum trowel (5–7 inches long) for transplanting seedlings.
- ● Pruners – Bypass pruners for clean cuts (look for rust-resistant blades).
- ● Garden fork – A 4–6 tine fork for aerating soil or turning compost.
- ● Seed-starting trays – 72-cell trays with drainage holes (biodegradable or plastic).
- ● Seed-starting mix – Sterile, peat-based mix (avoid garden soil—it’s too dense!).
- ● Grow lights or LED bulbs – Full-spectrum lights (12–16 hours/day) if starting indoors.
- ● Cold frame or mini greenhouse – A clear acrylic or polycarbonate cover (12"–24" height) for hardening off plants.
- ● Thermometer – A soil or air thermometer to monitor temperatures for cold-hardy crops.
- ● Compost or organic fertilizer – Balanced 10-10-10 or fish emulsion for nutrient boosts.
- ● Seedling heat mat – Electric or battery-operated (70–80°F range) for faster germination.
- ● Hose with adjustable nozzle – For gentle watering (avoid overhead spraying in cold snaps).
- ● Row covers or frost cloth – Breathable fabric (30–50g weight) to protect tender seedlings.
- ● Plant labels & marker – Waterproof labels to track varieties (try bamboo stakes or metal tags).
- ● Wheelbarrow or garden cart – For hauling soil, compost, or tools efficiently.
- ● Knee pad or stool – Because gardening is way more comfortable on your knees!
Step-by-step guide to February gardening success
February is prime time for cold-hardy crops—here's how to get your garden off to a strong start.
🌱 Step 1: Plan and Prepare Your Planting Schedule
Start by checking your local frost dates—most zones can handle cool-season crops like spinach, peas, and kale in February. I like to jot down my planting dates in a small notebook, marking 6-8 weeks before last frost for transplants and 4-6 weeks before for direct-sown seeds. This ensures seedlings mature before warm weather arrives.
For containers, choose sturdy pots with drainage holes—February's chilly nights mean you'll need to move tender plants indoors if frost threatens. I always keep a few extra pots on hand for unexpected cold snaps. Plan for 4 plants per 12-inch pot to avoid overcrowding as they grow.
🪴 Step 2: Amend Soil and Start Seeds Indoors
If you're planting directly in the ground, enrich the soil with 2-3 inches of compost and work it into the top 6 inches of soil. February's cool temperatures mean the soil won't warm up quickly, so focus on loose, well-draining beds. I like to add a handful of balanced fertilizer (10-10-10) to give early crops a nutritional boost.
For indoor seed starting, use seedling heat mats to maintain soil temperatures around 65-75°F. Place trays under grow lights for 14-16 hours daily—natural light alone won't cut it this early. Watch for first true leaves (not the initial seed leaves) before transplanting outdoors.
☀️ Step 3: Direct-Sow Cold-Hardy Crops
Once soil temperatures reach 40°F, it's safe to sow peas, spinach, and lettuce directly outside. Press seeds ½ inch deep and cover lightly with soil—don't bury them too deeply or they'll struggle to emerge. I like to use a small hand trowel for precision, especially in cold, clumpy soil.
Mulch newly planted areas with 2-3 inches of straw to protect seeds from temperature swings and retain moisture. Keep the soil surface moist but not soggy—February's unpredictable weather can dry out exposed soil quickly. You'll know moisture is right when the soil looks slightly damp but doesn't stick to your fingers.
💧 Step 4: Protect Tender Plants from Frost
Use frost cloth or row covers to shield young plants from unexpected cold snaps. Secure the covers with stakes or bricks to prevent wind damage. I've learned the hard way that leaving gaps invites frost to creep in—always tuck edges snugly. Remove covers during the day to let light reach the plants, but reapply before sunset.
For container plants, group pots together and wrap them in bubble wrap or frost blankets on chilly nights. You'll notice less stress on plants when they're insulated—leaves stay crisp and growth remains steady. Water containers before covering to reduce moisture loss overnight.
⏰ Step 5: Monitor and Maintain Through February
Check soil moisture every 3-4 days—February's cool air means water evaporates more slowly, but don't let soil dry out completely. You'll see wilting leaves as the first sign of thirst, especially in container-grown plants. Adjust your watering schedule based on rainfall; I always carry a small trowel to test soil moisture by feel.
Watch for pests like slugs and aphids, which thrive in cool, damp conditions. I keep a spray bottle of neem oil solution handy for quick treatment. Remove any yellowing or damaged leaves immediately—they invite disease and stress the plant further. By month's end, you'll have a thriving garden ready to transition into spring planting.
Tips & tricks for perfect February gardening success
February gardening sets the stage for a bountiful spring—here's how to avoid common pitfalls and maximize your early-season success.
Timing is Everything: The 6-8 week window before your last frost date is critical for transplants like broccoli or cabbage. I always mark my calendar with two dates: one for starting seeds indoors (6-8 weeks out) and another for direct sowing (4-6 weeks out). February's unpredictable weather means you'll need to stay flexible—check your local frost dates online or consult your county extension office if you're unsure.
Soil Temperature Matters: Don't rush to plant when air temperatures are warm but soil is still cold. Use a soil thermometer to confirm temperatures have reached at least 40°F before sowing seeds like peas or lettuce. I've planted too early more times than I'd like to admit—seeds need consistent warmth to germinate properly. If your soil is below 40°F, wait a few more days or use black plastic mulch to warm it up faster.
Lighting Strategy for Seedlings: Those 14-16 hours of daily light under grow lights are non-negotiable for strong seedlings. I learned this the hard way when my first batch of spinach seedlings stretched painfully toward the window. Position lights about 2-4 inches above seedlings and adjust as they grow. You'll know they're getting enough light when they grow upright and dark green—not leggy and pale. Consider using LED grow lights—they're energy-efficient and produce less heat than traditional bulbs.
Frost Protection Hacks: When using frost cloth or row covers, make sure they're secured tightly at the edges—even a small gap can let frost creep in. I've found that using bricks or garden stakes to weigh down the edges works better than clips, especially in windy conditions. For container plants, group pots together and wrap them in bubble wrap before adding frost blankets. This double layer provides extra insulation without trapping too much moisture, which can lead to fungal issues.
Pro Tips for Gardening In February
- February gardening sets the stage for a bountiful spring—here's how to avoid common pitfalls and maximize your early-season success.
- Timing is Everything: The 6-8 week window before your last frost date is critical for transplants like broccoli or cabbage.
- Soil Temperature Matters: Don't rush to plant when air temperatures are warm but soil is still cold.
Frequently asked questions
Got questions about February gardening?
You’re not alone! Whether you're a seasoned green thumb or just starting, these answers will help you navigate the early season with confidence. Let’s tackle the most common queries so you can get planting—even in the chill.
Can I start planting in February, or should I wait?
It depends on your climate! In warmer regions (Zones 8-10), February is prime time for cool-season crops like lettuce, spinach, and peas. In colder zones (Zones 3-7), wait until soil temperatures rise (around 40°F) or use row covers to protect tender seedlings. Check your last frost date for guidance.
What are the coldest-hardy crops for February?
Start with these resilient picks:
- Leafy greens: Kale, spinach, Swiss chard (tolerate light frosts)
- Root veggies: Radishes, carrots, beets (grow well in cool soil)
- Brassicas: Broccoli, cabbage, Brussels sprouts (thrive in chilly weather)
- Herbs: Cilantro, parsley, and chives (survive light freezes)
Do I need special tools for February gardening?
Not necessarily! Basic tools like a trowel, pruners, and gloves work for most tasks. For cold climates, consider:
- A soil thermometer (to monitor planting temps)
- Row covers or cold frames (to extend the season)
- Heated seedling mats (for starting delicate plants indoors)
How do I protect my plants from unexpected late frosts?
Use these quick fixes:
- Row covers: Lightweight fabric traps heat (remove during the day for ventilation).
- Cloche bells: Place over seedlings to create microclimates.
- Watering: Moist soil holds heat better—water plants the night before a frost.
- Mulch: Spread straw or leaves around the base to shield roots.
What if my soil is still frozen or waterlogged?
Don’t force it! Instead:
- Test soil moisture: Squeeze a handful—if it stays clumped, it’s too wet. Wait 1-2 weeks.
- Improve drainage: Mix in compost or sand to loosen heavy clay.
- Start indoors: Grow seedlings in pots under grow lights until outdoor conditions improve.
- Plan cover crops: Plant clover or winter rye to prevent erosion and enrich soil.
Pro Tip:
Use a gardening journal in February to track soil temps, frost dates, and plant progress. Next year, you’ll be a frost-fighting pro!
Wrapping up and next steps
February might still feel chilly, but with the right cold-hardy crops and a little planning, you can turn your garden into a thriving oasis before spring. From spinach and kale to peas and potatoes, these early plants set the stage for a bountiful harvest.
Don’t wait—grab your gloves, sketch a quick layout, and start small to build confidence and momentum!
🌱 Your Next Step: Start Small & Stay Inspired
Begin with just one or two crops to test the waters, then expand as you gain confidence. Pro tip: Keep a garden journal to track progress—future you will thank present you! 📖✨ Ready to dig in? Check out our recommended tools to make February gardening a breeze.