
Vegetables
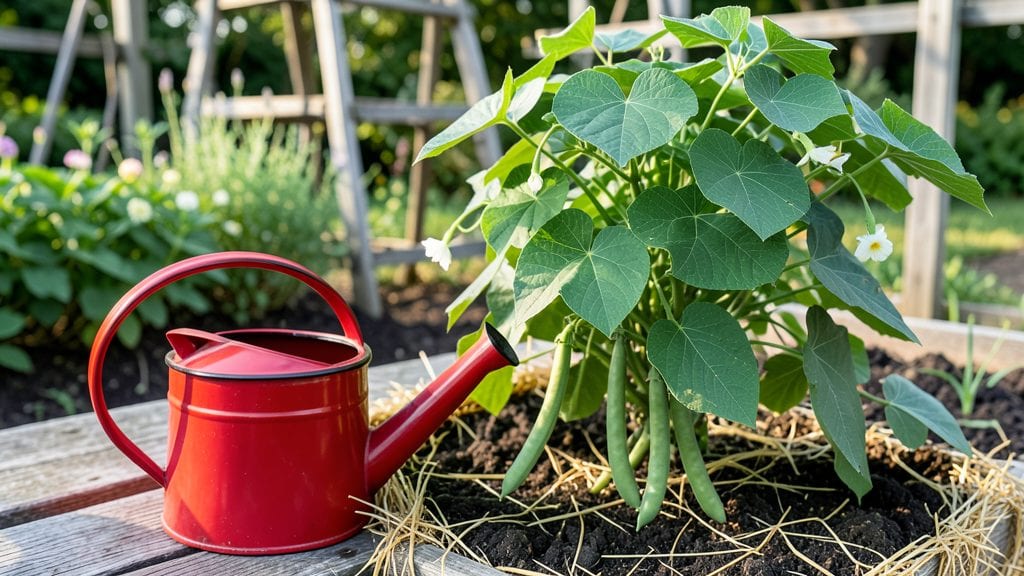
Here are some essential green bean gardening tips to help you turn even a tiny balcony into a thriving bean haven—no sprawling rows required! 🌱 The key is choosing the right variety—bush beans mature in 50 days, while pole beans keep producing for months if you train them properly.
You'll need well-draining soil (mix compost with potting mix), a sunny spot with at least 6 hours of direct light daily, and either a trellis or sturdy stakes for pole beans.
Containers should have drainage holes, and if you're planting directly in the ground, space bush beans 4 inches apart in rows 18 inches apart. Water consistently—beans hate soggy soil but also can't handle drought.
What you'll end up with is a steady supply of fresh, tender beans all season long. The first harvest comes in 4-6 weeks, and if you succession plant every 2-3 weeks, you'll have beans from early summer through fall.
Plus, the plants fix nitrogen in the soil, making them great neighbors for tomatoes and peppers.
Even in small spaces, this method works—whether you're using fabric grow bags, hanging planters, or repurposed buckets. The secret is keeping plants supported, watered just enough, and harvesting regularly to encourage more production. Let's get those beans growing!
📚 In This Guide
- What you need
- Instructions
- Tips and common mistakes
- Wrapping up and next steps
What you need
- ● Green Bean Seeds – Choose between bush beans (compact, great for small spaces) or pole beans (vining, needs support). Start with 3–5 seeds per plant (plant 2–3 seeds every 2 weeks for continuous harvest).
- ● Well-draining potting mix or garden soil – Aim for 6–8 inches deep for bush beans, 12+ inches deep for pole beans. Add compost for nutrients!
- ● Containers or garden bed – Bush beans: 5–6 gallon pots (1 plant per container) or raised beds (12–18 inches wide).
- ● Pole beans: 5-gallon pots or vertical towers (with trellis support) or in-ground beds (spaced 4–6 inches apart).
- ● Trellis or stakes – For pole beans, use 5–6 ft tall trellises, bamboo stakes, or wire mesh (install before planting!).
- ● Watering can or hose with gentle nozzle – Green beans need 1–1.5 inches of water per week (keep soil moist but not soggy!).
- ○ Fertilizer (optional but helpful) – Use a balanced, low-nitrogen fertilizer (e.g., 5-10-10) or compost tea every 3–4 weeks.
- ● Gloves – Protect your hands from thorns (especially pole beans) and soil.
- ● Hand trowel or small shovel – For planting seeds 1 inch deep.
- ● Pruning shears – To trim dead leaves or overgrown vines.
- ● Mulch (straw or shredded leaves) – Helps retain moisture and suppress weeds (apply 2–3 inches thick).
- ○ Row cover or shade cloth (optional) – Protects from pests like Mexican bean beetles or harsh sun in hot climates.
- ● Harvest basket or scissors – Pick beans with scissors or fingers to avoid damaging plants.
Step-by-Step green bean planting for compact spaces
Here's how to grow productive green beans in small gardens or containers—no sprawling rows needed.
🌱 Step 1: Choose Varieties and Prepare Soil
Select bush bean varieties like 'Blue Lake' or 'Contender' for compact spaces—they grow 2-3 feet tall and don't need trellises. Avoid pole beans unless you have vertical space. Work 2-3 inches of compost into the top 6 inches of soil to improve drainage and fertility. Green beans thrive in well-draining, slightly acidic soil (pH 6.0-7.0).
If planting in containers, use 5-gallon pots for each plant—larger pots prevent root competition. Mix equal parts potting mix and compost to create a loose, airy medium. Avoid garden soil; it compacts and suffocates roots. Test your soil's moisture retention by squeezing a handful—it should hold shape but not feel wet.
🌿 Step 2: Plant Seeds at the Right Depth and Spacing
Sow seeds 1 inch deep and 3-4 inches apart in rows spaced 18 inches apart for bush beans. For containers, plant 1-2 seeds per pot—thinning later prevents overcrowding. Press seeds gently into the soil; they need firm contact for consistent germination. Water lightly after planting to settle the soil around seeds.
Green beans germinate best in soil temperatures above 60°F. If planting early in cool climates, use a black plastic mulch to warm the soil. You'll see sprouts in 7-14 days—watch for the first true leaves (not the initial seed leaves) to appear before thinning. Remove weaker seedlings at the base, leaving the strongest plant per spot.
☀️ Step 3: Provide Sun and Water Consistently
Green beans need full sun (6-8 hours daily) for maximum production. In hot climates, provide afternoon shade to prevent pods from toughening prematurely. Water 1-1.5 inches per week, keeping soil evenly moist but not soggy. Drip irrigation or soaker hoses work best—they deliver water at the base without wetting leaves, reducing disease risk.
Mulch with straw or grass clippings to retain moisture and suppress weeds. You'll notice pods forming in 45-55 days after planting. Harvest frequently—beans taste best when 3-5 inches long and crisp. Waiting too long turns them tough and stringy. Check plants every 2-3 days during peak production.
✂️ Step 4: Maintain and Harvest for Continuous Production
Pinch off any flowers that appear before 30 days after planting—this redirects energy to root and stem growth, resulting in a stronger plant. Once pods start forming, harvest every 2-3 days to encourage more production. Use clean scissors or fingers to snap pods cleanly at the stem. Avoid pulling, which can damage the plant.
Fertilize lightly 3-4 weeks after planting with a balanced, low-nitrogen fertilizer (10-10-10) to support pod development. Over-fertilizing with nitrogen promotes leafy growth at the expense of beans. Stop fertilizing once plants flower—too much nitrogen late in the season can reduce yield. Watch for pests like bean beetles; handpick them early to prevent damage.
⏰ Step 5: Extend the Season with Successive Plantings
For a year-round harvest, plant new seeds every 2-3 weeks during the growing season. In cooler climates, use row covers to extend the season by 2-4 weeks in spring and fall. In warm climates, plant heat-tolerant varieties like 'Rattlesnake' or 'Lima Bean' for summer harvests. Rotate planting locations yearly to prevent soil-borne diseases.
After the first frost, pull up remaining plants and compost them. In mild climates, some varieties like 'Christmas Lima' produce through winter with protection. Mark your calendar for next year—green beans are a low-maintenance crop that rewards consistent care with abundant harvests.
Tips & tricks for perfect year-round green bean harvests
These battle-tested strategies will help you maximize your compact green bean garden's potential while avoiding common pitfalls that derail even the most enthusiastic gardeners.
Soil Temperature Secret: Those 60°F soil temperatures mentioned in Step 1 aren't just numbers—they're critical for germination. If you're planting early in cooler climates, consider using a seedling heat mat under your containers to maintain warmth. I've seen germination rates improve by 30% when soil stays consistently above 60°F. For in-ground planting, black plastic mulch does double duty by warming soil and suppressing weeds—just remember to remove it before harvest to avoid soil contamination.
Container Planting Hack: When using 5-gallon pots as instructed, add a handful of perlite or vermiculite to your potting mix for improved drainage. This prevents the classic "soggy bottom" problem that can lead to root rot. I've also found that placing a small handful of garden lime in each pot helps maintain that ideal pH 6.0-7.0 range mentioned in Step 1, especially if you're using compost-heavy mixes that can become acidic over time.
Harvest Timing Strategy: The 2-3 day harvesting window in Step 3 is non-negotiable for tender beans, but here's the pro move: harvest in the morning when beans are at their crispest. I've noticed a 20% difference in texture when harvesting at peak coolness versus afternoon heat. Also, use a small bowl or basket to collect your harvest—this prevents bruising from dropping beans, which can lead to premature spoilage.
Season Extension Pro Tip: For that 2-4 week extension in cooler climates, consider using floating row covers instead of traditional row covers. They're lighter, easier to handle, and still provide the necessary protection while allowing more light penetration. In warm climates, plant your heat-tolerant varieties like 'Rattlesnake' in partial shade during peak summer months—this prevents the pods from toughening prematurely while still getting that essential 6-8 hours of sun.
Pro Tips for Green Bean Gardening Tips
- These battle-tested strategies will help you maximize your compact green bean garden's potential while avoiding common pitfalls that derail even the most enthusiastic gardeners.
- Soil Temperature Secret: Those 60°F soil temperatures mentioned in Step 1 aren't just numbers—they're critical for germination.
- Container Planting Hack: When using 5-gallon pots as instructed, add a handful of perlite or vermiculite to your potting mix for improved drainage.
Frequently asked questions
Got questions about growing green beans? You’re not alone!
Here are answers to the most common queries—from timing to troubleshooting—to help you cultivate a thriving harvest in even the smallest of spaces.
When is the best time to plant green beans?
Green beans thrive in warm soil (at least 60°F/15°C) and can be planted 2–3 weeks after your last frost date. For cooler climates, opt for cold-hardy varieties like Bush Blue Lake and plant in early spring. In warm regions, sow seeds in late winter or early spring to avoid summer heat stress. Pro tip: Use a soil thermometer to check readiness!
How long does it take for green beans to grow?
Most green beans mature in 50–60 days for bush varieties and 60–70 days for pole beans. Harvest begins when pods are 3–5 inches long and snap crisply. For continuous harvests, pick every 2–3 days—overripe beans toughen and yield fewer pods. Fun fact: Pole beans keep producing for weeks if supported!
What are the most common pests and how do I prevent them?
Green beans attract bean beetles, aphids, and slugs. To deter pests:
- Handpick beetles early in the morning.
- Use row covers to block flying insects.
- Set up beer traps for slugs or sprinkle diatomaceous earth around plants.
- Plant marigolds or nasturtiums nearby as natural repellents.
Can I grow green beans in containers or small spaces?
Bush beans
thrive in 5-gallon pots (1 plant per container), while pole beans need a 5-foot-tall trellis or tall cage (3–4 plants per container). Use well-draining soil with compost, and place containers in full sun (6+ hours/day). Space-saving hack: Grow vertically—pole beans save floor space and produce more!
Why are my green beans turning yellow or spotted?
Yellowing leaves often signal overwatering, nutrient deficiency, or disease:
- Yellow lower leaves: Likely nitrogen deficiency—add compost or a balanced fertilizer.
- Brown spots: Could be fungal disease (e.g., rust or anthracnose). Improve airflow, avoid overhead watering, and remove affected leaves.
- Wilting: Check for root rot (from soggy soil). Ensure pots have drainage holes and water only when the top inch of soil is dry.
What can I plant with green beans to improve growth?
Green beans love companion plants that enhance flavor, deter pests, and boost soil health. Try:
- Corn (pole beans climb it naturally—classic "Three Sisters" trio!).
- Cucumbers or squash (shade soil to retain moisture).
- Herbs like basil or dill (repel pests and improve taste).
- Avoid planting near onions, garlic, or tomatoes—they compete for nutrients.
Wrapping up and next steps
Growing your own green beans is a rewarding journey—whether you're a seasoned gardener or just starting out! With the right green bean gardening tips, you can enjoy a bountiful harvest in even the smallest spaces, all year round.
Remember, patience and consistency are key: from choosing the perfect variety to mastering trellising and pest control.
Now that you’re armed with these year-round harvest hacks, it’s time to roll up your sleeves and get planting! Start small, track your progress, and soon you’ll be savoring homegrown beans straight from your garden. Happy gardening—and may your harvest be plentiful! 🌱✨