
Size
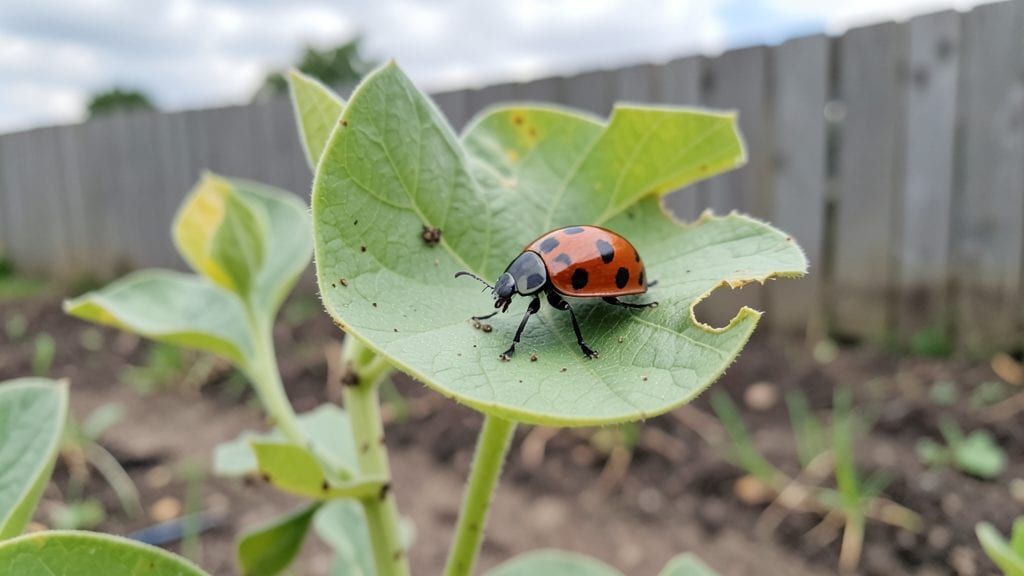
Growing a garden ladybug population is like inviting tiny, armored superheroes to patrol your plants. 🌱 These bright red-orange beetles devour aphids, mites, and other garden pests with shocking efficiency—some adults eat up to 5,000 pests in their lifetime.
The best part? They thrive in natural settings with minimal effort from you.
You’ll need a few simple elements to attract them: nectar-rich flowers like dill, fennel, or marigolds, a water source (a shallow dish with pebbles works), and shelter from harsh weather.
Skip the pesticides—these beetles are sensitive to chemicals, and they’ll vanish if their habitat feels unsafe. Ladybugs also love mulch piles or leaf litter where they can overwinter safely.
Once established, you’ll notice fewer pests and more balanced ecosystems. Watch as they swarm your plants during infestations, their tiny legs moving at lightning speed. The key is patience—it takes about two weeks for eggs to hatch, but the payoff is worth it. Your garden becomes a self-sustaining pest-control system.
This method works in any climate zone, from coastal gardens to hot desert landscapes. Even small spaces like balconies can support ladybugs with the right setup. Let’s get these beneficial beetles working for your garden naturally.
📚 In This Guide
- What you need
- Instructions
- Tips and common mistakes
- Wrapping up and next steps
What you need
- ● Ladybug eggs or larvae: Purchase from a reputable supplier (e.g., Biobest or Garden Safe). Aim for 50–100 eggs or larvae per 100 sq. ft. of garden.
- ● Breeding container: A 16–20 oz clear plastic or glass container (like a mason jar or ventilated box) with a fine mesh lid (¼-inch holes).
- ● Substrate: Moistened potting soil (1–2 cups) for larvae to pupate.
- ● Paper towels or damp cotton balls (placed at the bottom) to retain humidity.
- ● Food for adults: Honey or sugar water (mix 1 tsp honey in 1 cup warm water, let cool).
- ● Pollens or aphids (fresh or dried, available at garden centers).
- ● Food for larvae: Fresh aphids (grow on a potted plant like dandelion or milkweed) or aphid-infested leaves.
- ○ Commercial ladybug larvae food (optional, like Biobest Larvae Food).
- ● Spray bottle: For misting the container (keep humidity at 60–70%).
- ● Small paintbrush or tweezers: Gently transfer ladybugs to your garden.
- ● Heating pad or warm spot: Ladybugs thrive at 70–80°F—place the container near a sunny window or use a low-wattage pad.
- ● Aspirator or net: For safely collecting wild ladybugs (if supplementing with local populations).
- ● Label & marker: Track breeding dates and releases.
- ● Outdoor release cage: A small mesh cage (like a ventilated pop-up tent) to acclimate ladybugs before releasing them.
Step-by-step instructions for attracting ladybugs to your garden
Here's how to turn your garden into a ladybug haven—naturally and effortlessly.
🌿 Step 1: Create Shelter and Water Sources
Ladybugs need safe places to hide from predators and lay eggs. Start by adding small rocks or flat stones in shady spots—they love climbing underneath. I like to arrange them near plants like dill, fennel, or marigolds, which give them both cover and food.
Next, provide water. A shallow dish filled with pebbles and water works perfectly—just make sure the pebbles extend above the waterline so ladybugs don’t drown. Place it in partial shade where they can drink without overheating. Check it daily to keep the water fresh.
☀️ Step 2: Plant Ladybug-Friendly Flowers and Herbs
Ladybugs adore nepeta (catmint), cosmos, and yarrow—these flowers provide both pollen and nectar. I plant a few clumps of each near my veggie patches, where pests are most active. Avoid pesticides entirely, as even "organic" sprays can harm ladybugs.
Herbs like dill, fennel, and parsley are also magnets for ladybugs. These plants attract aphids, which ladybugs eat voraciously. If your garden lacks these, consider adding a small patch just for ladybugs. You’ll see them within days after planting.
🌱 Step 3: Introduce Ladybug Eggs or Pupae
If your garden isn’t already attracting ladybugs, buy ladybug eggs or pupae from a reputable supplier. These arrive in small containers with moistened paper or soil. Place them in a shaded, sheltered spot near aphid-infested plants—they’ll emerge hungry and ready to work.
Handle them gently! Ladybugs are delicate, especially as eggs or pupae. I use a soft paintbrush to transfer them to leaves rather than touching them directly. Avoid releasing them on windy days—they won’t stay put.
⏰ Step 4: Monitor and Maintain Their Habitat
Check your garden weekly for ladybugs. Look under leaves, on stems, and near flowers—you’ll spot them as tiny orange or black speckled dots. If you see them but few pests, they’re likely thriving. If pests persist, add more shelter or plants to attract more ladybugs.
Keep the area weed-free but leave some ground cover for ladybugs to hide in. Over-tidiness can make your garden less inviting. A balance of flowers, herbs, and safe hiding spots ensures ladybugs stick around season after season.
Tips & tricks for perfect ladybug garden attraction
A few simple strategies will help you create an irresistible ladybug habitat that keeps them coming back season after season.
Shelter Selection: When arranging rocks or stones for ladybugs, choose flat, irregularly shaped ones—they provide more hiding spots than smooth river rocks. I like to create small crevices where ladybugs can nest and lay eggs. Place them near the base of plants where they'll stay shaded during hot afternoons.
Plant Placement Strategy: Position your ladybug-friendly plants like nepeta, cosmos, and dill in clusters rather than scattered. This creates a concentrated food source that attracts more ladybugs. I plant mine in a small border around my vegetable garden where aphids are most active. The ladybugs will follow the food—and the pests!
Water Safety: The pebble water dish is crucial, but don't forget to refresh the water daily. Stagnant water can become a breeding ground for mosquitoes, which are ladybug predators. I place a small piece of cork or bark in the dish too—it gives ladybugs something to grip while they drink, preventing accidental drowning.
Timing for Eggs/Pupae: If you're introducing ladybug eggs or pupae, do it in the morning when temperatures are cooler. Ladybugs are most active in the early hours, and they'll be ready to start hunting pests right away. I also avoid releasing them when rain is forecasted—they need dry conditions to establish themselves.
Pro Tips for Grow A Garden Ladybug
- A few simple strategies will help you create an irresistible ladybug habitat that keeps them coming back season after season.
- Shelter Selection: When arranging rocks or stones for ladybugs, choose flat, irregularly shaped ones—they provide more hiding spots than smooth river rocks.
- Plant Placement Strategy: Position your ladybug-friendly plants like nepeta, cosmos, and dill in clusters rather than scattered.
Frequently asked questions
Got questions about growing your own garden ladybugs? You’re not alone!
Here are answers to the most common queries to help you get started with confidence—no bugs (or confusion) left behind.
How do I know if my garden needs ladybugs?
Ladybugs are your allies if you’re battling aphids, mites, or soft-bodied pests. Look for signs like curled leaves, sticky residue (honeydew), or visible clusters of tiny insects. If your plants are under siege, it’s time to call in the cavalry! Pro tip: Start with a few hundred adults or larvae for small gardens (500 sq ft).
When is the best time to release ladybugs?
Timing matters! Release ladybugs early in the morning or late afternoon when temperatures are mild (50–75°F). Avoid peak sun or extreme heat—these bugs are sensitive. Spring to early fall is ideal, but avoid releasing them during heavy rain or wind. Bonus: If temps drop below 50°F, wait until the next day.
What if ladybugs disappear after release?
Don’t panic! Ladybugs may fly away if your garden lacks food, water, or shelter. To keep them around:
- Add nectar-rich plants (e.g., marigolds, dill, or cosmos).
- Provide water sources like shallow dishes with pebbles.
- Offer hiding spots like leaf litter or dense foliage.
Can I use ladybugs if I’ve used chemical pesticides?
Nope!
Ladybugs are highly sensitive to synthetic pesticides. If you’ve used chemicals recently, wait at least 3 weeks (or until residue is gone). For safety, switch to organic sprays (neem oil, insecticidal soap) or physical barriers (row covers). Always read labels—some "organic" products can still harm them!
Are store-bought ladybugs better than wild ones?
Store-bought ladybugs (like Hippodamia convergens) are hardier and bred for pest control, but wild ladybugs can still help! The key difference:
- Store-bought: Guaranteed species, higher survival rates, and immediate action.
- Wild: Free (if you attract them naturally), but may include harmless non-predatory species.
Wrapping up and next steps
Growing a garden full of ladybugs is a rewarding way to keep pests at bay naturally while supporting biodiversity! 🌿 Whether you’re a beginner or a seasoned gardener, these tiny allies are easy to attract and maintain—just provide the right habitat, food, and protection.
Start small, observe their impact, and soon you’ll see your garden thrive with fewer pests and more vibrant blooms.
Ready to take the next step? Expand your garden’s ecosystem by planting native flowers or adding a small water source. Every little effort helps—your garden (and the ladybugs!) will thank you. 💚